2007
 Playday
BUILD A TREE HOUSE
by Dorothy Ainsworth
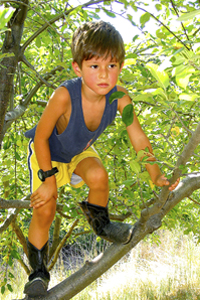 Zane at 5
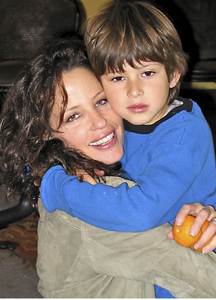
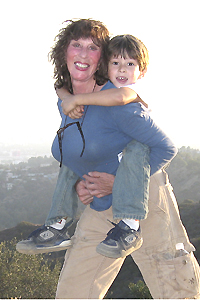 Grandma & Zane
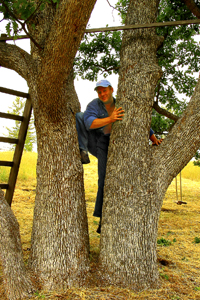
There's nothing like a grandchild to bring you out of your comfort zone. There IS no middle ground. It's either down on your knees or up in the trees. When Zane was four we played on the floor, but when he was five he took to the sky, and that's when this Grandma decided he absolutely needed a tree house.
 Floor frame perimeter
His Uncle Eric offered to help build it and volunteered to do the hardest part of the construction. He was inspired to get involved, not only to do something special for his nephew, but because it was a perfect opportunity to be a kid again himself. I'm sure a lot of moms and dads out there feel the same way, but whatever the motivation, building a tree house is a fantastic family project.
The Planning Stage
I live on 10 acres and have 3 big oak trees on my property. We chose the best one of the bunch for accommodating a tree-house. It had a double trunk and 5 major outstretched branches, like an open hand just waiting to hold a tiny house full of squealing kids.
 Uncle Eric
 Floor frame with joists
Eric took measurements and sketched a simple plan dictated by the shape of the tree and the orientation of its thicker vertical arms and smaller forked horizontal limbs. The main load would be supported by the 5 leaders coming off the huge trunks. The platform would have to be strong and sturdy but flexible enough to sway with the tree in a breeze. And all this would be 12 feet off the ground! Eric's reasoning was: "Why build a house in a tree if you're not up high enough to feel a little giddy?" Made perfect sense to me.
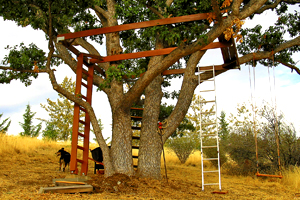
 Three-ladder access while building
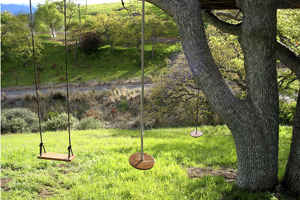 Swing & rope seat
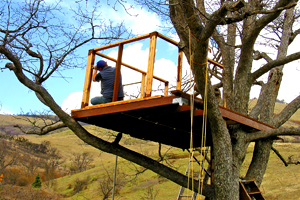
 Before slide & railing
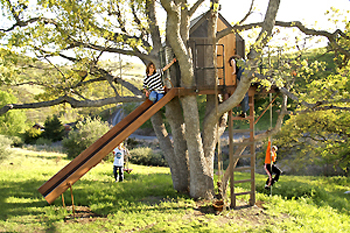
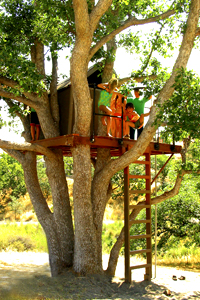
We decided on a 6' x 8' clubhouse on a 9.5' x 12' base, with the house set far enough back on the platform to create a 4-foot landing at the top of the ladder for kids to come and go with ease. The house would be surrounded by a 20"-wide deck with 36" high railings and safety netting all around, except for access to a fireman's pole on one side and a slide on the other. A vertical ladder close to the trunk would keep it looking streamlined, and give the kids a real workout going up, up, up after the easy rides down, down, down.
Additional playground equipment would include knotted Tarzan ropes hanging from thick horizontal limbs, and a big swing suspended by ropes long enough to create an arc that could catapult a dare-devil into the next county!
The tree house would have a door as well as screened window openings to keep mosquitoes out on hot summer over-nighters, but with shutters to close on cold rainy days. A hinged bed/table platform with a flat military-style mattress would fold up against the wall when not in use.
Division of Labor
 Cynthia & Zane
I could tell that Eric was itching to get started, and his enthusiasm was infectious, so I appointed myself to be the go-fer to run after supplies, trek back and forth with tools and boards, and try to throw said tools up to the monkey perched in the tree. "Try" is the key word. Eric miraculously avoided injury from my many spastic attempts, and they were worth a lot of laughs, but I finally had to use the ladder to expedite the process. Zane and his mom were coming to visit soon, and I had promised them a big surprise!
Things to Consider
Building a low-positioned tree-house is no problem, but building a tree house way up high is logistically challenging. Planks have to be hoisted up with ropes or carried up ladders (think Swiss Family Robinson, 1807) and then leveled and fastened while straddling branches and pushing against thin air to put screws in with a cordless drill (Swiss Family Robinson, 2007)
The initial work can be downright uncomfortable. I noticed on several occasions that Eric's feet would be facing one way, crammed into narrow crotches in the tree, and his body would be twisted in the exact opposite direction, like a tornado had flung him there. We concluded that there is no need for yoga classes when you build a tree house!
Tips and Techniques
Every family's tree house project will be unique, but here are some basics we learned:
Pick a tree that has easy access and is close enough to the house for safety reasons, or at least within earshot to hear cries for help, which sound different from the usual cacophony of screaming and laughing. Adult supervision is mandatory for young children.
Pick a healthy tree and don't damage it...tree wounds do not heal well. Never girdle the trunk or a branch with a tight rope or chain or wire, or cut the bark away all around it. Girdling will kill the tree.
 Spacer attached to bracket
Screw as few lag bolts as possible into the tree to secure the first 2"x6" or 2"x8" supporting plank of the platform, be it a rectangle, square, triangle, trapezoid, or whatever. Then lash or screw the other framing members to that plank and to each other to finish the framing. Cut away just enough bark to make a flat spot for the lag bolt and its washer.
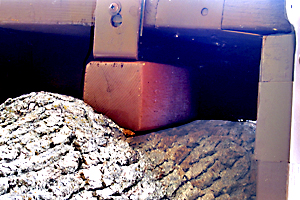
Trees continually grow, and they move every which way in the wind, so your joinery has to be able to withstand some flexing. If your floor is a rectangle, this can be achieved by securing only one side of the rectangle (a 2"x6" or 2"x8" on edge) to the trunk and/or to a vertical limb of the tree with 1/2" x 4" or 5" lag bolts, but the other three sides have to be free floating. These three boards that complete the rectangle will rest on 3" heavy-gauge L-brackets that are attached to the tree with shorter, less-invasive 1/4"-diameter screws.
When the tree moves, the three unanchored boards of the rectangle will ride and slide on the flat surfaces of the L-brackets. You may have to place shims or blocks behind some of the brackets to fill in gaps (curves or dips in the tree), and get the bracket out to where the board can ride on it.
It's important to keep everything plumb, level, and square as you go along...as best you can. A string level works well, or you can use a long straight 2"x4" with a level on top of it, or a laser level, to span greater distances. You may need a helper for this initial step of the project...to mark the tree while you hold the level.
 Custom fit
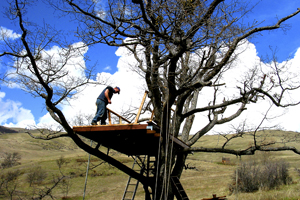
After the rectangular frame is secured, you will fill it in with a grid of floor joists, straddling vertical branches here and there if you need to. Then you'll top it off with plywood or planks to complete the platform. Eric had to custom-fit his floorboards around several vertical trunk-like branches. He scribed the circular cutaways to ensure accuracy, then cut them a little larger to allow for tree growth...using a jigsaw. These massive, non-structural trunks coming right up through the deck add to the zen-like feeling that you and the tree are one.
If you will be circling a single trunk with framing members that radiate out to support your floor, you won't have to worry about the challenge of multiple trunks and vertical limbs that move independently and exert uneven stresses on a structure (indeed, it could be pulled apart!). Eric's ingenious solution to our problem required extra work and accuracy, but the tree-house has withstood the test of time, through two seasons of high winds and snow loads, without damage.
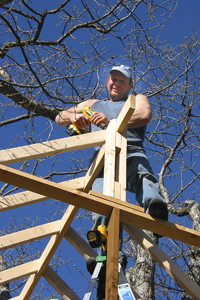
 Eric raises a wall
 Fastening walls at the corners
 Fastening a rafter to the ridgebeam with screws
Building Materials and Finish Work
Keep in mind the platform is the base of the whole structure. To distribute the weight and keep the total weight of the structure down so your tree won't have to creak and groan, spread the load over as wide an area as possible. After all, it is alive. Use the smallest dimensional lumber you can get by with and still maintain strength and durability. Even lightweight materials add up. To avoid waste and save time, labor, and money, use common sized lumber and sheathing whenever possible.
Eric used 2"X6"'s 16-inches apart for the floor framing and 2"x6"'s for the floor boards themselves. He used 2"X4" studs 24-inches apart for the walls and 16-inches apart for the rafters. He sheathed the structure (walls and roof) with 7/16" oriented-strand-board (OSB), which is commonly used for construction nowadays, because it's lighter and cheaper than plywood. Then he roofed with inexpensive asphalt shingles.
To add a touch of English Tudor style to the house, I fastened narrow batts (cut from OSB) vertically a foot apart on the exterior walls.
 Back view
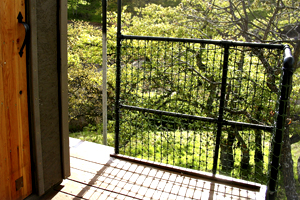 Railing & safety mesh
The inner walls aren't insulated, but I caulked every crack and spray-glued 1.5" dia. foam-pipe insulation to every seam where wind might blow in. Then I caulked the tubes securely in place.
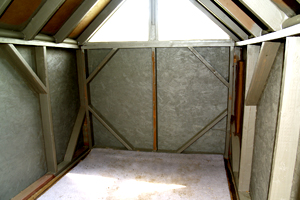 Inside view
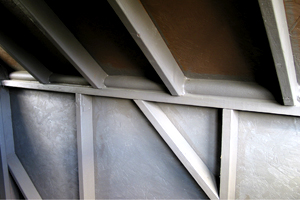 Close-up of knee brace
When that was completed, I painted inside and out tree-trunk-gray so the little house would look like an integral part of the tree. For contrast I painted the batts a lighter shade of the same color, and the deck a darker shade.
Together, Eric and I fashioned railings from 3/4" iron pipe and fittings, and attached them with pipe flanges screwed to the outside planks (rim joists) of the platform.
Eric had fun building the door out of utility-grade 1"x 4"'s lamination-style: One face is all verticals, the other face all horizontals. The two faces are fastened together with a lot of screws. This method is strong, doesn't warp, and can be cut to any shape you like. To allow taller kids (i.e., adults) to fit through without ducking, ours was custom-cut to the gable roof angle.
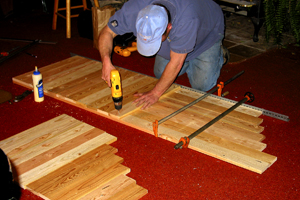 Eric building door
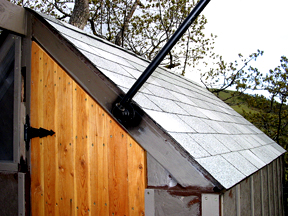 Finished door
Details
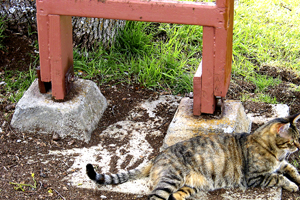 Ladder attached to piers set in concrete, and "Pretty" the cat
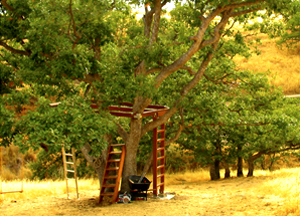
The heavy-duty wooden ladder was supported off the ground by piers pre-cast with brackets. This ensured that the bottom of the legs wouldn't rot. (We had recessed the piers into wet concrete on a pad that we poured in place.) The ladder also doubled as an extra support for the platform.
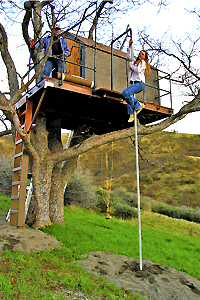 Zane's cousin Aeada uses fireman's pole
The galvanized 1.5" dia. fireman's pole (for small hands) was also set in a deep hole filled with concrete that Eric mixed in a wheel barrow and poured in place. At the bottom of the pole is a large area of soft sand for the kids to land in. The pipe fittings that connect the pole to the deck also support the side of the platform that has the longest free-floating span.
The slide is built from 3/4" plywood and 2"x6" runners. The surface is factory-painted sheet metal, for a nice, slick surface...not galvanized sheet metal. Galvanized is not good for sliding on. I built it at a 35-degree angle so it would be fast, but not too fast. Metal pipes are bolted to the lower end of the slide and set deep in concrete for support. The slide is 24 inches wide and 12 feet long, but the length of your slide will be dependent on the height of your tree-house platform.
 Building slide
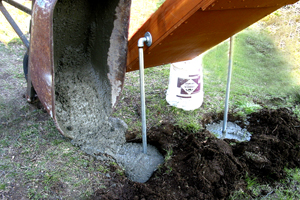 Setting the supports in concrete
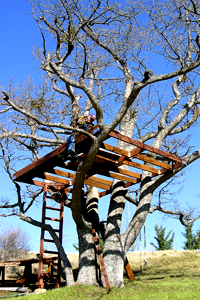
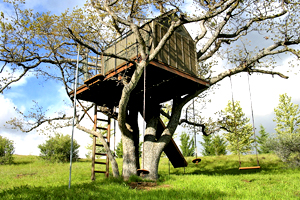
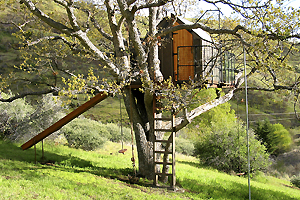 Finished tree house
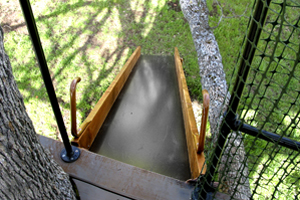 View down slide
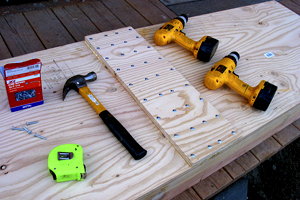
 Tools it took to make swing seat
The swing seat is a piece of 2"x10" 24-inches long, with holes set 2 inches in from each end, and suspended from above with 3/4" diameter rope.
I came across a perfect-sized carpet remnant for $5.00 at a garage sale, and glued it to the tree house floor to keep wind from whistling up through the cracks, and to provide a soft place for the kids to play on indoors.
We rigged up an old metal bucket to a block and tackle with ropes to create a dumb-waiter to go from ground to deck so the kids could transport food, toys, and my little dog Peaches up and down all day long. This contraption is the biggest hit of all!
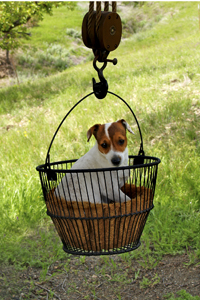 "Peaches" going up, up, up
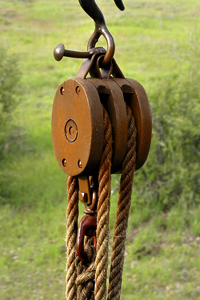 Block & tackle to hoist bucket
Total cost of building the tree-house:
Cost of materials: About $500.
Cost of labor: One sore arm from throwing like a girl.
 Baby robins
Two works in progress: Ours and Mrs. Robin's: Last summer, while building the tree house, we got the chance to observe first-hand a mother robin raising three consecutive families of babies hidden in a nest deep in a hole in the upper tree trunk, close to where we were working. We respected her privacy, but couldn't help peeking down the hole with a flashlight occasionally to watch the progression from blue eggs to tiny naked babies with wide-open beaks, to little pin-feathered creatures fluttering out of the hole, to fully-feathered robins flying away...all in a span of only two weeks after the eggs hatched. A birdseye view of the life cycle of three nests of robins was a serendipitous and delightful gift from nature, not unlike what we all witness as our own kids (and grandkids) are growing up.
Closing Thoughts
Eric keeps reminding me that this high-rise "Room with a View" isn't just for children. We adults and our fine UNfeathered friends might want to reserve The "Old-Oak Hotel" once in a while just for a change of scenery --- to read a book, have a picnic, spend the night, or howl at the moon. In the event that happens, I made a sign for the tree-house door: "No Kids Allowed" -- with a backwards "S" of course, so the kids can read it.
 Beautiful summer afternoon at the tree-house