2005
 Piano studio
MAKE SHADE WHEN THE SUN SHINES
by Dorothy Ainsworth
While others are basking in the sun and loving it, I run for the shade. I know there would be no life at all without that huge ball of hydrogen fusion radiating down on us, but after being scorched a few times, my motto is, "Use It But Diffuse It." Sunlight and heat, over time, will oxidize, vaporize, and brutalize everything it blares down on that isn't protected.
After building my vertical-log home and piano studio a few years ago, I've been watching the logs on their southern faces dry and crack and bleach out, in spite of re-staining them regularly. Last summer I decided to protect them from the direct rays of the sun, once and for all, with nice big awnings.
Like most DIY projects, I started with a little research. I looked on the internet for sample fabrics and custom-made awnings and their prices. I entered the dimensions and styles I wanted for the main house and optimistically clicked on the quote button. A total of $4000 popped up -- $1000 in materials and $3000 in labor. Gulp! Excuse me while I gasp for air! I earn $8.50 an hour as a prep-cook making chicken shish-kebabs. I figured out I would have to make 10,000 shish-kebabs to have the job done, or 2,500 to do it myself. Either way, it's a lot of skewering, but 2,500 was the number I was willing to make for shade.
Fortunately, I know the awning guy here in town, and he agreed to order the special weather-resistant awning fabric I needed (Sunbrella), at cost plus 10%. He has plenty of business from people who want a professional job and can pay for labor, so he was kind enough to help out this do-it-yourselfer. Note: You can expect to pay $12 to $20/yd. for fabric.
I don't have a welder or a tubing bender, so I turned to what I'm familiar with for the awning frames: pipe construction. It doesn't take a lot of skill to use a couple of pipe wrenches together...that's why they call 'em monkey wrenches! (Well, cousins to monkey wrenches for you tool purists.) I also know how to use a sewing machine, so I was all set to tackle the project.
Here's How I Did It
I measured and measured and fussed and fussed, but in spite of mistakes, I never once cussed! It's one thing to see an awning already up on a house and say, "Oh, no biggie; that looks easy," and quite another to wave your wobbly tape measure around in thin air trying to get exact measurements...especially in a breeze.
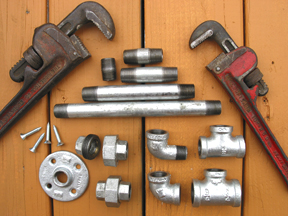 Pipe wrenches & pipe fittings: nipples, flange, unions, ell, street ell, tees
I had drawn the basic layout on paper first, so I filled in the measurements as I took them. The math in the layout stage has to be extremely accurate...adding up the lengths of all the tees and nipples and unions that go in between the long pipe pieces, and the elbows that go on the ends. In my case, all those fittings and pipes, when screwed tightly together, had to total exactly 19 feet. After much deliberation and pre-planning, I finally completed my pipe order and took it to the hardware store, where they cut and threaded the various lengths of 1/2" galvanized pipe on the list. I bought the fittings at the same time and couldn't wait to get home to assemble the frame flat on the deck to make sure it ended up as a rectangle instead of a parallelogram or a trapezoid. Miraculously it did. Note: 1/2" pipe costs about 75 cents a foot, and pipe fittings are amazingly cheap. (2005)
 Frame assembled
A rude awakening about pipe-construction of a closed rectangle is the way it has to go together in the proper sequence or you end up unscrewing a pipe that you just screwed in! That's why God made unions. They allow you to screw righty-tighty without simultaneously un-screwing lefty-loosey. It's not as complicated as it sounds on paper; it's completely logical after you unwittingly do it wrong. In fact, it's almost worth the laugh when you catch yourself saying, "What the?" But the important thing to remember here is that every rectangular or square or triangular section of the frame has to have its own union.
My assembled frame was a grid of rectangles made from two 19-foot pipes linked together by nine 12-foot pipes perpendicular to the 19-footers and was now ready to receive its covering.
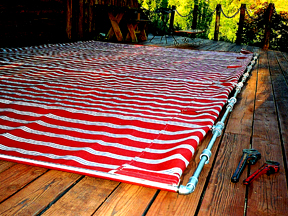
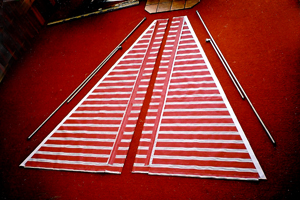
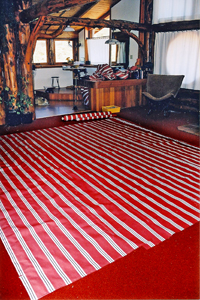 Strips cut to length
 Sewing strips together
It was time to cut the fabric to fit the frame. Standard awning fabric is 47 1/2" wide (I don't know why they don't make it 48"!). My awning had to be 12' x 19', so some head scratching ensued (like a monkey again). There were some other considerations too. My fabric had stripes, so they would have to go in the right direction. There would be a series of long narrow pockets (4" wide), sewn 24" apart on the underside of the awning, to hold each cross-pipe of the frame. The cross-pipes have to be close together (18"-24"), or the awning fabric will sag in between, no matter how tight you try to stretch it. You have to keep in mind the wind-flapping, rain-pooling, and snow-loading your awning will have to endure over time.
I proceeded cautiously: more measuring...more scratching. I finally got brave enough to cut six 13-foot lengths off my 40-yard roll of fabric, allowing the extra footage for seams and end flaps. It's wise to think ahead before you get scissors-happy, or you'll be very unhappy ordering more fabric! Important tip: Cut with pinking shears so the edges won't fray.
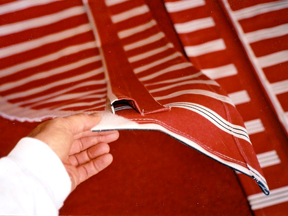 Tunnel strip to receive pipe
I sewed only two of the (13' x 47.5") pieces together at a time (lengthwise), then laid them out on the frame to mark where the long pocket strips had to go. While sewing the long strips on, I took great care to provide some slack space for the pipe to fit in by bunching up the fabric as I went along to create a tunnel the entire length of each strip. If you sew the strips on flat, when you push the round pipe in, it'll pull and pucker everything out of shape.
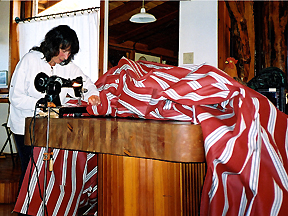
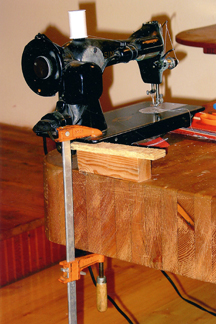 Sewing machine clamped to table
 Sewing on trim
I didn't sew all the 13-foot lengths together first and then sew the strips on is because it would make the awning too huge and cumbersome to work with. When you are sewing an awning on a small sewing machine, the sequence of putting it together is very important. After all the pocket strips are sewed on, then you sew the sections together, and then you hem the entire perimeter of the giant rectangle. Note: It's important to use 100% polyester thread because it is more weather resistant than cotton.
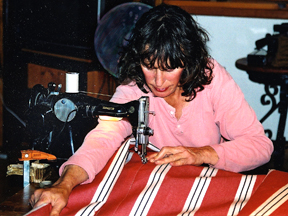
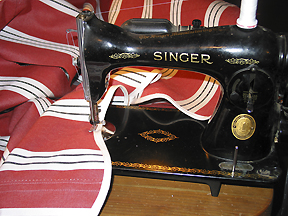
Since I have an old 1929 Singer sewing machine that sits on top of my dining table, I clamped it securely to the table with a bar clamp so it wouldn't skate around as I guided yards and yards of fabric under the needle. Projects like this make going to the fitness center entirely unnecessary!
I gathered up the huge awning (300 sq.ft. of fabric) and wrestled it outside to the deck to try it on. That required taking the frame apart (in place) and inserting each 12-foot pipe into its respective pocket (tunnel), then screwing it all tightly back together again. Tightening the fittings by straining two pipe wrenches against each other is another great workout!
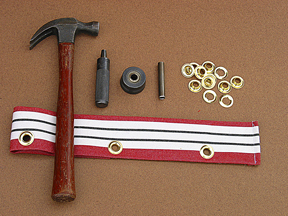 Grommet tools
 Awning lashed to pipe using grommet holes
Everything fit beautifully, so I danced a little jig on the deck (high on oxygen) before tackling the actual installation of the awning on the house. While the sleeping giant was still lying down, I sprayed two coats of invisible silicone water repellent on its skin (fabric) to make it even more weather-resistant than it naturally is.
The assembly would first be raised straight up, flat against the house, then fastened along its 19-foot edge to a horizontal beam above the picture windows...16 feet off the deck. I got a couple of husky friends to lift it vertically and hold it there while I climbed up a ladder and screwed clamps around the pipe and to the beam at two-foot intervals. The U-shaped clamps allowed the 19-foot pipe assembly to rotate in the cradles as we pivoted the awning out and propped it up on four supporting pipes.
The pipe-legs were screwed into tees already installed 5-feet apart in the outer 19-foot pipe, 12 feet above our heads. I had used 3/4" x 3/4" x 1/2" tees so I could slip the 3/4" holes onto the horizontal 1/2" pipe and rotate the tees at any angle I needed. Then the 1/2" threaded hole of each tee was used to receive a leg. I screwed a pipe flange onto the bottom of each supporting pipe-leg and fastened the flanges to the deck with hefty #12 screws.
The lengths of the vertical legs determined the pitch of the awning. I wanted a four-foot drop in the 12-foot run...steep enough for good sun protection and rain run-off, but not too steep to block the view.
Everything went well, and my sigh of relief echoed across the canyon. The hardest part was over.
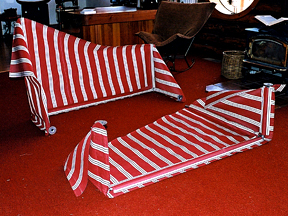
 Sides installed
The next step was to make the triangular pieces to close in the sides of the awning. For now it was just a big wing hovering over the south-facing deck. A triangle on each side would provide more shade east and west, and would help stabilize the awning.
 Side pieces with velcro sewed on
I had planned in advance how I would attach the two triangular frames to the house and to the outer corners of the awning. I had installed 90-degree street ells on all four ends of both 19-foot pipe assemblies to receive the horizontal pipes of the right triangles. (Street ells have male threads on one end and female threads on the other.) The right-triangle itself was formed with a 90-degree elbow connecting the two legs. The vertical leg was screwed into a tee that was waiting for it in the 19-foot horizontal pipe on the house.
After a test run, I took the triangular frames back down and made their respective awnings to fit, then put them back up. The dress rehearsal went well, so I attached them permanently to the house with a pipe flange on the horizontal leg, and U-clamps on the vertical leg. The hypotenuse edge of the fabric was pipeless but had a 2"-wide industrial-strength Velcro strip sewed on it that mated to a flap I had pre-sewn on the main awning.
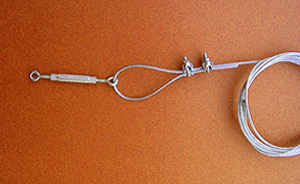 Aircraft cable & turnbuckle
Finishing Touches
I live on a windy hilltop, so I set about to make sure the awning would not rack and turn into a giant parallelogram in a strong wind, or worse yet, into a pretzel. I fastened two large X's, made from 1/8" aircraft cable and closed-eye turnbuckles, to the underside of the awning frame (diagonally corner to corner). The two 10' x 13' X-shaped crosses, pulled taut by tightening the turnbuckles, keep the awning braced for a hurricane. Caution: If you live in a windy area, this step is absolutely necessary. (See close-up photo of turnbuckle assembly.)
 Side window awnings
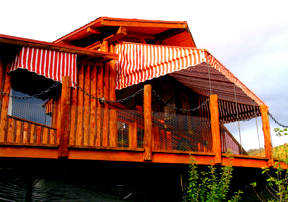
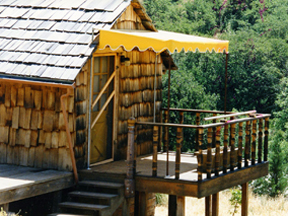
 Loft deck awning
After successfully completing the large front deck awning, I made two small box-type awnings for the side windows...also out of pipes. Then I decided to put an awning over the loft-deck on the back of the house. After finishing that one, I went completely awning-crazy, being only mildly awning-crazy to begin with. I bought 50 more yards of awning material from the awning man, and made awnings for the piano studio deck and south-facing windows and entrance way. Even my shop will eventually get the awning treatment!
The nine awnings I've made so far have cost a total of $2000, one-fourth the cost of having them custom-made. They have increased the value of my house and studio proportionately, but what's most important is that they have increased my enjoyment and quality of everyday life.
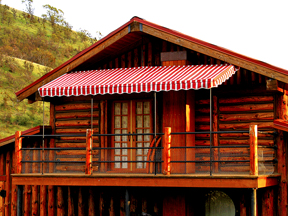
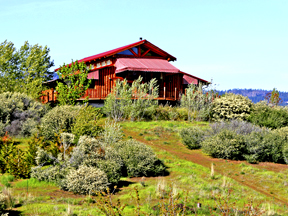 Log house with awnings
 Front view of Studio
It was well worth the 5,000 shish-kebabs I ultimately had to make to pay for all nine of them.
Closing Thoughts
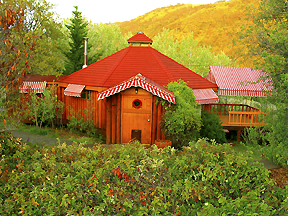
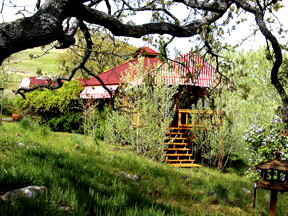
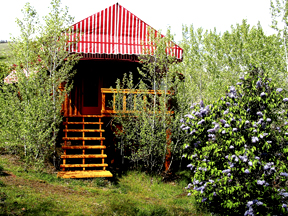
 Guest cottage with awning
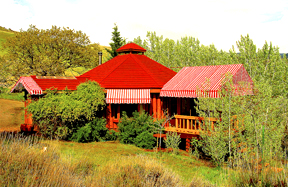
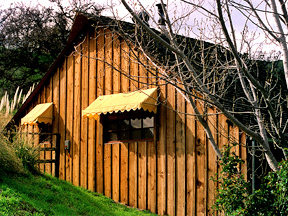 "Barn" with awning
I don't think there's a house alive that wouldn't look better with an awning or two. Depending on the architectural style of one's home, the setting, and the type of awning, they can add a whimsical holiday look (festive and inviting), a European or Mediterranean look, a classic look, a quaint and charming look, or a distinctive modern and stylized look, just to name a few.
Awnings appear to increase the size of a home, and give it a well-groomed, cared-for attractiveness. They prevent birds from flying into picture windows, and help insulate the glass from heat and cold, but best of all...they offer delicious shade!
You can go out on your deck when it's raining or snowing...or stay in. At least you have the choice when you have an awning. You can thumb your nose at mother nature when it starts to sprinkle during your pre-planned BBQ, and not a drop of water lands on the sizzling steaks (or tofu-burgers).
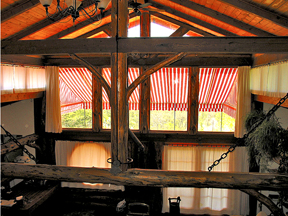 From inside looking out
Another serendipitous use of an awning is for a photo shoot. The diffused and reflected light under its canopy is perfect for taking pictures of friends and relatives who come to visit. You can also temporarily close in the sides of the awning with gauzy material or bamboo curtains or whatever you like for added privacy and shade. Simply hang fabric between the vertical pipes and secure it to the legs with handy spring clamps. Your once-exposed deck could also be a nice sheltered place to camp-out on a warm summer night.
Visualize YOUR home with awnings. Take a photo of your house and draw awnings on it to see if you like the look. Even small, visor-type awnings over the windows dress up a home and are easy to make.
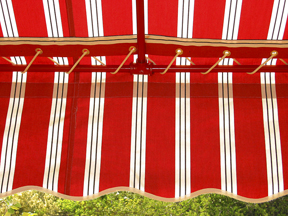
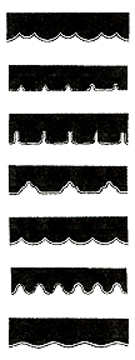 Trim ideas
There are many ways to build awning frames, but I found that playing with pipe fittings is a whole realm of creativity unto itself. It's a world of adult tinker toys, and there seems to be no end to the possibilities of practical things one can build with pipes. They are strong and versatile, come in many sizes, and if galvanized or copper, are almost weatherproof. I recently made curtain rods for a motor home out of gleaming copper pipe and bronze fittings. They looked so beautiful that it was a shame to cover them up with curtains.
After building the frames, you can get as wild and creative as you like with fabric and trim. Your choice of awning colors and style of valances (trim) can be an extension of your personality, like choosing a bright colorful tie or scarf to go with a conservative suit. (See illustration of valance styles.)
Making awnings is fun and requires only a few tools: two pipe wrenches, a sewing machine, a pair of scissors, a tape measure, screwdriver, a hammer, and a grommet tool. It helps to have a high pain threshold, a little brawn, a little brain, and a little money, but that goes without saying for any construction project. If you have none of the above, then you need lots of money!
Next time you walk out onto your patio deck bathed in bright sunlight and have to scrunch your eyes into little slits like "Squint Eastwood," do something about it. Go ahead...make your day ...make an awning!
 Awning frame
 Covered frame
 Southern view of studio
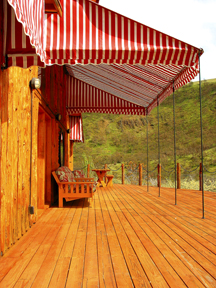
 Shady protected deck
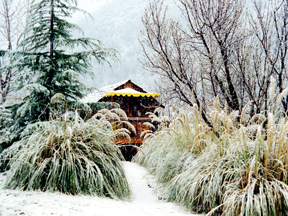 Cottage winter
 Cottage spring
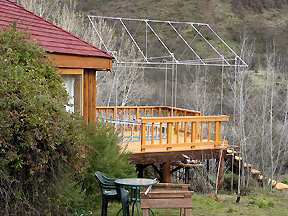
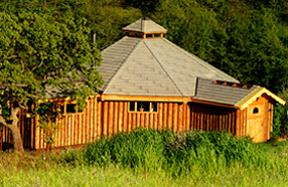
 Piano studio, before
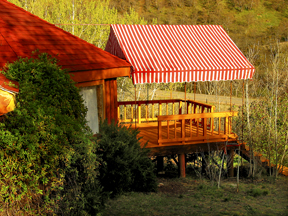
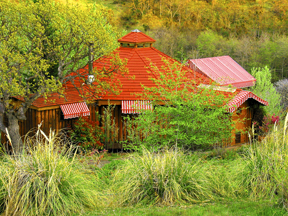
 Piano studio, after
 West view of studio, before
 West view of studio, after
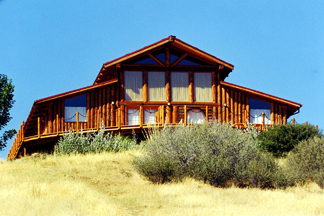 Log house, before
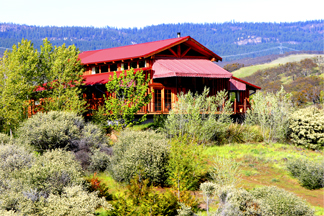 Log house, after