July 2014

Easy Awnings
by The Shady Lady
A window without an awning is like a lamp without a shade---bare and glaring. In my opinion there's not a window around that wouldn't look better with an awning on it. But attractiveness isn't the only consideration; awnings are practical and useful.
They offer shade from the sun, prevent UV damage, protect from rain, save on heating and cooling bills, keep birds from flying into deceiving reflections in the glass, and divert water run-off from going straight down into foundations.
 Log house, 2005
 Piano studio, 2005
Back in 2005 I made massive cloth awnings on iron-pipe frames for a big log house and a log piano studio. They turned out beautifully but I'm afraid they were more work than the average do-it-yourselfer would be willing to do, even to save tons of money--which I DID.
Since then, my son and I built his stud-frame house which also needed awnings. This time around I decided to make small metal-framed awnings for his modestly-sized south-facing windows. They were quick and easy to make AND install so I thought I'd share my design with other shady characters.
The steel frames are made from 3/4" square tubing and require a welder or a person you can hire to do the welding. Everything else you can do yourself. I was fortunate to have a professional welder right down the road to ask if he would make the frames and mounting brackets for me and how much he'd charge.
I gave him the size of each awning frame I wanted, along with a drawing of the awning design and the length, width, and pitch (35° slope angle) of each one so he could calculate how much square tubing to buy and the time it would take to weld them up, and give me an estimate. In short order he said he'd do it for $540 for all six, including the custom-made mounting brackets, and he'd also drill the screw holes.
I was thrilled with the reasonable enough price and gave him the go-ahead. Steel is at an all-time high and skilled welders are not cheap, but I figured $90 each was affordable for frames that will last forever.
He had them all done in no time and I started in doing my part. As soon as I brought them home I cleaned them with solvent and spray-painted them with Rustoleum's "Warm Brown".
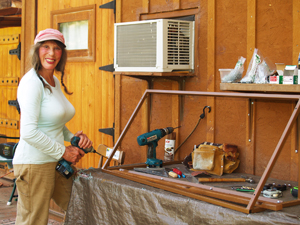 Dorothy drilling extra holes in frame to bolt on furring strips
 Awning frame
 Suntop label details
Home Depot and Lowe's have POLYCARBONATE corrugated roofing panels for awnings, greenhouses, and outbuildings, made by PALRAM Corp. They are durable, lightweight, rigid, UV resistant, chemical resistant, can support a heavy snow load, are easy to cut and work with, and virtually unbreakable.
Their "Suntuf" translucent panels have a lifetime warranty, but I chose their non-see-through (opaque) "Suntop" panels, which have a 10-year warranty, because I didn't want the greenhouse effect of trapped heat under the awnings. They may fade a little after the ten years, but could be easily replaced whenever necessary.
The panels come in different colors and lengths, but I chose the easy-to-handle 2'X 8' panels in "Sedona Brick". The sloping surface area of each awning--except for the bigger picture window awning--would be only 2-feet so I could cut the 8-footers in equal increments. I bought four panels from Home Depot at $25 each.
 1x3 Furring strips attached with small bolts
 Close-up of bolt, flat washer, lock washer and nut.
 Cutting panels to length with industrial scissors
 Polycarbonate is tough stuff but easy to cut
 Checking length of panels on frame
 Panels attached to frame with gasketed screws
Before I could screw the panels onto each frame I had to bolt furring strips across the top and bottom. I had a lot of scrap lumber so I used lightweight low-profile 1"x 3's and sealed them with spray paint.
Surprisingly, the various mounting bolts, flat washers, lock washers, and screws really added up at the hardware store and totaled about $50 before I was through!
I methodically cut and installed the wooden strips and the awning material until one by one they were all done and ready to put on the house. I placed the panels on the frames so there would be a 1" gap at the top and a 2.5" overhang at the bottom. I fastened the panels with 1" gasketed screws in the trough of each corrugation and snugged them down just so.
 Underside of panel installation
 Close-up
 Finished awning. Note air space along top for trapped wind to escape
 One 2'x 5.5' awning finished

 Five awnings completed
 Another view of finished awning
The mounting bracket design ended up being a good idea because it has a 3/4" drop-in channel that holds the awning frame securely to the house horizontally along the top, and the awning-frame "legs" hold it vertically to the house. It ain't goin' nowhere.
All told, the six awnings of various sizes cost an average of $115 apiece. You can't have them custom made and installed for that---anywhere.
 Close-up of mounting bracket, tipped to get photo, but screws go straight
into house, creating 3/4" channel to receive 3/4" frame top
Close-up of mounting bracket, tipped to get photo, but screws go straight
into house, creating 3/4" channel to receive 3/4" frame top
 Dorothy screwing down awning "legs"
 Cabin with its new awnings

 One up, three to go
 Mission accomplished
I hung the awnings at a calculated level where they offer delicious shade but don't block much of the view---just like the baseball cap I wear all summer.
