June 2013
BUILD A BALCONY DECK
by Dorothy Ainsworth
The charm and appeal of a deck is that it lets you go outside without leaving the house. It provides a seamless transition from indoors to outdoors without putting a foot in the dirt, and that makes it feel as good as it looks.
A balcony deck is a pleasant and inviting place to get a breath of fresh air, lounge and sip, pet the cat, read the paper, hear the birds, and enjoy the view. From your elevated perch, you can watch the sunrise, gaze at the stars, or howl at the moon.
In my opinion there's not a second story room in any house that wouldn't be enhanced by adding a deck to it. Why not be able to step out onto the balcony deck of your bedroom and stretch and yawn, and greet the day...barefoot and in your bathrobe if you like?
Decks extend our living space without costing very much. In 30 years of developing my property, I've added at least one deck onto every livable structure and every storage building---totaling 13 in all.
My last big project (building son Eric's house) took six years of paying as we went and doing the labor ourselves. (See 8 different issues of BWH "Building Eric's House" Parts 1-8 2006-2012)
To get to the finish line a little sooner, we decided to postpone building the balcony deck off the kitchen until later---or never. The deck was in the original plans and we paid the permit fee for it, but enough was enough. Fortunately we had planned ahead and left the electrical wiring out of the place in the wall where the door might be someday, and stubbed out 2 sets of wires for an outlet and a porch light.
After we received the final inspection and occupancy certificate in April 2012, I hung up my carpenter's belt and considered myself retired from construction work. That silly concept was short-lived. Exactly one year later, I took the belt off its rusty nail, rescued a cute little spider from it's home in the nail pouch, and started in on the project.
Planning the deck
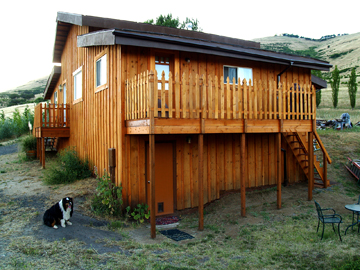
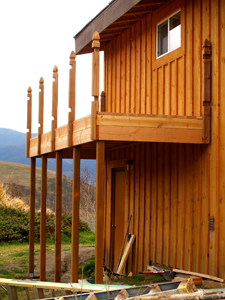
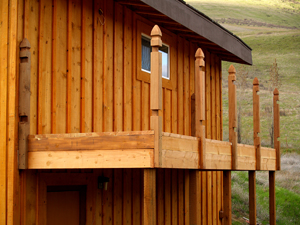
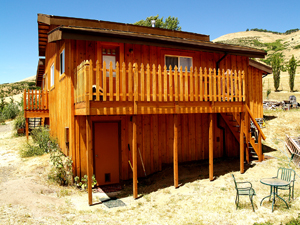
Eric's house is nestled into the side of a slope, with the basement buried on the west side but completely exposed on the east side. His kitchen is eight feet off the ground, sitting atop the basement. The entire east wall is tall, bare, and boring with nothing on it but the kitchen window twelve feet up and the basement door at ground level far over to one side. The house just didn't look balanced without a balcony deck on that side; it cried out to be built.
I figured the deck would not only be an attractive and useful addition to that side of the house, but also create a protected area underneath it for garden tools. It would accentuate the good features of the east side: a spectacular view, sunrises and moon rises, delicious shade in the afternoon, rainbows galore in the spring, and---being on the lee side---very little wind.
We decided on a long narrow deck that would be small and affordable ( $10/sq. ft.) and only take a couple of months to build. I had a 24-foot wall to play with, so I decided to make the deck 18-feet long and 5-feet wide. That way I could use standard lumber with very little waste and still have room to squeeze in a fire-escape stairway off the end without it extending beyond the wall and intruding onto the walkway around the house. The 90 sq.ft. deck itself would be plenty of room for a little table, some chairs, and a portable BBQ.
It was a cool April, so getting it done before the scorching summer was imperative. I sketched out some detailed plans, made a materials list, and drove the old truck to Home Depot, where I used my 12-month interest-free charge card, and got loaded up---or down---depending on whether you are looking at the height of the load, or the flatness of the tires.
Sidebar: I'm a do-it-yourselfer as well as a devout patriot, so to me and many other builders, Home Depot and Lowe's save us time and money by providing everything we need at a one-stop shop. In my opinion they represent the American free-enterprise system and capitalism at its finest!
About deck construction
The great thing about retrofitting a deck is that you can do all your hammering and sawing outside without disturbing anybody inside---well, until you cut the door opening in the wall. But that's just one day of inconvenience and mild torture---a small price to pay for years of future enjoyment.
Deck construction is simple and straight forward. There's nothing complicated about footings and piers, bolting or lag-screwing a ledger board to the house, attaching the joists, then laying down the deck boards.
Setting the piers
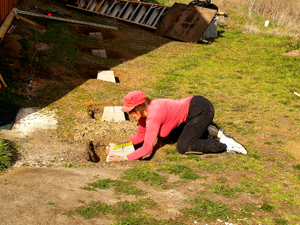
My first step was measuring and re-measuring, then hammering stakes in the ground and running level strings every which way---with horizontal string-levels hanging from them---to lay out the deck on the ground first so I would know where to dig the pier holes. After outlining the squares with fluorescent spray paint, I dug five large and fairly deep holes (44" apart) so I could wrestle the piers into them and have room to adjust their exact positions and level them before pouring concrete around them. I used piers with a hole in the top to hold adjustable brackets so I could fine tune the deck leveling process later if I needed to.
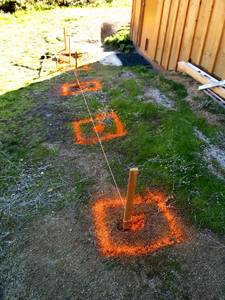 Pier holes marked
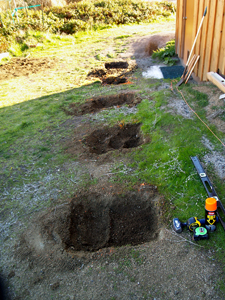 Pier holes dug
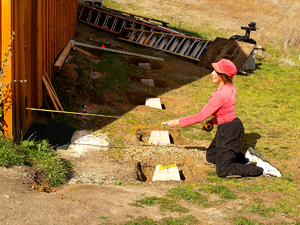 Measuring for pier placement
 Adjusting pier placement
Note: When you build a deck, the most important tools are LEVELS: string-levels, a long level, a medium level, and a short (torpedo) level. The old saw: "Plumb, Level, and Square" should be muttered under your breath constantly like a prayer as you work so you won't end up muttering something else when you discover you just built a sloping parallelogram instead of a level rectangle.
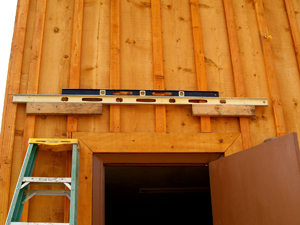
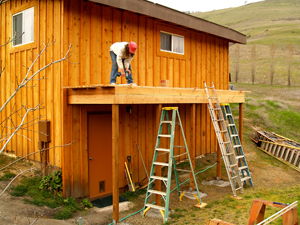
Setting the ledger board
Next step was snapping a long horizontal level chalk-line on the outside wall THREE INCHES LOWER than the finished floor on the inside. That three inches provides a 1.5" step-down from the house to the deck, and also allows for the 1.5" thick 2x6 deck boards that will be fastened on top of the ledger board later. The 1.5" step-down is very important so rain doesn't creep into your house.
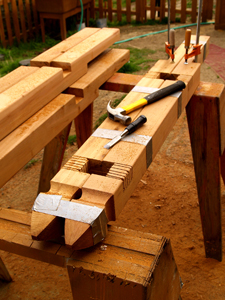
I installed all the joist hangers on the 2x6 18-foot ledger board and its corresponding rim joist at 24" O.C. (on center) while they were still down on the saw horses. Then I lag-screwed the ledger board to the house making sure it was lined up and squared with the piers, and perfectly level from end to end.
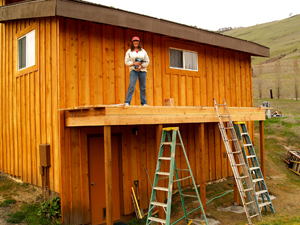
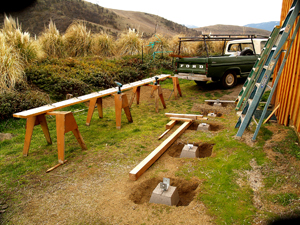 Overview
 Installing joist hangers
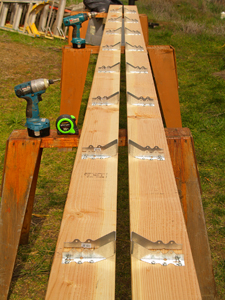 Ledger board & rim joist w/ hangers
 Blocks to support ledger board while attaching it
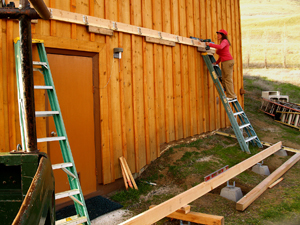 Attaching ledger board to house
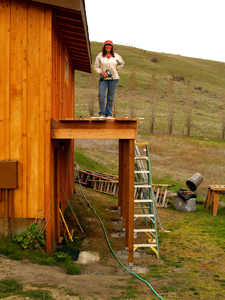
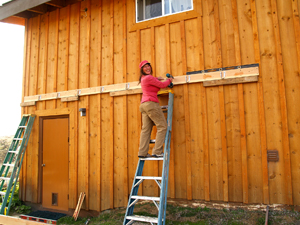 Time out to smile
Setting the posts
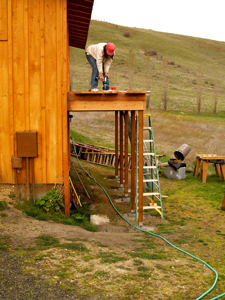
I temporarily plumbed and braced each 4x4 in place in its bracket on top of each pier. Then, working from a ladder, I was able to run a 6-foot level from the ledger board to the post and make a mark to cut the post off level with the ledger board.
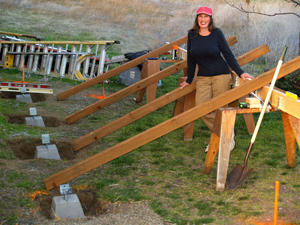 Five 4x4 posts
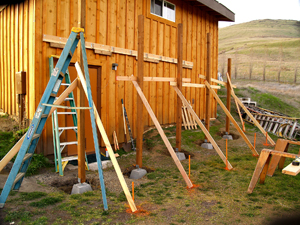 Posts plumbed and braced
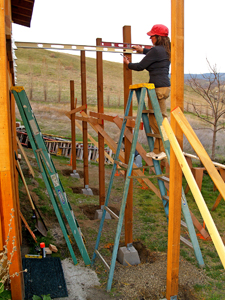 Marking posts to cut off level w/ledger board
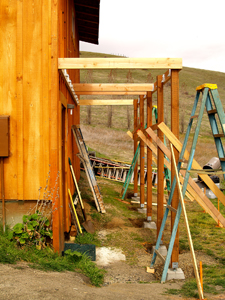 Rim joists installed
After taking the 4x4 posts down and cutting them off, I put them back up, re-braced them, and fastened them permanently to the post brackets with screws. I then connected the posts all around with TWO sets of rim joists on all three sides to accommodate fastening long rail posts later.
 Deck joists installed
 Braces removed
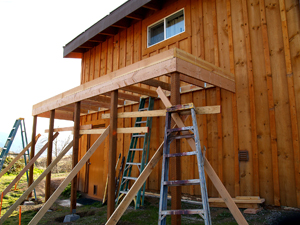
Then I mixed ready-mix concrete in a wheelbarrow and poured it around each pier. I did this step last just in case I had to make any last minute pier adjustments.
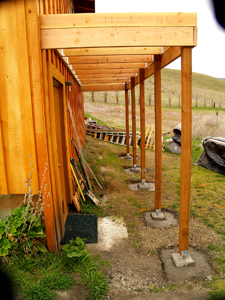 Side view
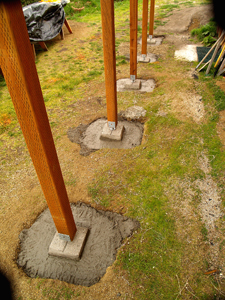 Concrete poured around piers
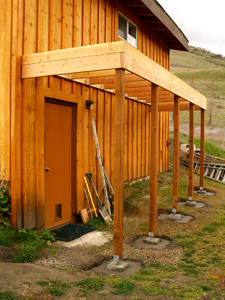
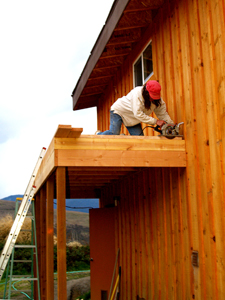
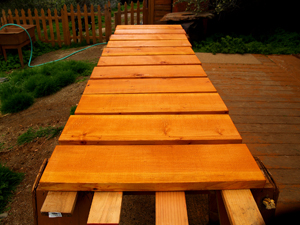
Installing deck boards
I put L-flashing along the house side and installed the ten 5-ft. 2x6 joists. Then I screwed down all the 18-ft. 2x6 DF kiln-dried deck boards with 3" deck screws and put a coat of natural sealer/stain on them. It was now time to build the deck railing.
 Dorothy fastening deck boards
 Taking a quick break
 End view
 All done
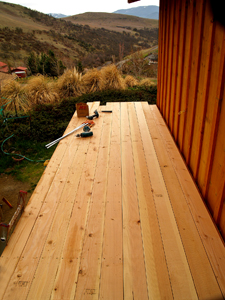 Beautiful Doug Fir kiln-dried decking
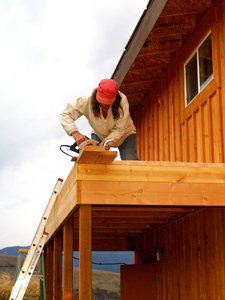
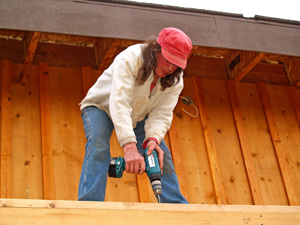 Dorothy putting in 1 of 400 screws
 Trimming off overhang
 Trimming off final 2 boards
Deck railing
 Front-door landing/deck
To use the same style railing as the front door deck/landing/stairs, I bought the same style decorative gothic posts and picket fencing (Home Depot) and installed it as before---by notching the gothic posts and screwing them onto the rim joists surrounding the deck, then fastening the fencing to those posts.
 Gothic posts for railing
 Posts gang-notched to support deck railing
 Gang-notching bottom of posts w/electric chainsaw
 This flat area will attach to rim joists
 Kerf-cuts w/circular saw make notching easy
 Pairs of end posts matched up
 Fence railing tested to fit notches
 Perfect fit
 Gothic posts ready to receive fence-railing
 Close-up of Gothic posts
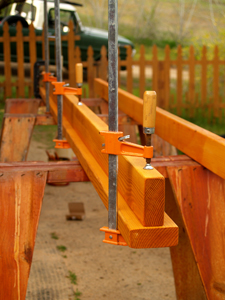
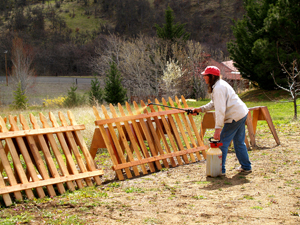 Dorothy sprays stain on fence railing
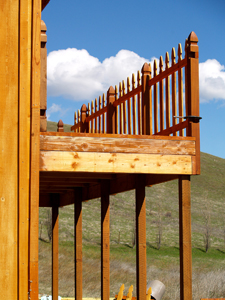 Front railing up
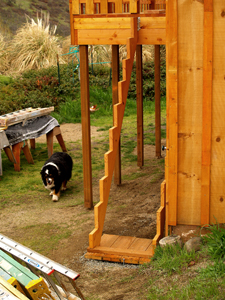
Stairs and handrails
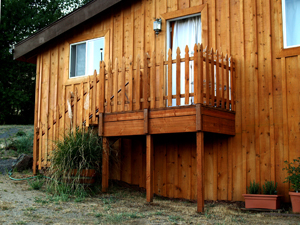
 Deck w/railing completed
I built a little gate on the stair end of the deck and then tackled the stairs. To fit the rise and run of the space, they had to be moderately steep, but still within the safety code. They are there mainly to be used as a fire escape, so the handrails are only 27" apart, enabling a person to safely and securely hang on with both arms while going up or down. I also put traction strips on the steps---cut from inexpensive composition-roofing and screwed down with flat lath-screws.
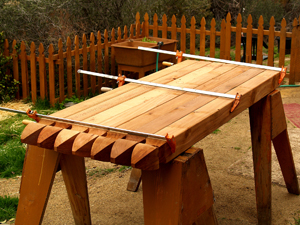
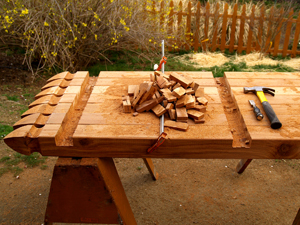
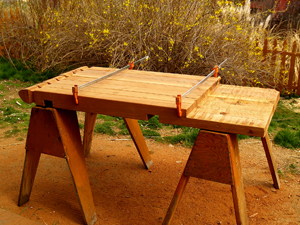
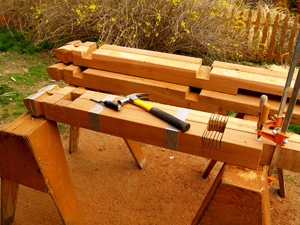
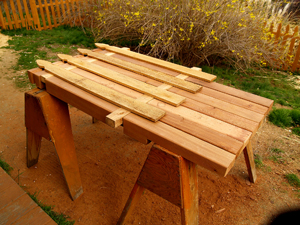
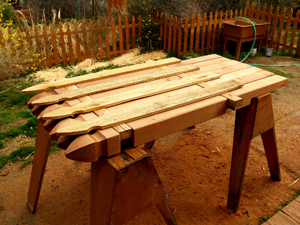
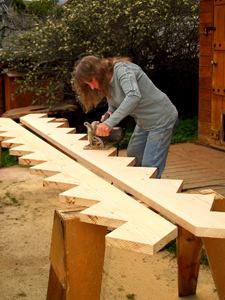
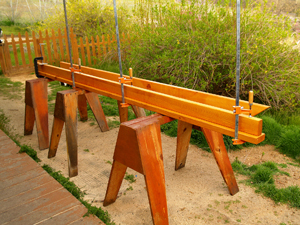
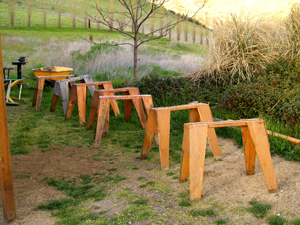
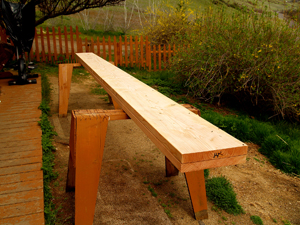 Straight grain 2x12's ready to notch out
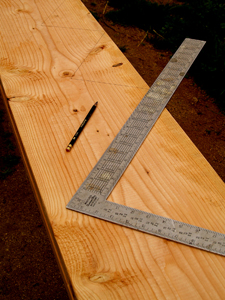 Laying out rise/run of steps w/rafter square
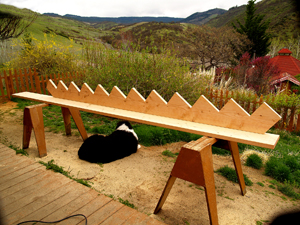 One stair horse done
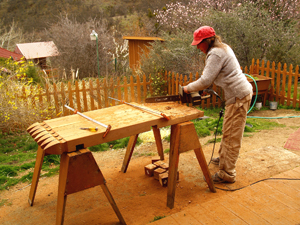
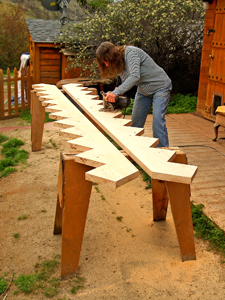 Making cuts w/circular saw
 Accuracy is important
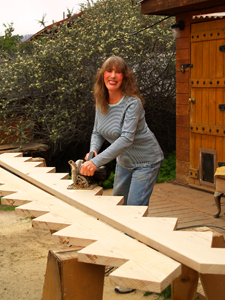 Time out to pose
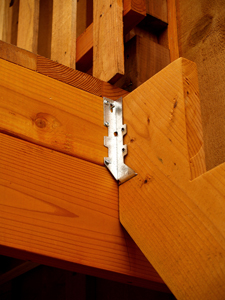 Close-up of slot-cut trick for joist hanger
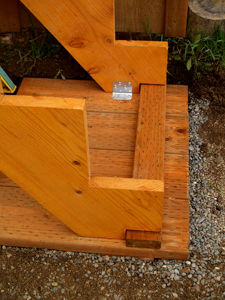 Landing at bottom of stairs
I cut the stair horses from DF 2x12's and attached them at the top with metal hangers and at the bottom to a landing. I made handrails out of smoothly sanded 2x4's forming an up-side-down "T" (screwed together) for the outside rail. I fastened it flat-side-down to the angled-cut top of 4x4 posts set in concrete, and used wall brackets for the inside rail. The handrails are strong, supportive, and very inexpensive to make.
 Stair horses installed
 Close-up kiln-dried DF for steps
 End view of deck and stairs
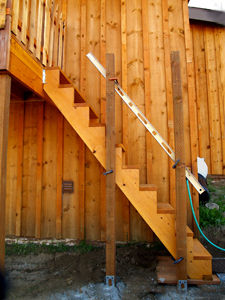 Marking 4x4's to cut off at handrail angle
 Long 2x4's for handrails
 Close-up of handrail construction
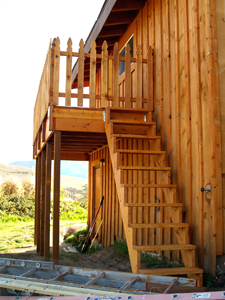
 Finished fire escape
 Side view of finished deck
Door from house to deck
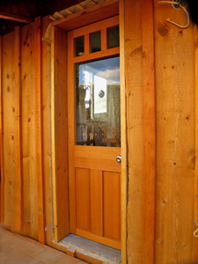
Now that the deck itself was done, it was time to cut the door opening to fit a quaint little one-of-a-kind 2-foot-wide door I bought for $50 at a builders' discount outlet. It was built from beautiful straight-grain Douglas Fir, and had a window in it to let more light into the kitchen, which made it ideal.
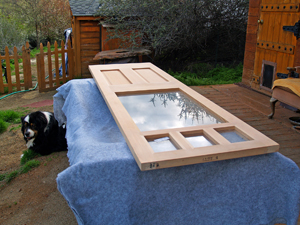 The new door
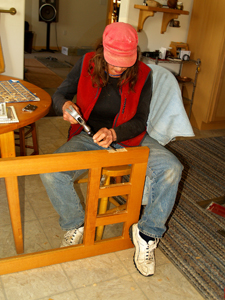
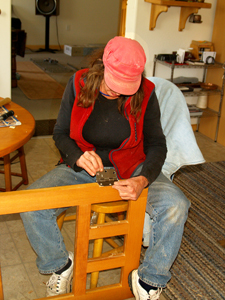
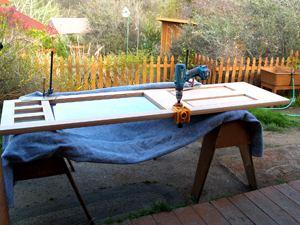 Drilling holes for door hardware
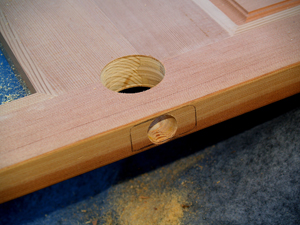 Ready for installing door knob set
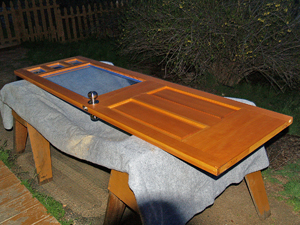 Hardware installed and door stained
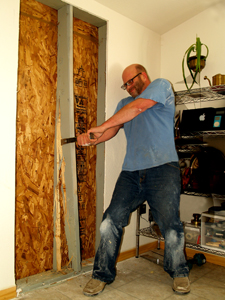
Eric cut the opening with a circular saw through the siding on the outside and a sheetrock saw and Sawzall on the inside. The hardest part was removing one wall stud from the middle of the opening, and adding an additional stud on each side.
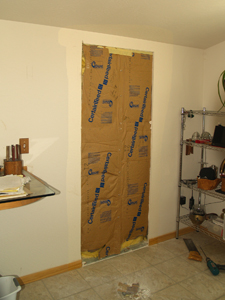 Sheetrock cut away exposing insulation
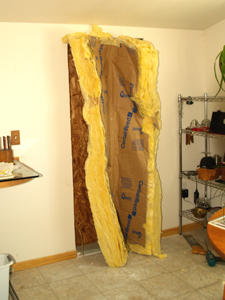 Insulation removed
 Eric pries off middle stud
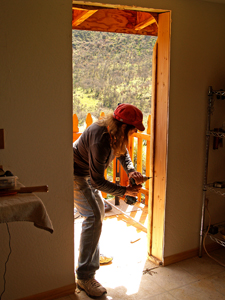
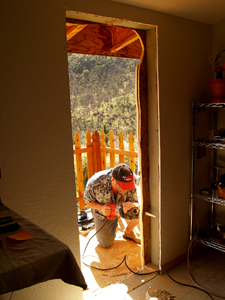 Eric uses Sawzall to trim excess siding
I then framed it all around with straight-grain kiln-dried DF 2x10's. The three layers of siding, sheathing, and inner wall sheetrock, plus the 2x6 framing, added up to 8.25", so I had to rip 1" off of each 2x10 because a 2x10 is actually 9.25". (Rip means cut lengthwise.) I measured and shimmed very carefully during the door-jamb framing process so the door would fit the jamb with only 1/8"-3/16" clearance all the way around, leaving just enough room at the bottom for the threshold.
 Dorothy attaches extra side-studs
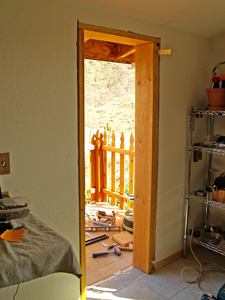 One side of door jamb installed
Note: Shims are mandatory for squaring and plumbing a jamb, and hanging a door.
I installed the door's hardware and hung it without incident. Everything fit perfectly, including the sweep on the bottom of the door as it brushed over the threshold. I used finish nails to attach molding (stops) all around the door jamb, and framed the outside of the door with siding to match the winDow frames.
 Dorothy chisels mortise for hinge
 Installing one of 3 hinges
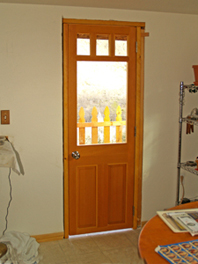 Door hung, inside view
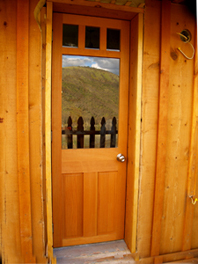 Door hung, view from deck
 Door hung, outside view
I splashed more sealer/stain on everything and backed down the steps as I sashayed back and forth with the paint brush---and the job was done.
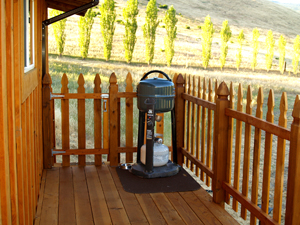 BBQ and looking north
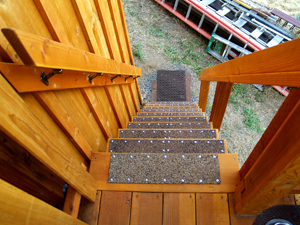 Going down (note traction strips)
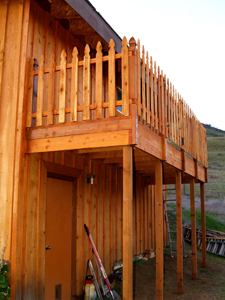
 Deck in the morning sun
 Deck in late afternoon
Closing thoughts
Building the deck had another benefit: I was now able to finally (and easily) put rain gutters on that tall side of the house without using scaffolding. I may get ambitious and put an awning over the deck before the rainy season begins, but for now, it's BBQ time!
When (pianist) Eric wears his "Go For Baroque" T-shirt, everybody misreads it as "Go for Barbeque", so now he's right in style either way.
 Herd of horses in the yard (neigh)