2011
 Fall 2010
 Winter 2010-11
BUILDING ERIC'S HOUSE
Part 5
by Dorothy Ainsworth
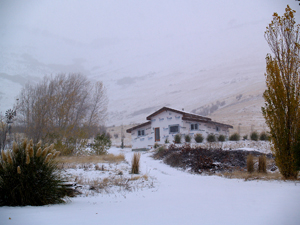
Last fall we wrapped Eric's house in white Tyvek like a cocoon to protect it through a harsh winter of rain, wind, and snow. From the outside it looked like a cold deserted box sitting on the hill, but on the inside a creature was stirring and it wasn't a mouse. It was ME preparing for the FINAL plumbing inspection.
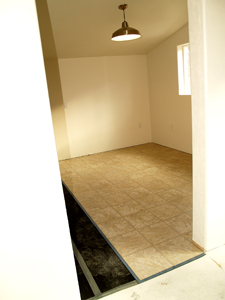
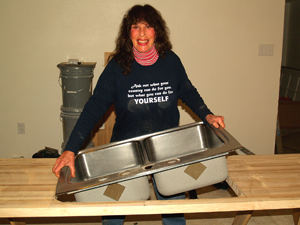
There were 2 toilets, 3 sinks, and a hot water heater to install. But before any of that could happen the flooring had to be laid in the kitchen and bathrooms, and cabinets had to be installed to hold the sinks and basins. That meant I'd have to start from the floor up.
Home Depot is only 10 miles away so I took the old covered wagon (my ancient Ford truck) in case I found some suitable flooring I wanted to haul home. Once there, I got a quick education from a salesman on some of my options: linoleum, ceramic tile, vinyl tile, and hardwood. Eric, who was busy working, said he trusted me to make a good choice as long as I kept his color scheme and budget in mind.
After looking at samples galore and asking lots of questions, I finally made the decision to buy vinyl tile-strips (ambiguously called "planks") that would be RELATIVELY easy for a beginner to install.
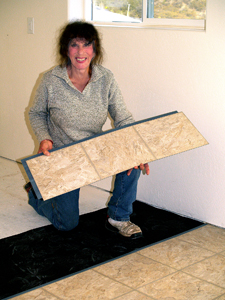 Vinyl tile-strip
"Traffic Master" brand was advertising a resilient floating-floor system called "Allure", and they lured me right in with their brilliant line: "ANYBODY CAN DO IT!" The sales-rep backed that up, and a printed poster on the wall behind the color samples erased all doubt. It read: "The ultimate do-it-yourself flooring! No messy adhesives or glue! Looks and feels like ceramic tile yet is waterproof even in moist areas! The planks adhere to each other, not your sub-floor, using the revolutionary GripStrip! To cut a plank simply score and snap! No underlaymemt necessary and the tile is quiet and warm underfoot! Follow the instructions and you'll be enjoying your new floor in just a few hours!"
It sounded too good to be true and I should have known better, but I went full-bore ahead and purchased enough cases (15) to cover the kitchen and bathroom floors----to the tune of $750----and signed on the dotted line for Eric to pay it off interest-free in 12-months (regular promotional offers by Home Depot AND Lowe's).
Allure tile was NOT cheap at $2/sq.ft., but was guaranteed for 25 years and was proclaimed to be the quickest and easiest flooring to install. Their claim would be true under IDEAL conditions, but when is that ever the case? Right away I ran into a problem. Our floor wasn't perfectly smooth because we had taken so long to build the house we had caulked the plywood floor-seams to withstand two winters before the roof went on. Consequently, a few of the seams were a little lumpy---not exactly like telltale gopher trails but almost.
The instructions said 1/8" variation in the sub-floor here and there was OK, so I set about to even things up. I chiseled and sanded the errant seams as flat as I possibly could without having to rent a major belt sander, then decided to put down tar paper as an underlayment...to completely smooth out the surface and hide any imperfections.
I had tried several times to call the company's customer service help-line to ask if using tarpaper would void their warranty, but they never returned my calls. The plumbing inspection deadline wasn't going to wait for somebody back in Connecticut to finally answer the phone--- and patience isn't one of my virtues when I get on a roll--- so I proceeded with my plan.
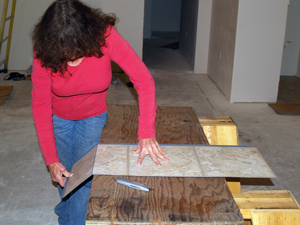
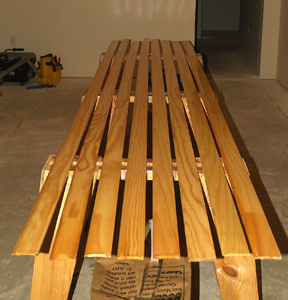
I rolled out the 3-foot wide 90# tar paper and stapled it down one course at a time making sure the seams came perfectly together side by side so there would be no raised overlaps. The 12-foot wide by 24-foot long floor was now smooth and clean and ready to go.
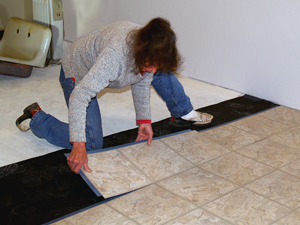
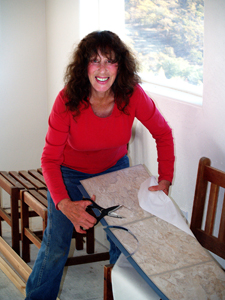
Then the fun part began: laying the pretty tile. Each alarmingly heavy case of tile (whew!) contained 8 planks 36" x 12" to cover 24 sq.ft. The first row had to be squared with the starting walls (beginning in a corner and working from left to right) to insure that all the subsequent rows would be square. It turned out---surprise!---that the wall corner was slightly out of square so after laying only two rows of tile-strips I was able to move and adjust the 2-foot by 12-foot "floating floor" to a happy medium by dividing the difference. That adjustment was necessary because the starting row was not exactly parallel with either wall which meant it would end up WAY off by the time I got to the other end of the room.
They don't tell you in the owner's manual how to prevent this kind of disaster. They also don't tell you that the sticky "GripStrip" would rather stick to itself and your fingers than stick to the next tile strip. It also attracts dirt and debris like a powerful magnet, then WON'T stick to itself. I learned the hard way why they recommended buying an extra case "just in case".
One more thing they don't stress emphatically enough is that BEFORE you press the sticky surfaces together you must mate up the tile edges EXACTLY. You can't be off more than hair's width from the edge of the previous laid row as well as tightly against the tile just laid to the left, or you'll have an unacceptable gap. If this happens, they describe a way to fix it in the instructions, but who wants to get out the hair dryer to heat up the glue and try to pry the GripStrip apart? Fortunately I was so nervously careful in placing the tiles that I didn't have to resort to that trick of the trade.
 Laying tile strip
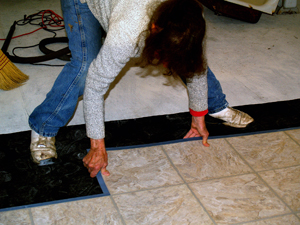
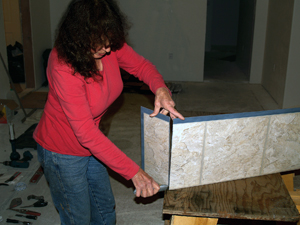
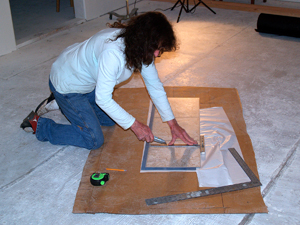
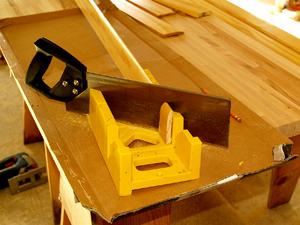
The required procedure in laying this type of tile is to "stagger the joints". On alternate rows the wall-starter strip must have only two tiles in it instead of three, so one tile on the LEFT side of the strip has to be cut off. Then the last tile in each row needs to be cut off wherever it ends up at the wall. There will be a lot of "scoring and snapping" going on, but make sure your utility knife is razor sharp or there will be a lot of "gnawing and haggling" going on.
 Scoring
 Snapping
I made the mistake of using a fine-tooth blade on my jigsaw to trim off one of the tiles, and every speck of vinyl that flew off landed right on the glue strip. I went right back to scoring and snapping!
 Scoring with razor knife & t-square
 Snapping
 Fitting corner piece
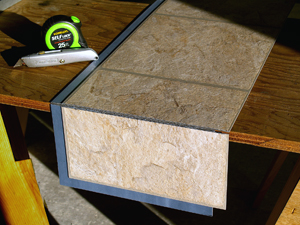
It IS true that the average person CAN do this---and I lived to tell about it---but I wouldn't say it's a piece of cake. To do a PERFECT job would require a perfect floor and factory-trained experts like you see in tutorials. That wasn't me, but I WAS able to do a darn GOOD job.
I managed to get all three rooms done in record time, but only because I was a "maniac on the floor" like Jennifer Beals in "Flashdance". Well, not exactly. There's nothing exciting and glamorous about doing the duck-walk in Levis, and there was no handsome guy in tights to pull me up and twirl me around.
 Bite cut for toilet flange
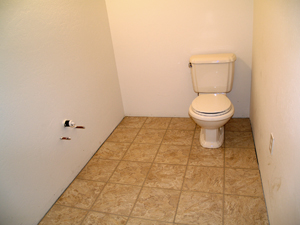 Bathroom tile done
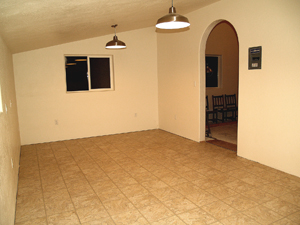 Kitchen tile done
 Baseboard stained
 Cutting baseboard corner
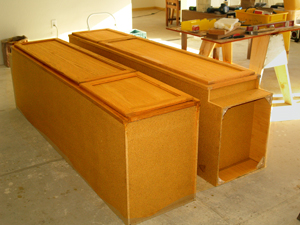
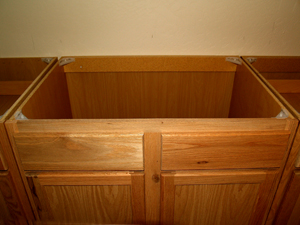
After tiling all three rooms, I installed base-board trim around their perimeters, and now I was hell-bent on getting the cabinets in. I heard that Lowe's carried UNFINISHED oak cabinets and vanities for do-it-yourselfers for very reasonable prices. I climbed back in the old-mobile and it shook and shimmied me all the way to Lowe's which was 20 miles away. Again, Eric was at work (SOMEBODY has to pay for all this!) and again he gave me permission to run him into debt. If you can't trust your mother, who CAN you trust?
As soon as I saw the oak cabinets I knew he'd approve. They were fairly well made and best of all---affordable. I immediately spied one that was slightly damaged down low on the kick plate (easily replaced) so of course saw an opportunity to get a discount. It was the largest and costliest cabinet, the one we needed to hold the double sink, and the regular price was $200. The manager of the dept. said I could have it for $50. SOLD!
I had taken all the necessary measurements before going in so after deducting the length of the sink cabinet, I picked out a few others that would fit well together in the available space. When I asked for help loading them onto a giant flat cart, the manager took me on a detour to his desk where he entered my data into a computer software program and it immediately printed-out a 3-D illustration of my kitchen to scale so I could easily visualize a workable cabinet arrangement and future appliances. It's a great customer service they provide and of course it boosts their sales. It worked so well on me that I was inspired to go ahead and buy a beautiful black and stainless steel gas-range and matching hood I had my eye on that was on sale for 25% off ($500).
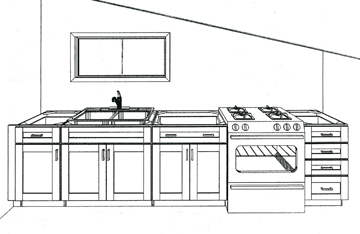 Lowe's print-out
Before I was through I had run Eric's bill up to a grand total of $1000 --- payable interest-free for an extended 18 month period. For only $60/month to Lowe's and $60/month to Home Depot the kitchen and bathrooms would be basically complete and the final plumbing inspection AND the final mechanical inspection (activated hood-fan) would be on time. Pay-as-you-go seemed to have up-and-went.
I am a big advocate of paying as you go but sometimes it's wiser to expedite progress by taking advantage of an exceptional opportunity. Interest-free loans on sale-items were just too good to pass up, and the payments were within Eric's budget. If there's one thing I'm good at it's rationalizing!
I felt recklessly rich chugging home in my old pickup with the bed overflowing with cabinets and a stove. I marveled all the way home at what a great country we live in to be able to build such a nice house on sweat and promises alone.
Installing and leveling the cabinets (using shims) was not a difficult job, and finishing the oak surfaces was no work at all. I brushed on a couple of coats of a clear acrylic/polyurethane sealer called "Poly-Finish" by Ace. It's a water-based odorless mar-resistant satin-finish and that's what Eric wanted in the kitchen and bathrooms---not the lingering fumes of a petroleum-based stain. He wanted to keep the wood grain light blond which would go nicely with the white walls, sandy colored floor, and stainless steel appliances. When the sealer was dry I installed all the brushed-nickel cabinet-pulls that match his decor and cost only $2 each.
 Sink cabinet
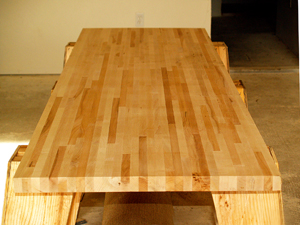 Raw butcher block countertop
Eric was working fulltime on a commercial soundtrack project so I continued to work on the kitchen by myself. The next step was to decide what kind of countertops and drain boards to use. I had heard that Lumber Liquidators stocked 8-foot x 25.5" x 1.5" hard-rock maple butcher-block countertops made by Williamsburg Butcher Block Company for $199 each. I decided to check them out on the internet.
When a photo of the butcher-blocks came up on Lumber Liquidator's home page, it was love at first sight, and without hesitation I ordered not just one, but THREE of them! So, again, while Eric was at his piano keyboard making money, I was at my computer keyboard spending money. But this time I paid the bill myself and informed Eric that 24 lineal feet of counter space would be his Christmas AND birthday presents for the next 3 years. We both knew it was a lie, but that's the kind of thing a mother says when she wants to give a guilt-free gift.
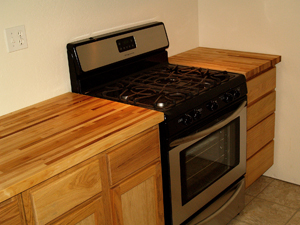
They arrived by truck a week later and were exactly as I expected: Gorgeous! I couldn't wait to attack the project, but first I had to mount the range-hood to the wall and connect it to its existing ceiling duct, then slide the range in place under it, perfectly centered. The range hood installation was NOT an easy job, but I had to grit my teeth and just do it. It was the last fan to hook up so I could get the FINAL mechanical inspection signed off.
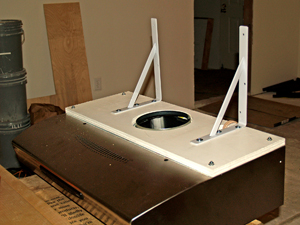
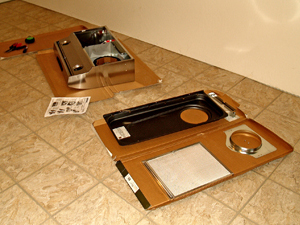 Range-hood components
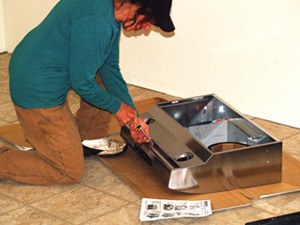 Assembling range-hood
 Shimmed up to seat into duct
 My own device to hang range-hood
 North wall of kitchen
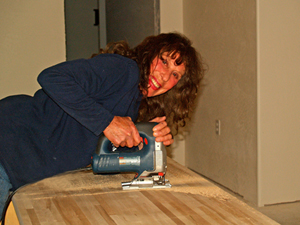
Now I was ready to get started on what I really wanted to do. I set the first countertop on saw horses and trimmed a few inches off to the exact length needed for the drain board, and then traced around the top-mount stainless steel sink and cut out the sink hole with a jigsaw.
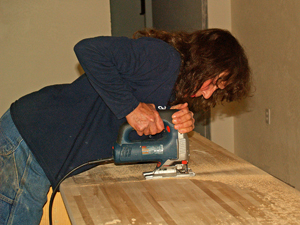 Cutting sink hole
 Lying down on the job
 Perfect fit
Note: The sink-hole has to be marked extremely accurately or the sink could fall through, depending on whether it's a top-mount with a lip or an under-mount style.
I hefted the sink board over to the row of cabinets and set it on. I squared it up, made sure it was level along its length and width, then fastened it from underneath, screwing up through special holes in plastic reinforced corner-tabs provided on each cabinet. I then trimmed-up and used the sink-hole scrap for a small butcher block to the right of the range.

 Finished job
Next I leveraged the second 8-foot countertop down flat on the floor on top of four 2x4 "stickers" (spacers). I had placed one at each end and one on either side of the cross-cut I was going to make in the middle, so there would be no binding of the blade. I cut the slab in half with a sharp new circular saw-blade and with the help of a guide clamped to the block so I couldn't waver.
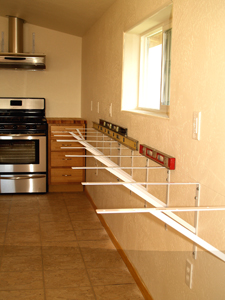 Brackets
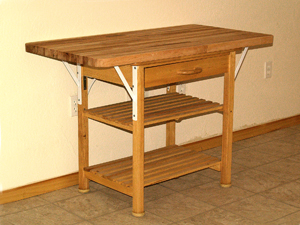
 Countertop installed.
 Installed butcher block with brackets
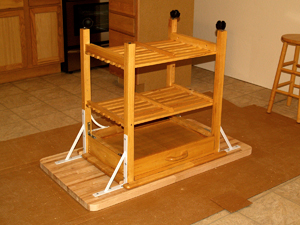
 Finished roll-around cart
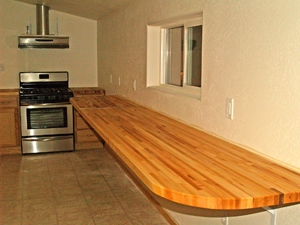
I used one 4-foot section of it for the top of a roll-around butcher-block island Eric had, and butted the other 4-foot section up against the third and final 8-footer, to create a 12-foot countertop along the east wall. I would join the seam later with a stainless steel T-strip.
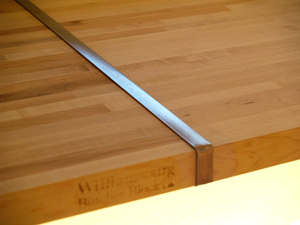 Stainless steel t-strip in seam
I matched up the center of the counter length with the center of the 4-foot window, and drew a line on the wall at exactly the right height (36") to be able to sit on a 2-foot stool and sip coffee and enjoy the view. I attached reinforced white brackets to support the 110-pound-each butcher-blocks by lag-screwing them to the wall studs at 16" centers along that line. All the space under the countertop is free and clear so there will be no toe-stubbing in Eric's kitchen.
I rounded the corners on the countertop by first marking the curve with a large lid template, then cut the curve with a jigsaw and sanded it smooth. While the sander was still going I ran it along the sharp leading edge of the counter to bevel it a tad.
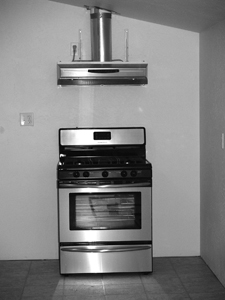
 Finished kitchen
When the countertop job was completely done, I wiped on several coats of plain mineral oil, at 4-hour intervals, to bring out the colorful grain of the hard-rock maple, and ooohed and aaahed with every application. Eric and I are both in love with the look, and we both think a house just can't have enough flat surfaces to pile stuff on.
I enjoy working alone. I have more time and building experience than money, and Eric has more money than time and building experience, so it works out perfectly. He makes his living as a composer and pianist, and has to stay intensely focused on creative work when he's not out tuning pianos. I understand that, and I don't even WANT help with jobs that are best done solo, so I give Eric the heavy work and I do the light work. We have a communication code: When he's practicing his piano down in the basement and hears 3 staccato poundings on the floor up above, he comes running.
 Cutting water lines with tubing cutter
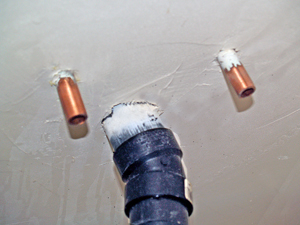 Copper 1/2" water lines cut
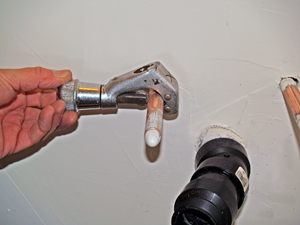
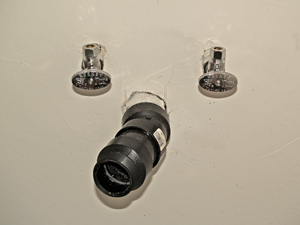 Angle valves installed
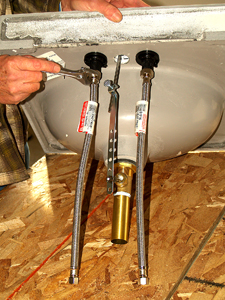 Supply lines on basin
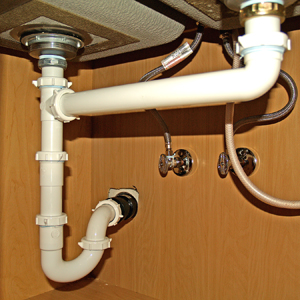 Kitchen double-sink plumbing
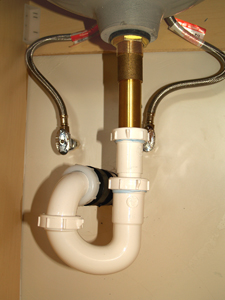
I installed and plumbed the sink, toilets, and basins with standard plastic pipe drain kits and traps and hooked up the water supply lines with their required angle-valves (shut-offs). All the parts were available at the hardware store, and fairly inexpensive. Then I rigged up the shower fixture so it could be tested, even though I hadn't tiled the stall yet. Next I hooked up the hot water heater in the basement and installed the mandatory earthquake straps around it.
Note: The internet is a goldmine for DIY instructions, so simply google: "installing sink drains" and click on various websites that show exactly how to do the job with accompanying photos and tutorials. Hammerzone.com was my favorite.
 Basin plumbing
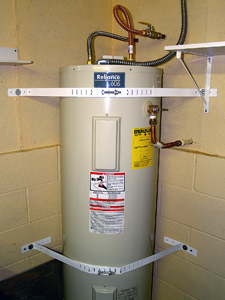 Water heater with earthquake straps
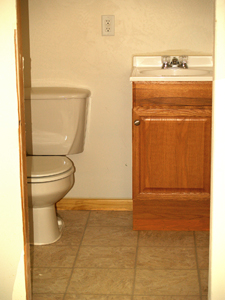
At long last I called for the final inspection and happily passed all the faucet and flushing tests, with water coming in and going out everywhere it should and not a drop where it shouldn't. The only thing I had forgotten was to put a bead of silicone seal around the base of each toilet, and I promised the inspector on girl scout's honor I would do it---and, bless his trusting soul, he signed me off.
 Half bath
 Main bathroom
That night I celebrated by breaking out a miniature Coronita beer that had been in my refrigerator for a year, and had myself a little party.
Closing thoughts:
There are 16 preliminary inspections and four finals listed on our big yellow "job card" issued by the county along with our building permit. We've passed all 16 preliminary inspections plus three of the finals (electrical, plumbing, & mechanical), but now have the FINAL FINAL to go. That's when they examine the entire building, and it's a biggie.
Before they will issue a "Certificate of Occupancy" we have a lot more major work to do. But then, after our final approval, we can take our time to finish up everything else, including floor coverings and awnings, and be able to pay for them as we go.
The inspector said that the interior doors can wait, except for the bathroom doors, which HAVE to be in. The flooring, such as carpet or hardwood, can wait. The front and back entrances have to have stairs and safety railings, the wood stove has to be hooked up, and the siding has to be on the house. Roof venting must be done at the ridge and the eaves, and that's it.
We figure we can accomplish all that within a year---by 2012----but it'll take yet another year to do all the cosmetic work and finishing touches that turn a house into a home. Eric's crowning glory will be moving his 9-foot grand piano from the basement into its final resting place in the living room.
Knowing Eric, at some point in his house-warming party, he'll don his Bach wig, play a Baroque fugue, take a deep bow and the wig will fly off. After six years of building, a little slapstick will be refreshing, but hopefully this house-warming party won't be as HOT as the last one! (My first log house burned down.)
 Eric
Eric