January 2012
BUILDING ERIC'S HOUSE
Part 7
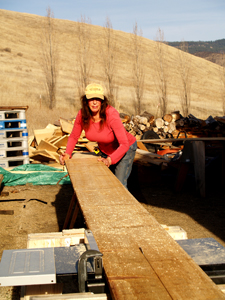
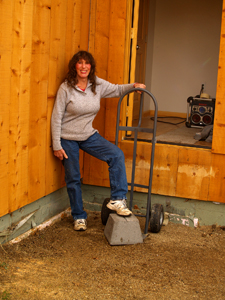
by Dorothy Ainsworth
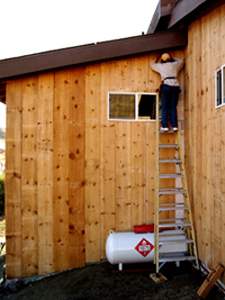
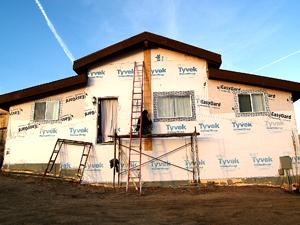
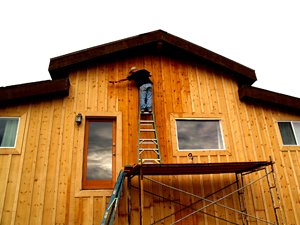
I knew it would be a daunting task to put 3,000 board feet of sugar-pine siding on the house, for several reasons: The 1 1/2-story walls were high-reaching, the 16-foot boards were long and heavy, and there were 200 of them. On top of that, the uneven ground wasn't exactly ladder-friendly, and I wasn't exactly a spring chicken any more. Not to mention it was winter and the days were cold, windy, and SHORT. I anticipated that this would be the most challenging job yet.
 Winter 2011
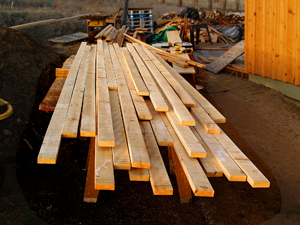
In a flight of fancy I imagined a crew of husky guys with nail guns and compressors going nonstop for a week, and thousands of dollar bills swirling out of my fantasy bank account and into their wallets. But my daydream ended abruptly when the big truck from Field's Home Center dumped a huge load of siding in the driveway and sped off in a cloud of dust.
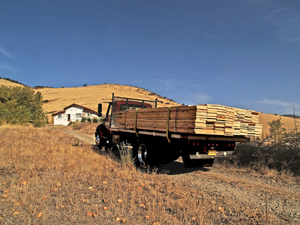 Here comes the siding

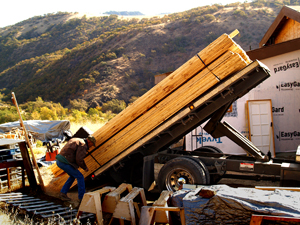
 3000 BF Sugar-pine 1x12's

It was my moment of truth. There was no way I could afford to pay for help, and Eric was gone everyday working to pay for the siding itself---to the tune of $3000. Grounded in reality this time, I resolved to tackle the job solo by following my own mantra: "One board at a time", and I started in.
Siding
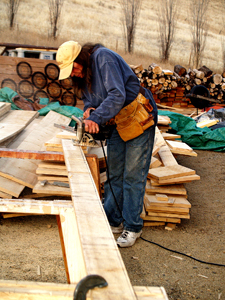
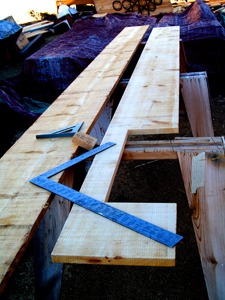
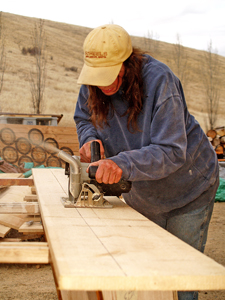
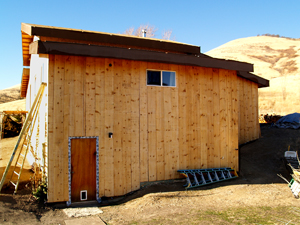
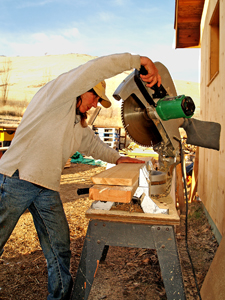
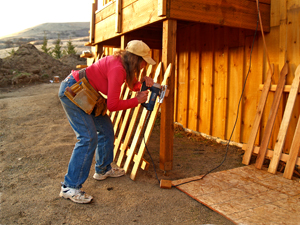
First I separated the better boards from the excessively knotty ones so I could put the worst ones on the back of the house (north side) and the prettier ones on the front. I set up three sawhorses to support and cut the sixteen-footers at whatever lengths I'd need. I used my jigsaw for cross-cutting and notching, and the circular saw for ripping (lengthwise cuts). All went well and before the first day was over I had half the north wall done. But only half a wall out of eight? I knew I was slow but this was ridiculous. The north wall didn't even require a long ladder or scaffolding, and the ground was level.
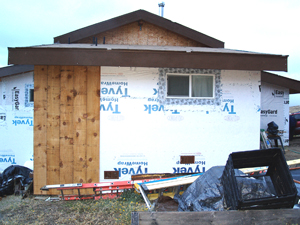
 North wall done
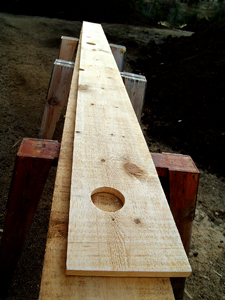 Porch light hole
 Trim job with circular saw
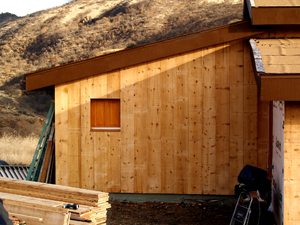
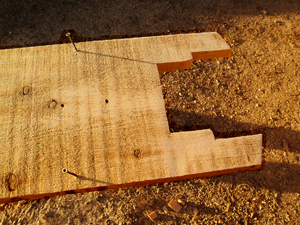
 Window notch
 Notching for window
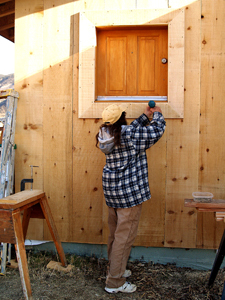
I realized that progress was going to take longer than expected due to the logistics of handling and attaching each board. The time-consuming process involved moving boards from the stack to the saw horse after checking for straightness and cracks, measuring accurately, notching for vents and faucets and porch lights, cutting the roof-pitch angle, then sanding the rough edges and sometimes the whole board if it was stained and dirty (and many of them were).
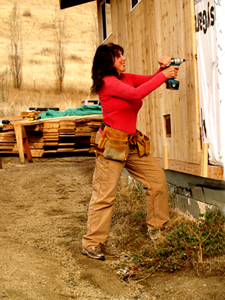
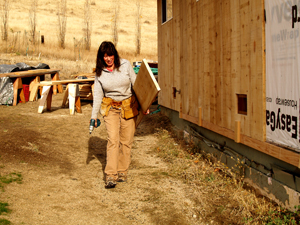
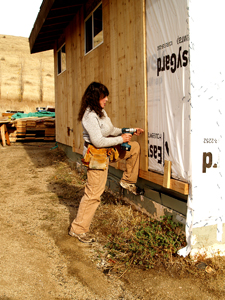
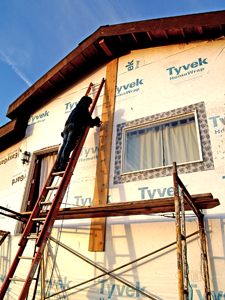
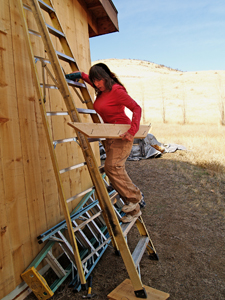
After choosing and preparing each board, I carried it over and hefted it upright against the wall, held it in place with any available body part, plumbed it with a level, put in the first screw, and then all the subsequent screws one foot apart all the way up and down on both sides.
The boards were a true one inch thick by a true 12 inches wide and every foot cost a dollar. I couldn't afford to squirrel around hurrying and making costly mistakes or having an accident. "Measure twice; Cut once" SOUNDED good, but more than once, I measured twice and cut twice.
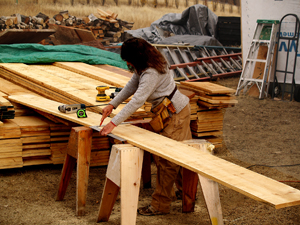 Marking length
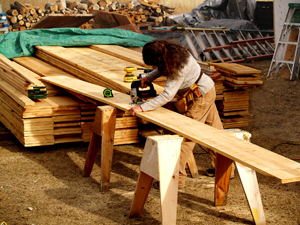 Cutting length with jigsaw
 One board at a time
 What knees are for
Based upon the easiest wall taking 2 days, I set a daily goal so I'd be finished with the job in a month (boards only, not battens yet). The final inspection on the house was overdue but we were on the home stretch so the building dept. was being patient. My new mantra became: "Ten boards a day keeps the inspector at bay".
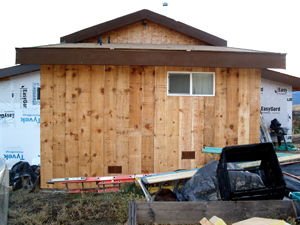
 West wall done
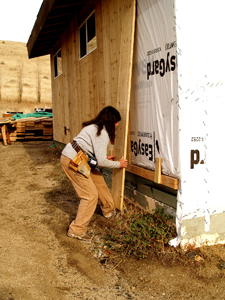
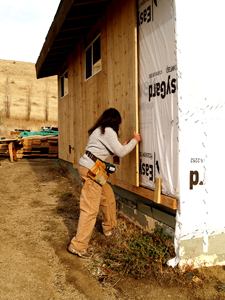
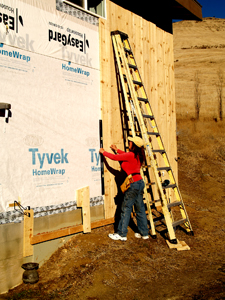
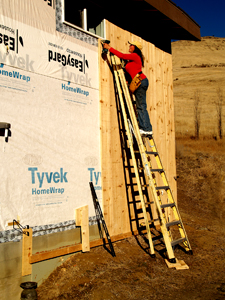
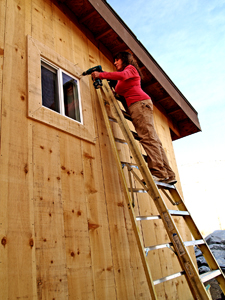
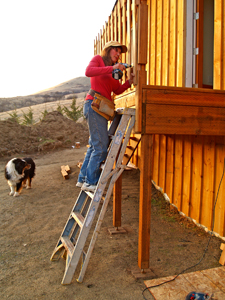
Because I was working alone, each board wanted to slip down even when I was holding it with all my might with a knee, shoulder---or even my head---while trying to drive the first screw in. Sometimes frustration is the mother of invention, and pain is a great motivator. When you have BOTH going, you become a genius. I solved the problem by creating a level ledge (shelf) to set the boards on by attaching a long 2x4 at the bottom of each wall, using vertical scraps of siding as the hangers. I had to use hangers screwed into the OSB sheathing or a board, because the impenetrable concrete basement wall was beneath the lower edge of the boards right where the 2x4 had to be.
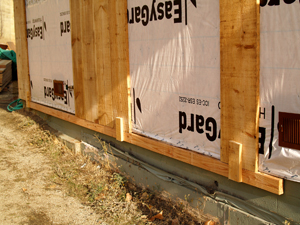 Ledge to rest boards on
"Sunrise, Sunset, Sunrise, Sunset"...I often sang that tune to the dog when trudging home at the end of each day spent doing the same methodical work week after week. Zorro joined in by wagging his tail. In the evenings I emailed my daughter Cynthia a photo of each wall as I finished it and she bantered right back with praise---except for one rather humorous reply : "I love seeing your progress, Mom--- from the comfort of my living room!"
 Kitchen wall done
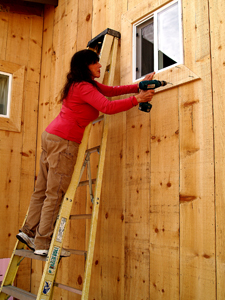
 Plumbing a board
 Fastening a board
 East wall done
 West wing done
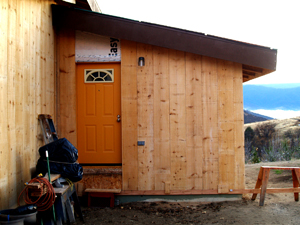 Entrance wall done
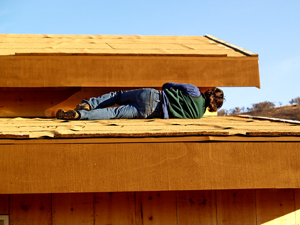 Glen "Burrito" Zimmerman
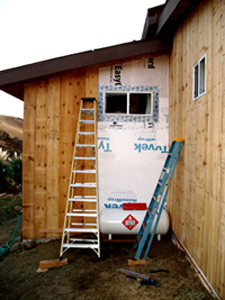
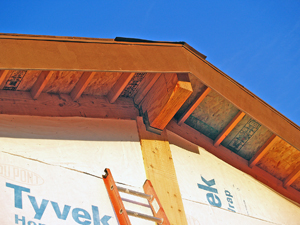
I saved the worst job for last but then HAD to cry for help. The only guy I knew who was slim enough to fit horizontally between the overhang of the two shed roofs was my Jack of All Trades friend, Glen Zimmerman. He did odd jobs for a living and this would be the oddest one yet. BEFORE the siding could go on that 17" short vertical wall, code required 6" galvanized metal L-flashing to be installed at the intersection where it met the lower shed roof. Glen first had to crawl on his belly like a reptile, sandwich himself horizontally in between the two roofs, then use a hammer and roofing nails from that position. He managed to complete both sides of the house in only 4 hours and was well worth the $60 I paid him. Then, to save money, I myself went up, up, up to put the flashing and siding on the triangular piece of vertical wall that joined the BEDROOM shed roof to the gabled end of the house.
Note: Flashing is extremely critical where walls meet roofs and ANYWHERE that water can get trapped and rot wood.
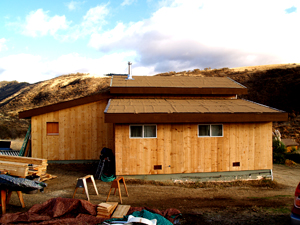
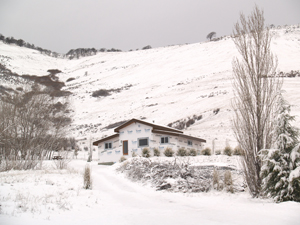
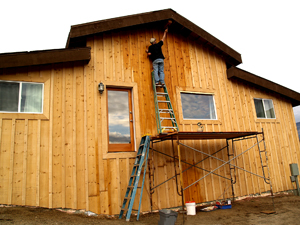
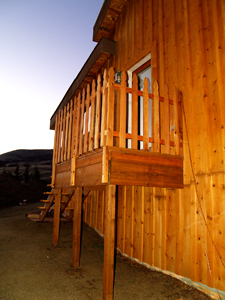
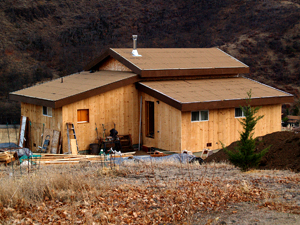 West side of house
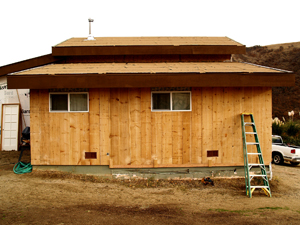
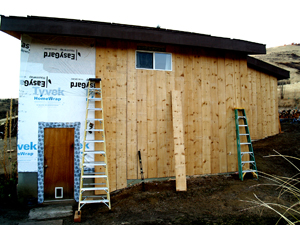
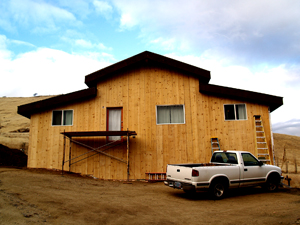
Just like in a time-laspe-photography video, the boards miraculously disappeared off the ground and ended up on the house in exactly one month...which happened to be 2 days before Christmas! Perfect timing. Storms were on the horizon and I needed a break. I'd wait for the new year (2012) to install the window frames, battens, and corner trim.
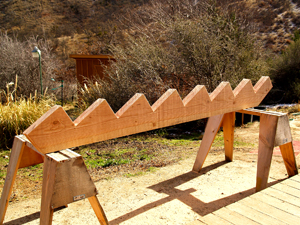
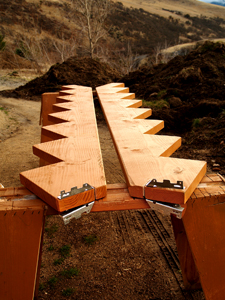
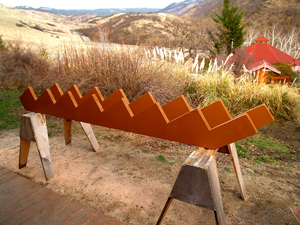
 Notch to fit around ridge-beam
 First board centered
 First board fastened
 Making progress on front
 South wall done
 "Sunrise ... Sunset ..."
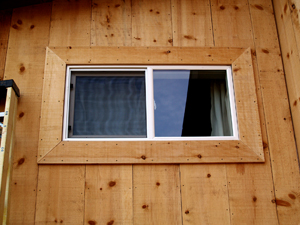
Framing Around the Windows and Doors
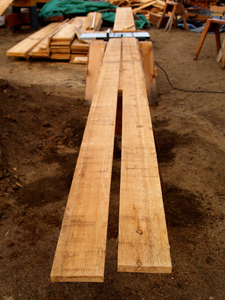
BEFORE the battens could go on I had to properly frame the nine windows and three doors with 6-inch wide stock cut from the sugar-pine. I ripped a dozen sixteen-footers right down the middle with the table saw, then cut four lengths for each window by mitering the corners with the chop saw. Once the substantial looking frames were installed I was ready to go batty with batts.
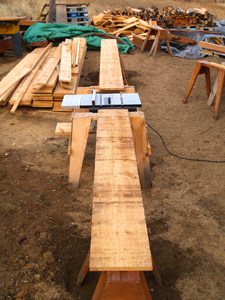
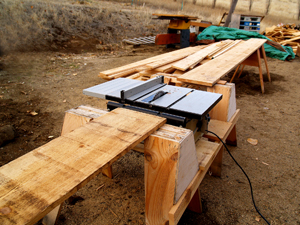 Make-shift saw table
 Ripping window frames
 Mitering window frames w/chop-saw
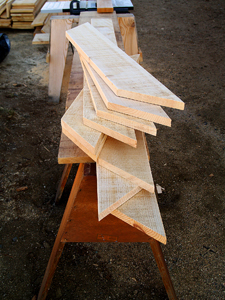 Window frames ready to install
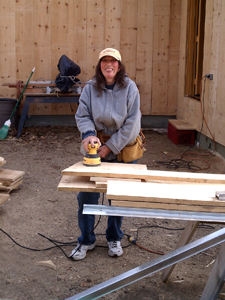 Freezing cold
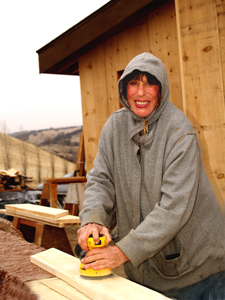 Sanding window frames
Battens and Screws
 Battens cut and sanded
Two hundred boards required 200 battens to cover 200 seams. I wanted 3" battens so I ripped fifty 12-inch wide boards into 4 equal strips (actually 2 7/8" each). It takes one sentence to describe that job, but a week to do it. My long-suffering friend Russ brought his small table saw up again and I bought a new 10" blade for it since I had dulled his last one cutting battens for a cabin (see BWH Mar/Apr 2012 issue #134). We set up the saw on a waist-high make-shift work table between two saw horses and screwed down out-rigger supports (long boards) extending out from each end. They were supported by even more saw horses from the "herd". Russ then fed the 16-foot siding boards into the screaming blade while I pulled them through the rest of the way. "Sunrise, sunset"......
 Fastening window frames
 Dutch-door frame
 Finished frame
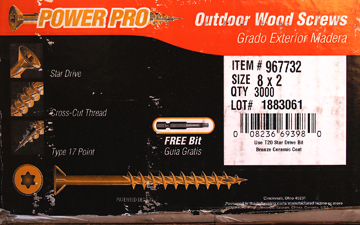
The house had been sheathed with 5/8" OSB (oriented-strand-board) so I bought 2-inch #8 screws to fasten the 1-inch thick boards. I used power-pro star-headed, bronze ceramic-coated OUTDOOR wood screws---- 6000 of them! The job took two 25-lb. boxes at $75.00 each. (Box price is less than half the regular price.) In the past I've used less expensive sheet-rock screws but when driven in they heat up and break off at an annoying rate. And even the bright gold ones end up rusting and staining the wood over time.
 Power-Pro screws
The 6-point star-drive takes a star-bit (included in the box) and makes a positive engagement when driven in. I also liked the self-propulsion feature of the thread design, which made my job easier, but I had to be careful not to bury the heads too deeply. Construction is all about the details, as boring as they might sound. Analogous to the human body, a house is only as strong as its joints and fasteners.
For the battens, I used the same type screw but a longer length to go through 2" of material plus the OSB. The 2.5-inchers were #9's (thicker diameter) which was good because the batts were attached with only ONE screw in the middle BETWEEN two boards (one every foot). A screw in the seam allows the boards and the batts to independently expand and contract without splitting one or the other. Luckily the sugar pine was kiln-dried at the lumber mill so movement should be nominal.
Stain
Because of so much high-ladder work, the window frames and battens took another month to install. Then Eric and I applied 10 gallons of transparent stain to the boards, batts, and frames---to seal, protect, and beautify the whole house.
We used 5-gallons of cedar-tinted "Super Deck" transparent stain but toned-down its unnaturally bright gold hue by adding 5 gallons of clear CWI UV-resistance sealer to it and a few splashes of a darker stain to get it just right. (Total: $200)
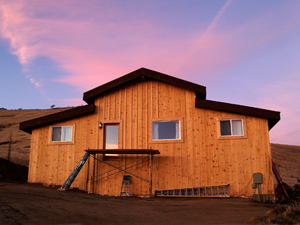
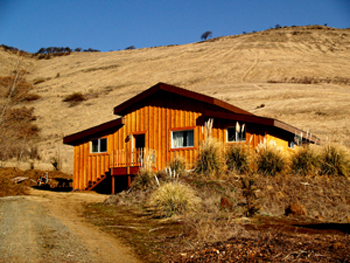
We masked all the windows and doors and then we sprayed it on up high with a garden sprayer, rolled it on down low, and brushed it on the spots that got missed. When the stain was absorbed into the rough-cut pine, the barn-style house glowed with the rich rustic charm I had envisioned when Eric first designed it.
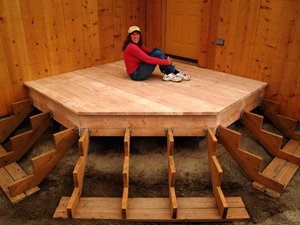
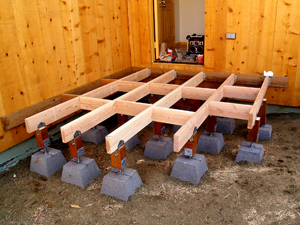
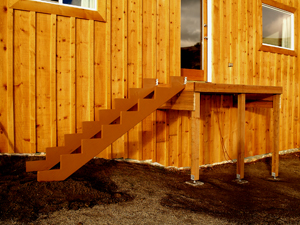
Decks, Stairs, and Railings
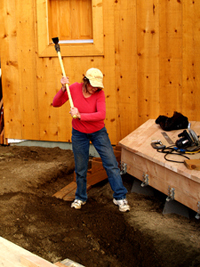
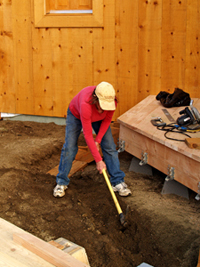
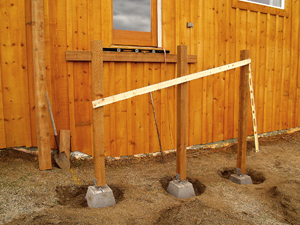
 Spray-painted deck lines
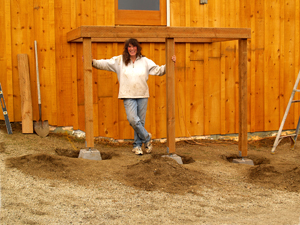
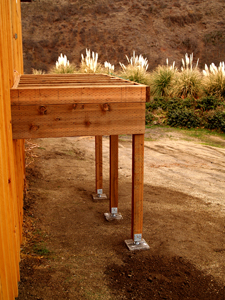
 One pier at a time
Next on the list of things to be completed before the final inspection could happen were decks, stairs, and railings off the two entrances. After installing vertical siding from ladders, it was nice to be working on a horizontal surface again---the ground.
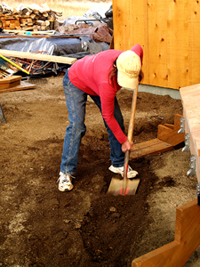
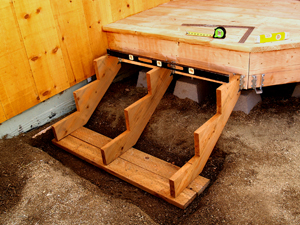
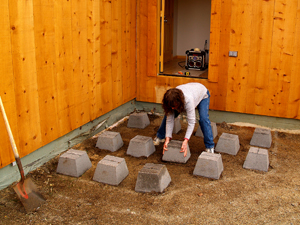 Setting piers
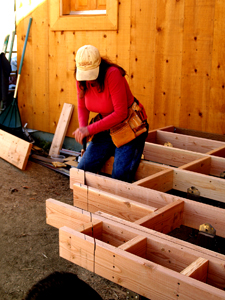
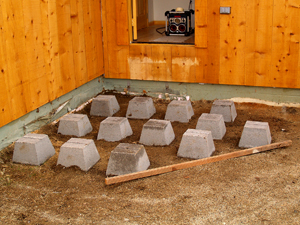 Laid out and spaced right
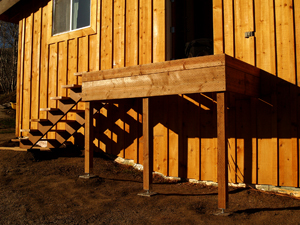
I made the main entrance deck 8'x 8' with the outside corner cut off at 45 degrees to keep it from sticking out into the driveway, and to create wrap-around stairs. It turned out to be a little complicated (the rim joists of each facet had to come together at 22 1/2 degree intersections), but I figured it out as I went along. The raised deck is 24" off the ground, so it required 3-step stairs all around. When completed, the whole structure ended up being a sizable deck: 12'x 12'.
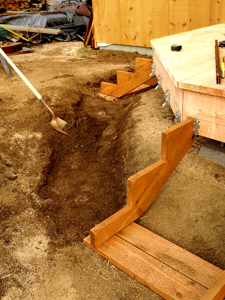
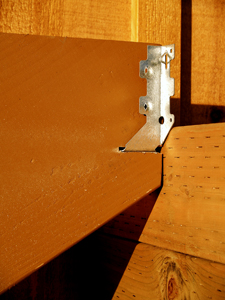
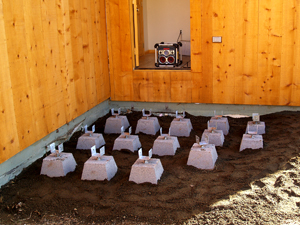 Brackets installed
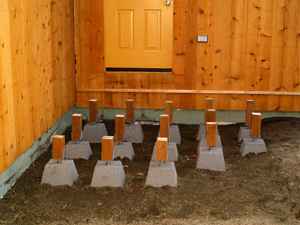 PT 4x4's installed
 Deck frame 2x6's
 Cutting 45 degree angle
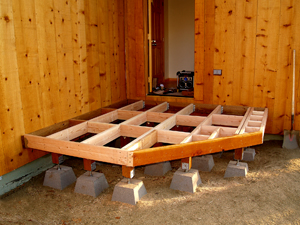 Deck frame complete
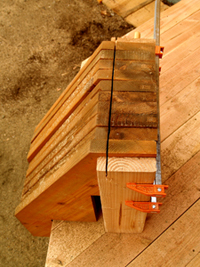
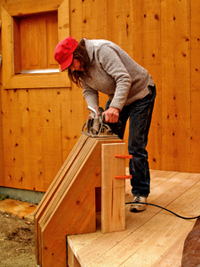 Gang-cutting joist hanger slots
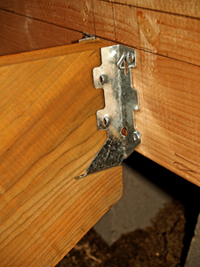 D's technique for low-hanging joists
Note: Without years of specialized construction experience, there's no way one can plan or visualize every detail in advance. The redeeming factor of being an inexperienced builder is if you go slowly enough, the solutions present themselves, and then you can proceed. The secret is to get started, and the ideas will flow.
 Stair horses rest on PT boards
 Leveling center facet for PT boards
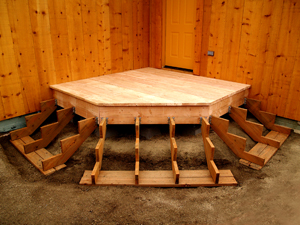 Stair horses ready for treads
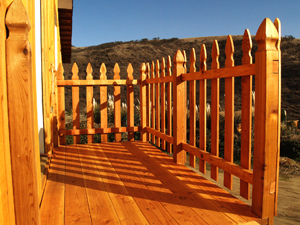
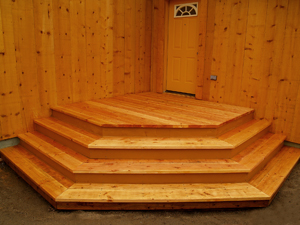 Finished wrap-around deck

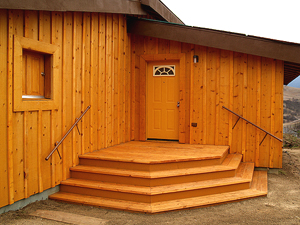 Protected entrance cove
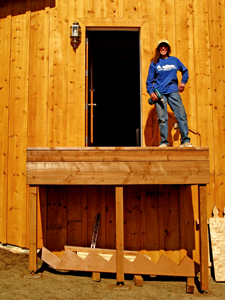
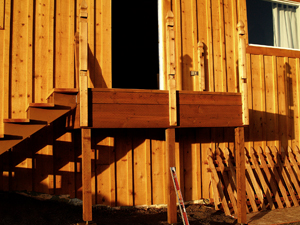
The emergency-exit door on the front of the house required a landing be built outside the door, then a long set of stairs down to the ground. Up to this point a parachute or a cape would have been the only way out of that door. The floor of the house is about 4 1/2 feet off the ground because the basement could not be completely buried due to hitting solid rock.
 Landing supports
 One of 3 stair horses
 Joist hangers go into slots again
 My idea of beauty
 How I avoid costly adjustable-angle hangers
Stairs themselves require a little head-scratching but they can be worked out on paper using two critical measurements: rise and run. Rise is the total vertical measurement from ground to threshold or landing, and run is the total horizontal measurement of the staircase assembly (stringers and treads).
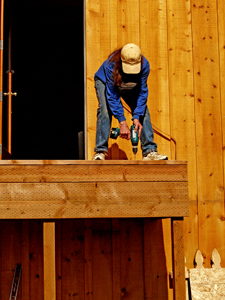 Fastening deck boards
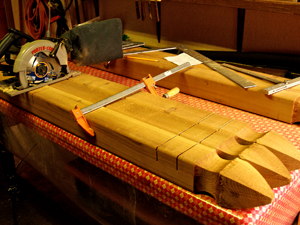 Gang-cutting notches in cedar posts
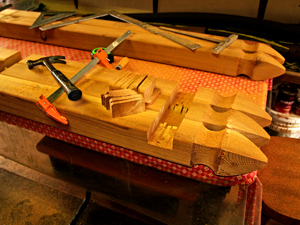 Gang-chiseling notches in cedar posts
 Cedar posts ready to receive railing
 Cutting rails to deck length
The rise and run of each step has to be perfectly consistent from the ground to the threshold or landing. The slightest variation (even an inch) can cause a person to trip. Rise DETERMINES the length of the run because stairs, by code, cannot be too steep. They have to ascend gradually and need to take up as much horizontal space as necessary to do just that. Seven inches is a comfortable step UP for the average person, and an 11-inch wide step accommodates even a big foot.
I was able to make my stairs an ideal 7 in 11 rise and run because I was not confined to a specific length. If I HAD been confined I would have had to alter those measurements a little to fit my space (such as 7.5 in 10 for instance), or use a spiral staircase, or whatever it took. There's always a solution to get from here to there even in a cramped space.
 Fastening deck railing
 Front deck/landing finished
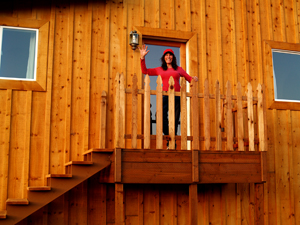
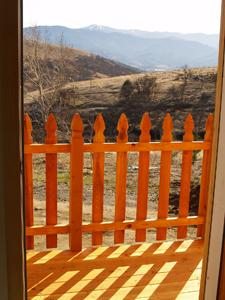 View from inside front door
 View from top of stairs
For the main deck stair-treads I fastened a 2x6 and a 2x8 DF board (actually 5.5 and 7.5) on each 11" wide step, which gave me 2" of overhang (nosing). AFTER backing each step with a 3/4" thick riser board I ended up with 1 1/4" nosing---not too much, not too little, but just right. Each tread measures 12 1/4" deep.
On the stairs off the FRONT landing, I used 2"x12"'s for the treads (actually 5.5" + 7.5") and left the risers out. The overhang (nosing) on those 7 steps is only 1/4" but that's OK for an OPEN staircase because a large foot with a big toe won't bump into a riser.
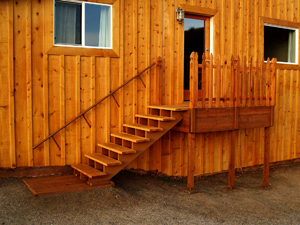 Deck, stairs, railing finished
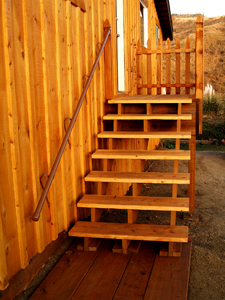
I built the entire framework out of pressure-treated lumber because it faces south and will be hammered by the weather. The decking is Douglas Fir, but the rail posts and the fence-style railings are cedar (all affordable from Home Depot). Because that staircase is 42" wide, I supported it with THREE stair horses ( AKA: stringers or carriages) that I cut from three 10-foot 2X12's. I used a rafter square to lay out and mark the 7" in 11" rise and run on the boards (easy).
Note: Google: "Rise and run of stairs" to find out exactly how to calculate the perfect ratio for your own project. Be sure to consult your local building codes when designing a staircase.
Railings are mandatory and have to be built to code as well. I made ours out of 1.5" dia. EMT pipes (electrical conduit) and adapted closet-rod hangers to support them.
When both projects were done, I caulked and trimmed where necessary, then stained and sealed the decks and stairs with "Super Deck".
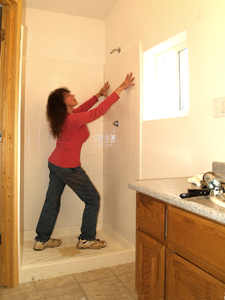
The Shower
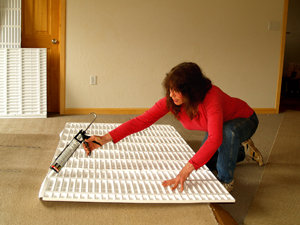
With no time left on the building permit, and my reluctance to take on another messy tile job, I decided to search the internet for an easier solution to Eric's shower walls. I found many sites to buy shower wall enclosures but none of them could be trimmed to fit our odd-sized shower pan (32x32x42). I had almost given up when I googled: "custom-sized shower surround wall kits" one more time and presto! "American Bath Enterprises, Inc." came up. They offered 3-wall acrylic shower and tub surround kits that are trimmable and glue-able. Their "Ameriwall" product line (made in America) looks like what you see in motels and hotels---white simulated tile that is sparkling clean and easy to maintain. Perfect for a bachelor.
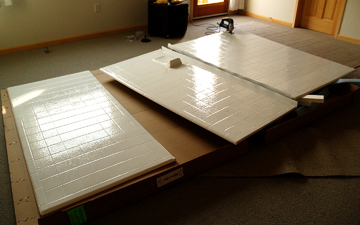 "Ameriwall" 3-wall shower panels
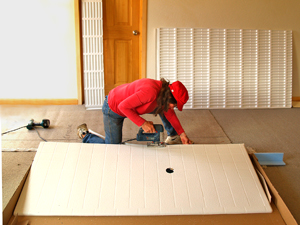 Trimming shower panel with jigsaw
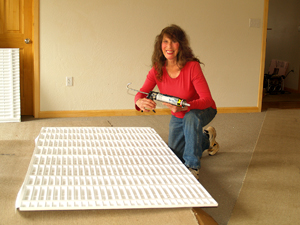
 Applying Loctite tub surround adhesive
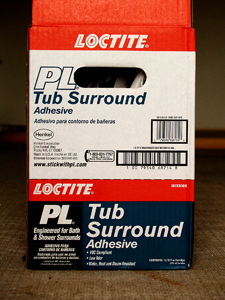 Special adhesive made for this job
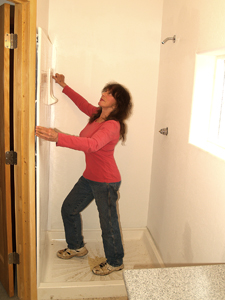 Setting first wall
 My way to hold wall until glue sets
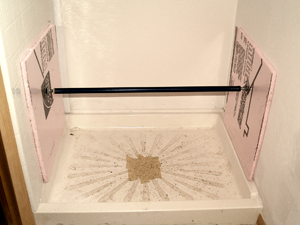
 Setting third wall
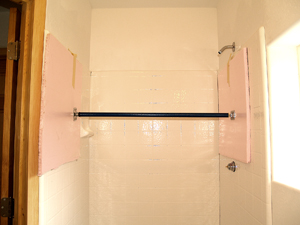 Applying pressure with adjustable rod
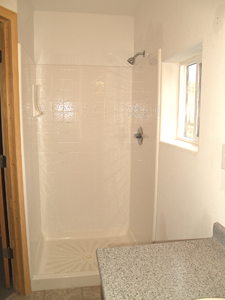 Finished shower installation
That conventional look wouldn't have been my choice for the rustic log house I built (see River Rock Shower BWH 2002 issue #77) but WILL be practical for Eric who would rather be playing the piano than scrubbing tile and cleaning grout.
The price was fairly reasonable ($400 plus shipping) so I ordered the kit without hesitation. It was shipped from Hayward, California and arrived in only 2 days. The vice-president of the company, Larry Arcadi, was great to work with by email and by phone---personable, professional, and instructional. I was able to install the shower walls in a few hours---just as they claimed---and I am very pleased with the results! Eric got soaked again, but 4 piano tunings and it's paid for, so he's pleased too.
(Website:
http://www.americanbathind.com
Phone: 1-888-228-4925.)
Wood Stove
There is still one more big purchase BEFORE the final: a certified EPA-approved wood stove. At this juncture, it is Eric's only major heat source so the installation is required.
I researched NON-catalytic wood stoves (our preference...less maintenance) on the internet and visited all the shops in our area, but although the stoves I looked at were heavy-duty excellent-quality name-brand masterpieces, they were all too expensive ($2,000) for our budget. We decided to compromise and settle for a medium-priced good-quality stove (US Stove Co. model 2000). Being a very popular and affordable stove ($1100), it was out of stock at every distributor listed on the internet, including Costco, Lowe's, and Home Depot. We may HAVE to wait, or choose another brand. If we DO have to wait, the inspector said he would allow us to RE-purchase a wood-stove permit sometime before next winter, and get a separate inspection.
Note: Ironically the "United States Stove Company" in Tennessee manufactures their stoves in China. When I called them in January 2012 to ask when their model 2000 would be available again, their answer of "next summer" gave new meaning to the phrase: "A slow boat from China".
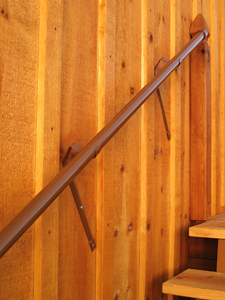
Even though it's more expensive, we will use INSULATED double-walled stovepipe from the stove up to the ceiling for 2 good reasons: It keeps the inner pipe hot enough to draw more efficiently and also keeps creosote build-up at a minimum. The inner pipe is lined with stainless steel, but is standard black on the outside. Another advantage is that we don't have to worry about the back wall getting warm and drying out over time.
Future Work
Eric designed the house with vented soffits in mind---for boxing in the eves---to discourage bee, wasp, and bird nests. We hope to do that later---after the final. The house also needs rain gutters. We will try to get the final inspection first, then put a metal roof over the existing rolled roofing, and add all the related amenities, as we earn the money to buy materials.
Closing Thoughts
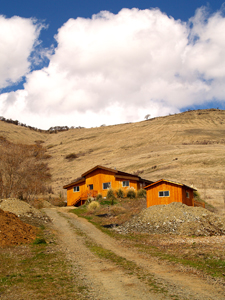
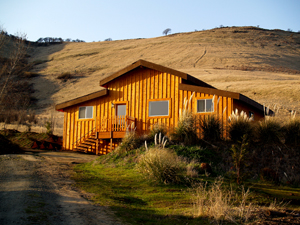
At last we can enjoy looking up the hill and feasting our eyes on warm cedar-toned board-and-batt siding instead of bright white and blue-lettered house wrap. That unintended billboard advertisement for TYVEK has been glaring at us for TWO years! Now I can easily visualize a long narrow deck off the front of the house as the dividing line between the upper house and the above-ground part of the basement. I can also visualize a small deck off the kitchen breakfast nook, and nice-looking awnings on the windows.
Ahh, yes, putting the finishing touches on the house is my favorite part, and landscaping is Eric's favorite part. We've been a good team, but the game is almost over, and we can get on with our separate lives. Our final article (Building Eric's House Part 8) will feature a finished house, a decorated home, and a sigh of relief that there will be no more inspection deadlines. Oops, I forgot about higher property taxes now!
 Eric
Eric