2002
 Romantic notion turned to stone
Build a River Rock Shower
by Dorothy Ainsworth
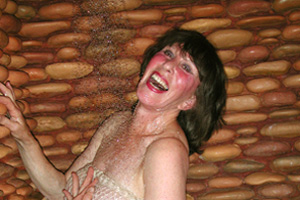 Dorothy tries out the new shower
I had always wanted a river rock shower...who knows why. We all have our idiosyncrasies. Maybe it just sounded like a beautiful idea. Maybe it conjured up images of two lovers washing each other's hair to Rossini's Barber of Seville, surrounded by walls of a thousand stones, and the shampoo sitting on its own little rock ledge. But whatever the reason, I knew I was a hopeless romantic and would still want one, even when I got to the age where I should be wearing a helmet in the shower!
I finally got my chance to go for it while finishing up the rebuilding of my log house after the first one burned in 1995. It would have been much easier and cheaper to use tile, but I knew that if I built what I really wanted, I'd cry only once. So I started in, not quite knowing where to begin.
Over the years I had collected a pile of small, smooth, flat river rocks, but cumulatively they were extremely heavy. Since this shower was in the loft bathroom, and even though the floor was supported by 4" X 10" beams, I'd have to consider weight.
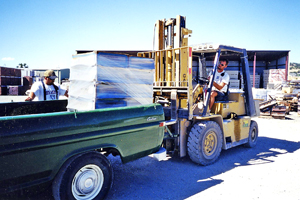 Picking up pallets of river rocks
 Close-up
I had heard of cultured stone (pumice and portland cement) cast from molds made from river rocks, but only half the weight. I looked in the yellow pages and found the local distributor for cultured stone products. They showed me samples, and I was delighted to see that each stone looked exactly like a real river rock but was flat on one side for ease in installation. They also gave me a leaflet of how-to instructions but warned me that they had no data on showers, so their 30-year warranty would not apply. I didn't care...I'd take the chance. Their stonework holds up outside in the rain; what's the diff?
 Painted plywood
 "Storm-Shield" tarpaper vapor-barrier
 Metal lath cut to shower wall size
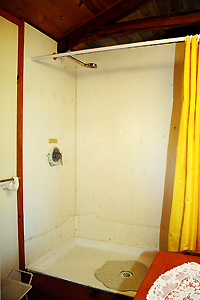
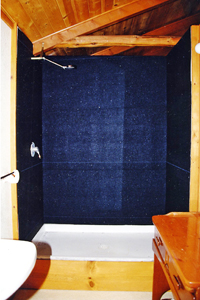
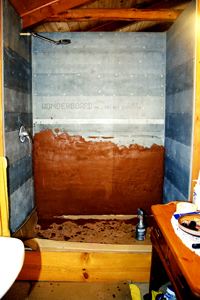
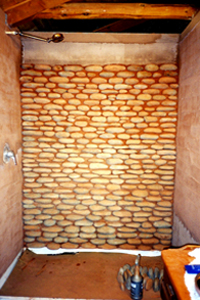
I had already built the shower walls out of 5/8" plywood attached to 2" x 4" studs (around a 3' x 5' shower pan), so I measured the square footage and ordered 9 boxes of their smallest stones, called skimmers (each one about the size of my clenched fist). Each box, called a handipak, equaled 8 sq. ft. and weighed about 90 lbs. The total cost was $600.
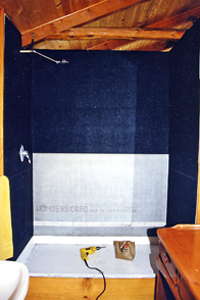
Following the instructions, I installed a vapor barrier over the plywood. I chose roofer's Stormshield...tarpaper with a sticky backing...but regular tarpaper or heavy gauge (6-mil) plastic sheeting can be used instead.
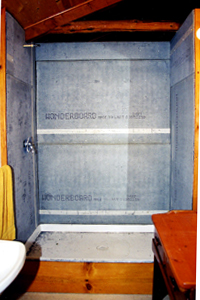
Then I covered the plywood with cement board (Wonderboard) and caulked the seams and screws, then fastened sheets of metal lath (2.5 lb. galvanized diamond mesh) to the cement board with small washers and screws. The mesh creates a textured surface to grab the mortar.
I was advised by the Cultured-Stone tech line to apply a scratch coat of mortar 1/2" to 3/4" thick on all 3 walls of the shower first, texture it with a 1/4" notched trowel, and let it cure for at least 48 hours before laying up any river rocks. Using that method, I could take my time installing a few rows of rocks whenever I felt like it, by mixing up a small batch of mortar each session to butter the rocks and pressing them against the scratch coat. Sounded good to me.
 "Wonderboard" attached next
 "Wonderboard" up
 Scratch coat goes on
 Scratch coat textured with notched trowel
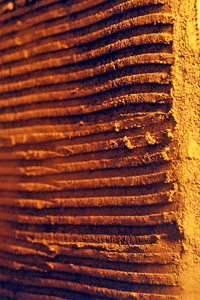
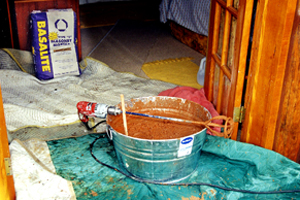
I bought six 94 lb. bags of Cultured Stone company's recommended Type-S mortar and mixed up 1/2 bag at a time to the consistency of peanut butter, dyed it a terra cotta color with iron oxide powder, and troweled it on with a tremendous expenditure of energy but no real skill. A lot of it fell off and made a huge mess that included permanently staining my shoes to look like feet of clay.
Because cement starts to harden within one hour, there was no time to lollygag. I quickly developed my own technique for forcing cement into the metal mesh. Using rubber gloves of course, I scooped up balls of mortar and threw them as hard as I could at the mesh: splat, splat, splat. After splatting on a row or two, I troweled it nice and smooth to about 5/8" thick, then raked it horizontally with the notched end of the trowel. Thank goodness no one saw me in action, but the end result was great!
 Type S mortar stained with iron-oxide gets blended with mixer-attachment on drill
 Ready to go
 Laying up a few courses at a time

Every night for a month, I worked a couple of hours on the shower. It became a late-night ritual to mix up my bucket of mud and lay up a few rows of stones while listening to FOX News and the possible whereabouts of Osama bin Laden. I've long since finished the shower, but they still haven't found bin Laden! (2011)
 Back wall completed
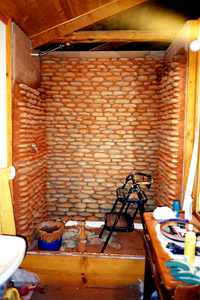
The first 2 1/2 feet of the stone wall, starting from the bottom, required squatting on one's haunches, and the last 2 1/2 feet required perching on a step stool. There was only about 2 1/2 feet of comfort zone in the whole process! I felt like a strange bird in a grotto with red droppings all around. Setting 1000 rocks used up another five 94 lb. bags of mortar and 25 lbs. of iron oxide powder!
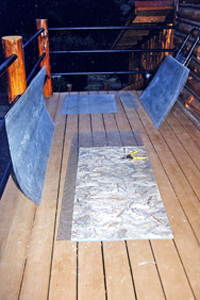
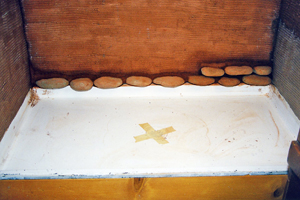
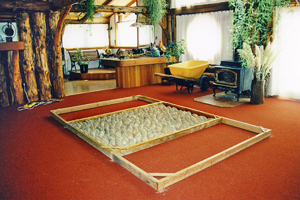
Before I ever began the actual stonework part of the project, I had laid out all the river rocks in a mock shower on the floor. I thought it would be a good idea to choose and arrange the rocks in each row in advance and then transfer them to the shower. As it turned out, that time-consuming step was not necessary. One can do just as well picking rocks out of the box as one goes, laying each row out on the floor to make sure the width corresponds to the shower-wall measurement before cementing the rocks onto the wall.
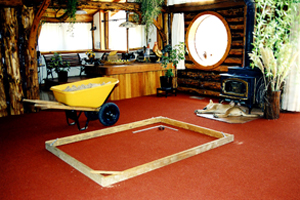 Mock shower frame on floor
It's aesthetically pleasing to alternate the big and small, fat and skinny, and flat and bulbous stones throughout the entire structure...to achieve a balanced look.
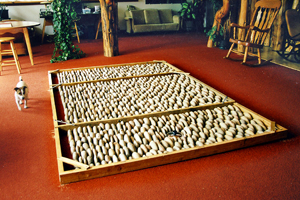 Test run of shower walls
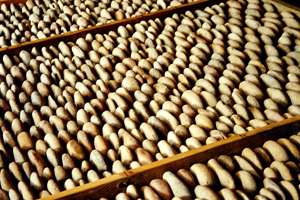
 Close-up
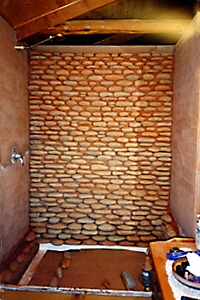
Because my log house is dominated by warm, earthy colors (even my carpet is a deep red-orange), I did not want anything gray. Not only did I dye the mortar, but I painted the rocks with colors I mixed from acrylic craft paint (from WalMart). Since I wanted a natural look and not the bright jelly-bean look, I mixed all the colors with lots of white. That created a more realistic dusty look to the rocks. When they were all painted to my satisfaction, I sealed the walls (rocks and mortar) with a multi-purpose, water-based sealer for concrete, tile, and masonry. The brand I chose came only in medium gloss (I wanted flat) so the rocks appear perpetually wet, but it's a nice look after all.
Note: The Cultured Stone people recommended water-based sealer. It didn't sound logical to me for a shower but I took their advice.
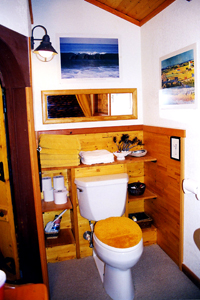 View of loft-bathroom from shower
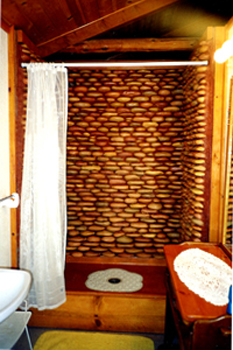
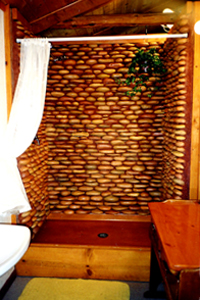
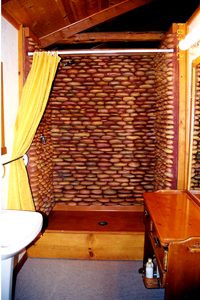 Finished
I'm happy with my 2000 lb., $800.00 river rock shower, and I'm so glad I didn't take the easy way out. My dream is now written in stone.
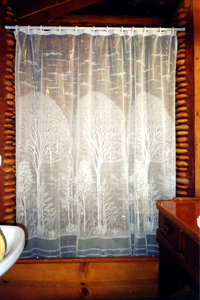 The final curtain