November 1, 2018
Build a Raised Garden w/Concrete Blocks
by Dorothy Ainsworth
Gardening is all about conservation of energy while producing maximum yields. Why bend over and pant and strain when you can stand up and breathe easy and really enjoy the experience of being outside and playing in the dirt? A raised garden bed at waist level is the answer, and it would work for a variety of veggies that don't need a tremendous amount of room to spread out.
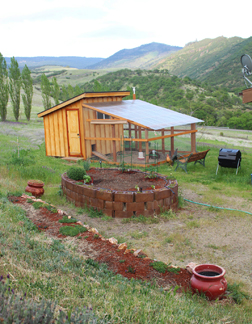
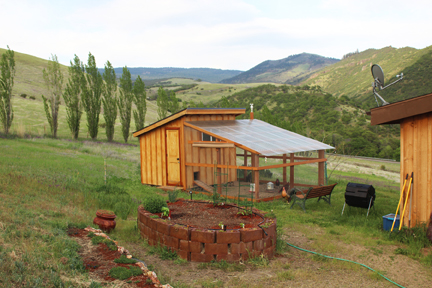
We only wanted to plant some tomatoes, a few bell peppers, and an assortment of chile peppers, so son Eric decided to create a raised garden bed out of concrete-blocks. It would be permanent, attractive, bug resistant, easy to navigate, and would absorb and hold heat. Standard 8"x8"x16" concrete bocks are cheap (about $1.50 each) and soil is dirt cheap.
Eric liked the shape of an oval, and the accessibility to the middle of an oval, but a narrow rectangle would work just as well. He leveled a big spot and laid out a 12-foot line for the long axis and at its midpoint, a perpendicular 8-foot line for the shorter axis. Then he spray-painted the curves freehand between the points.
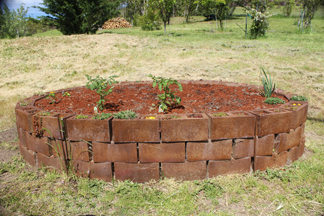
He measured the perimeter and figured it would take 60 blocks (3 layers) to build it 2-feet high, so off he went to Home Depot. While there he bought two 60-lb. bags of Ready-Mix to spoon down some of the holes to fill voids and gaps and hold it all together.
(Note: If you are tall build it 3-feet high.)
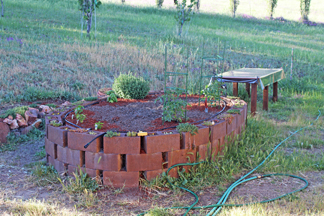
He laid down chicken wire on the bottom to foil gophers, then, as he stacked the blocks (staggering the joints), he kept an eye out for daylight gaps where soil could fall out, and poured concrete down the holes as needed.
I'm not fond of gray, so I got in the act and spray-painted the whole structure a nice warm brown, using a gallon of water-based concrete paint dispensed from a small garden sprayer (quick and easy).
We could have completely filled the form with soil from our own land, but to expediate the process, decided to fill it halfway, then buy two yards of topsoil from the business down the road ($50), and back the truck up to the block wall and unload it quickly.
Then Eric got busy adding amendments to the top foot of soil: compost from his year round composting drum, chicken manure from his chickens, tomato-specific fertilizer from the Grange, and potting soil for water retention. He put in a simple little drip irrigation system and he was ready to plant.
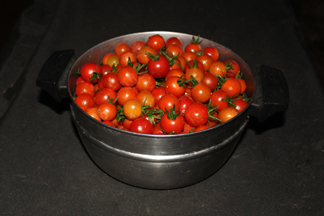
It's important to research and buy the right tomato starts for your particular taste. We like tart, acidic, and firm, not sweet, bland, and mealy. Flavor and texture are everything to me—heck with looks and size. We chose cherry tomatoes because they are so prolific and tend to mature without any splits and scars that extreme summer heat and insects can inflict on larger tomatoes. They are small but perfect for salads, and can be cut in half for sandwiches.
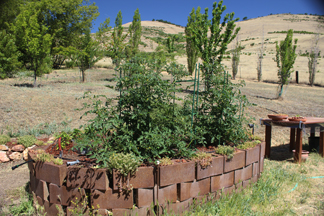
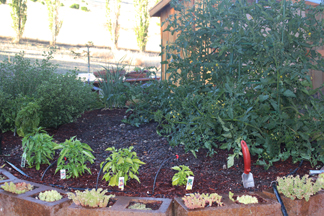
The TWO plants Eric chose grew so fast and lush in such a short time, he had to brace them with tomato cage ladders (Home Depot) that he could custom change or add supports to as the heavily-laden branches reached out in every direction.
Because of extremely fertile soil, plenty of sunshine, deep roots into deep soil, and spraying them occasionally with Miracle Grow from a hose dispenser, they produced an amazing number of tomatoes from June through August. There were so many ripening at such an alarming rate, I hired my grandson Zane to pick a large container full every 3 days through August, and gave away the excess.
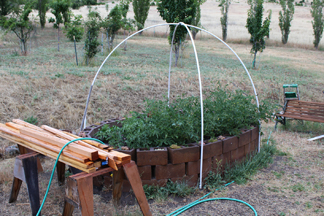
To deter deer that might happen by to graze, Eric hammered four 3-ft. rebar stakes into the ground on the outside of the oval and equidistant around it, and installed two 20-foot 1/2" pvc pipes over the rebar posts and tied the archways together at the apex. He put deer netting over the pvc frame and attached it with spring clamps so it could be easily removed to do the picking.
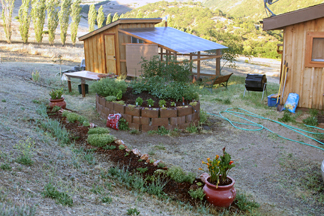
He also planted each void in the top row of blocks with a small cactus or succulent for visual appeal and decoration.
We had a successful season of practically being overrun by tomatoes, so I highly recommend a raised garden bed made from concrete blocks. But no matter how or where you choose to grow your veggies, the most important ingredient for tomatoes is filthy rich soil. They are heavy feeders, but also heavy producers.
Our project cost under $200 total, but scrounging used blocks, and digging and transferring your own dirt to fill the bed, would get the price down to about $100 total. I like the fact it won't rot or warp, and it's permanently there for every growing season.