8/25/11
 Doorthy
BUILDING ERIC'S HOUSE
Part 6
by Dorothy Ainsworth
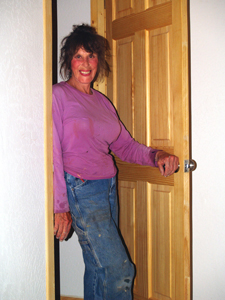
"It doesn't matter how slowly you go as long as you don't stop." This saying by Confucius is definitely my M.O. It has taken six years to build Eric's house, but this 'ol tortoise with lipstick is getting very close to the finish line.
 Late summer 2011
 Tortoise with lipstick
Several wild hares I know told me I was nuts to start another long drawn-out building project. They chose to buy instant houses, and now, sadly, a few of them are in foreclosure. Eric and I DO have some credit card debt but it's manageable.
"Building Eric's House Part 5" (BWH May/June 2011 issue #129) left off with the kitchen and bathroom tile laid and cabinets and countertops installed and the sink and toilet plumbing hooked up. After that expense, we needed some time to save up for the siding ($3,000) so I continued to work on the interior of the house. I decided to install the door jambs and doors because we DID have enough money for that relatively small job. The idea was to keep moving.
 Lots of trim to stain
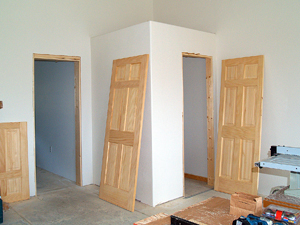 2.5 out of 6.5 doors to install
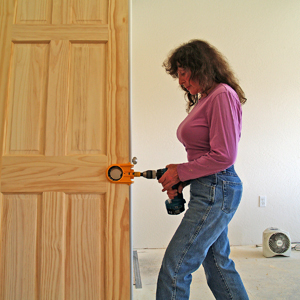
Doors and Jambs
My old haunt, Builder's Bargain Center, had a nice supply of beautiful solid pine doors---with small imperfections here and there---at half-price. I bought 6 of them for $60 each, 6 locksets for $20 each and 12 hinges for $3 each. I also bought some 1" x 8" pine and ran it through the table saw to rip an inch off the width of each board to fit the 6.5" wide jambs (2" x 6" framing is 5.5" wide plus 2 thicknesses of 1/2" sheetrock). I fastened the jambs to the door framing with screws, but first counter sunk the holes 1/4" deep with a special bit so they could be plugged with attractive hardwood bungs.
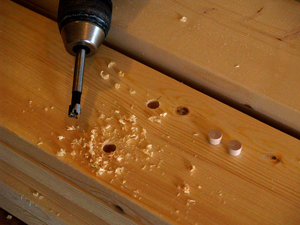 Countersunk holes and plugs
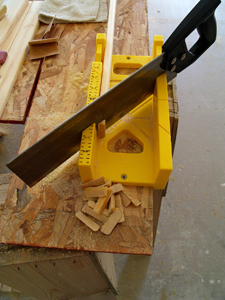 Mitered corners on doorstop trim
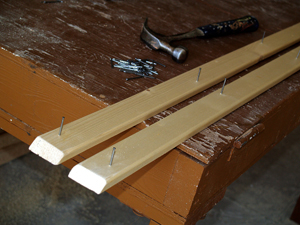 Doorstops ready to install
 Living room is still the shop
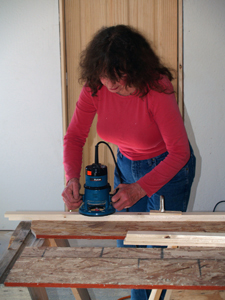 Routering rounded edges on trim
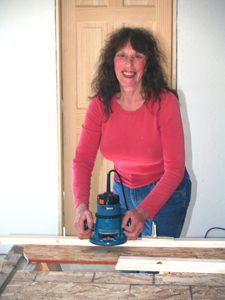 Not watching what I'm doing!
To save money, I also made my own 3/4" x 1 3/4" door-stop molding out of pine and rounded the edges with a router. AFTER the doors were hung, I used small-gauge finish nails to attach the stops to the jambs while pressing them against the CLOSED doors. And of course I used a nail-set to sink the heads below the surface, and filled each tiny hole with wood putty.
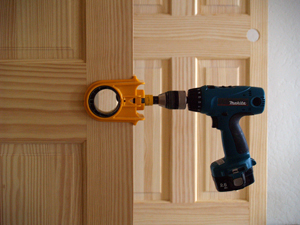 Self-centering hole-saw jig
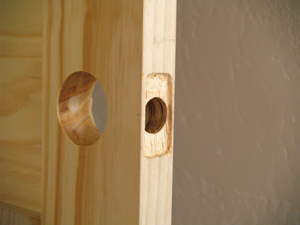 Latch-edge mortised with chisel
 Lockset installed
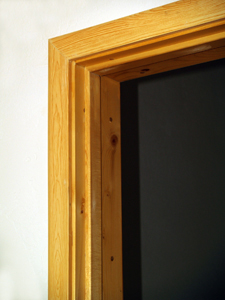 Handmade jambs, doorstops, and trim
 Happy the door works perfectly
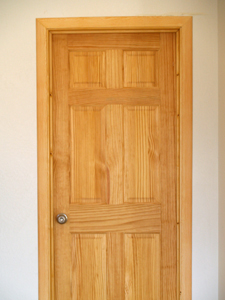 Finished solid pine door
A new building code required that we install a door or window fire-escape (called "egress") out of the bedroom. It had to be big enough for a 300-pounder to jump out of, and placed no more than 40 inches off the floor. The 2' x 4' existing bedroom window is 60" off the floor (for privacy) so would be hard to climb out of.
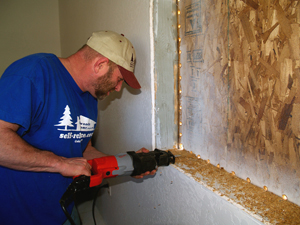 Eric removes OSB with Sawzall
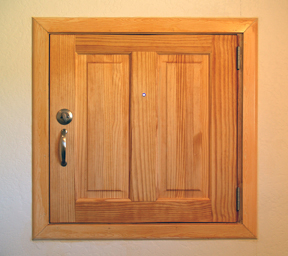 Finished emergency-exit half-door
This emergency exit was in the original plans and already framed-in but had been sheathed over during the winter. Eric cut the sheathing out with a Sawzall, and I installed one half of a pine door in the opening after fastening cedar jambs. I made a slanted sill out of a hunk of redwood I had lying around unemployed, and weather-stripped the stops. Because the recessed door opens IN, we'll put a screen on the outside. When the "dutch door" is open a nice breeze wafts through the room, so what seemed like a ridiculous code requirement turned out to be a good idea after all, not to mention attractive and useful.
 Egress door from outside view
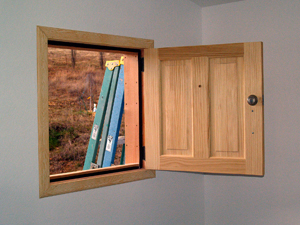 Egress door opens into bedroom
Eric's dad gave him a heavy-duty metal front door with a built-in jamb and threshold. It was second-hand and needed some repair and restoration but was a good-looking residential style. I completed the work in just a few hours, then painted the door and hung it. We saved about $200 and it looks as good as new.
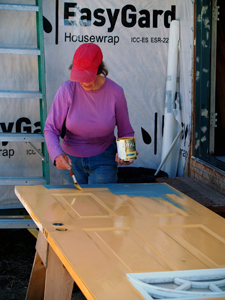 Dorothy paints front door
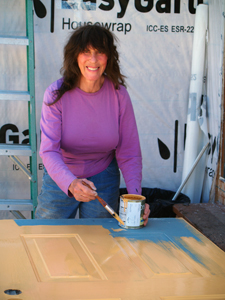 Not watching what I'm doing again
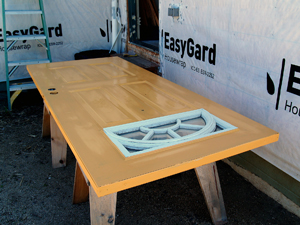 Refurbished metal-clad front door
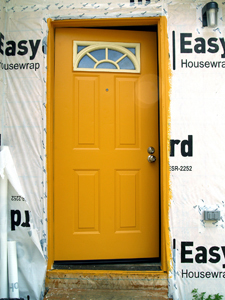 Front door hung
As soon as I finished installing all the doors and their hardware, I trimmed them out with pine-grained molding secured with small gauge finish nails called brads. I cut each section to length by hand and mitered the 45 degree corners using a fine-toothed saw and miter box. Then with medium gauge finish nails I installed all the pine-grained baseboard 3/8" off the floor around the perimeter of each room so the carpet could be pushed into that crevice when the time came.
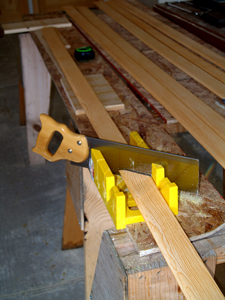 Mitering corners on door trim
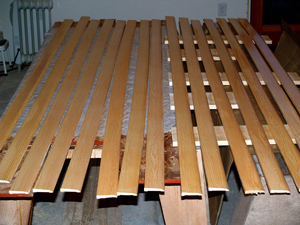 Baseboard trim stained
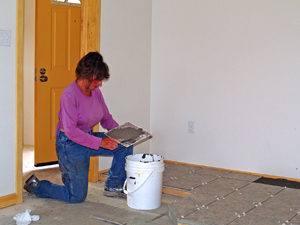
Carpet
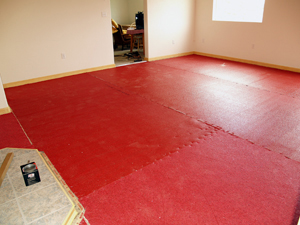
The time came faster than I had planned. I myself turned into a wild hare one day and called a carpet guy (Wayne Turner Flooring) for an estimate. Wayne came out, measured, and brought samples. For $1900 (including labor) he said he would pad and carpet the whole house with 110 yards of affordable 28 oz. commercial-grade carpet---which is what Eric wanted----and have it done in four hours. (His estimate was $500 less than Lowe's and Home Depot's for the same quality.) We couldn't resist the temptation of going ahead and getting that job done via a low-interest credit card. It would mean the interior of the house would then be completed---so we went for it.
 Dense carpet pad
 Pre-cutting carpet outside on tarp
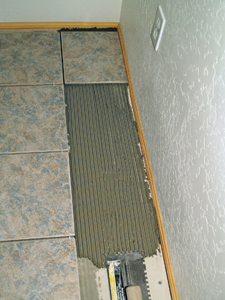
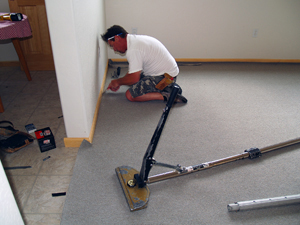 Tucking carpet under baseboard
 Living room upon entering
Propane
While I was still in the hopping mode, I also called a propane installer (Suburban Propane) and had a 125-gallon tank brought out, and had the orifices in the range converted from natural gas to propane. The good news was that a 125-gallon tank can be installed right near the house so we didn't have to dig a trench and bury a pipeline---as is required with larger tanks. Yay! The serviceman hooked us up to the gas pipe stub sticking out of the wall. The pipe had been installed during the plumbing job and had already been inspected and pressure-tested. At this point only the range is propane so a tank full of gas (100 gallons) should last a year---to the tune of $300. Installation of the whole system including the annual tank rental was an affordable $200.
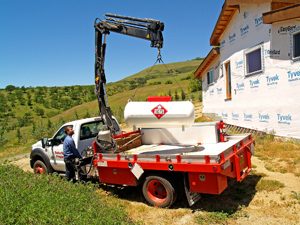 Propane tank delivered with crane
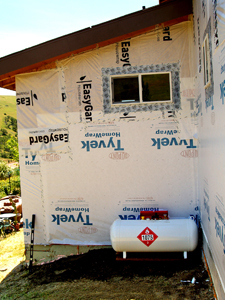 125-gallon propane tank installed
Hearth
Eric's basic color scheme is blue/gray flooring and blonde wood against white walls, and his hardware and fixtures are brushed nickel and stainless steel. It's a conservative industrial look and that's what he likes. I built a raised hearth for the woodstove, tiled it with a variegated blue/gray ceramic tile, and trimmed it in blondish molding to match all the other trim in the house. The total cost of materials for the hearth was $200 and the job was totally doable for any semi-skilled do-it-youselfer.
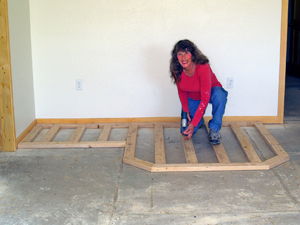 Raised hearth 2" x 4" frame
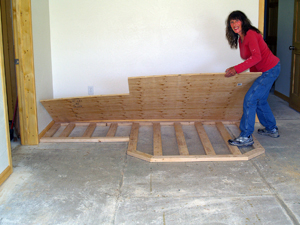 Frame covered with 1/2" plywood
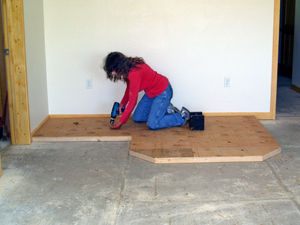 Plywood screwed down
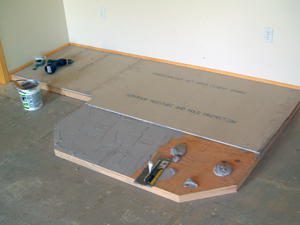 Fireproof cement-board glued down
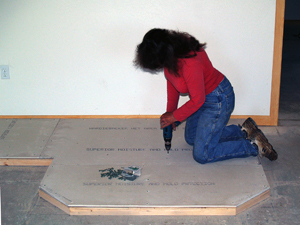 Cement board fastened with special screws
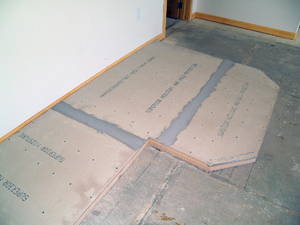 Cement board seams taped & smoothed over
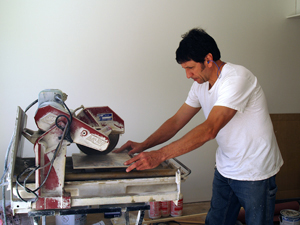 Friend Vadim Agakhanov cuts tile for me
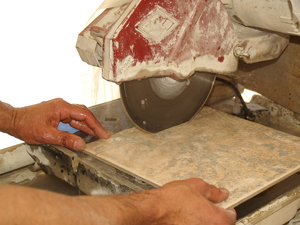 Close-up of tile cutter
 Buttering tile with thin-set mortar
 Laying tile on notch-troweled mortar
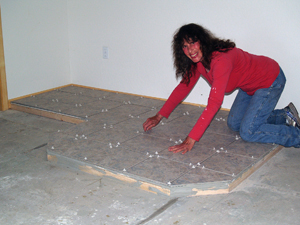 Removing 3/16" plastic spacers after mortar set up
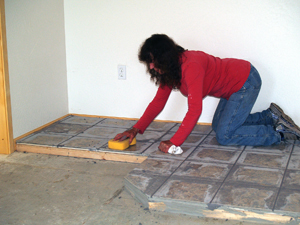 Grouting tile with sanded grout
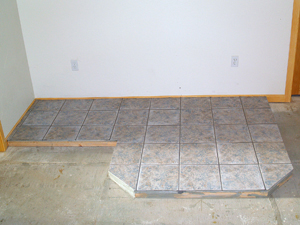 Finished hearth awaiting trim
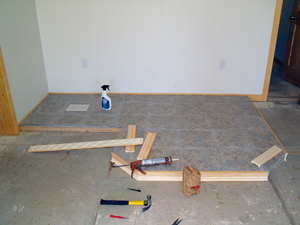 Working on trim job
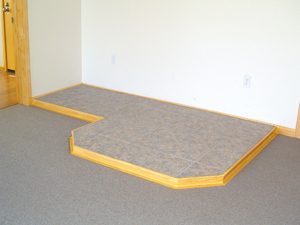 Finished and sealed hearth
Entrance Flooring
I installed a 4' x 8' section of T&G hardwood bamboo flooring in the entrance way because it will wear well under traffic. It was on sale at Home Depot for only $1.88 a sq. ft., and took about 2 hours to install with construction adhesive. (I CHOSE not to use nails.) The whole job cost $80.
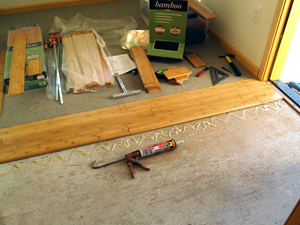 Entranceway T&G floor being glued down
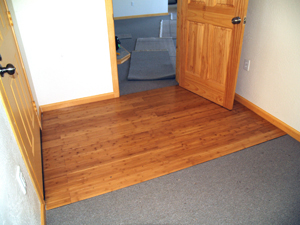 Entranceway hardwood floor completed
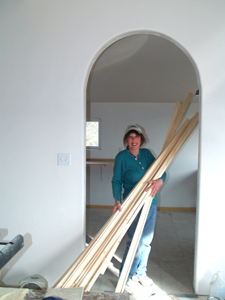
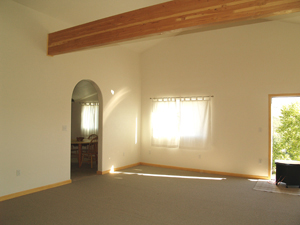
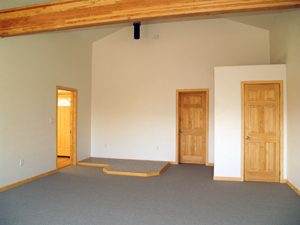
 Living room view of archway into kitchen
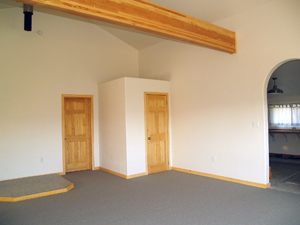
 Finished living room facing entranceway
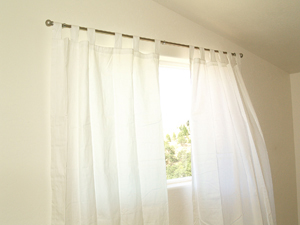
Curtains
When all the interior finish work was done, I couldn't wait to get out my sewing machine and make curtains. I've probably fooled a lot of people over the years because of my massive (seemingly masculine) building projects, but if the truth be known, I am NOT the tough gal type who loves to strut around in a carpenter's belt. I would rather wear an apron and bake cookies than saw a board in half. I'd rather hold a baby any day of the week than pound a nail. It doesn't mean I didn't enjoy creating my own house, but my biggest pleasures in life are soft and maternal and have to do with nurturing. I'm the Little Red Hen story but with a different ending: I'd happily share the bread even if I had to build the kitchen to bake it in. And I did.
 "Old Faithful" hems curtains
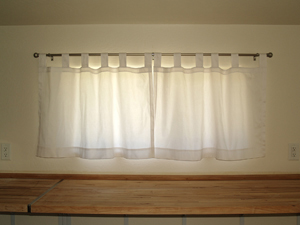 Kitchen curtains
The crisp white chino-cotton curtains are simple, light, and airy. The house is on a hill so they are mainly there to dress the windows and to keep the blinding sun from peeping in---rather than Tom from peeping in. (But anyone creeping around this property will do so at their own peril!)
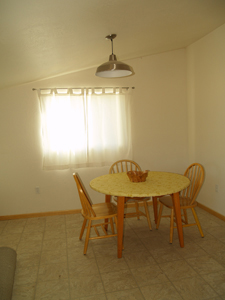 Dining area
 A breath of fresh air
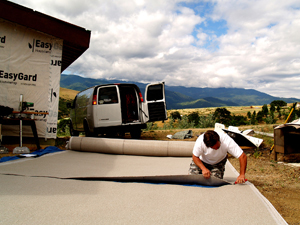
Siding
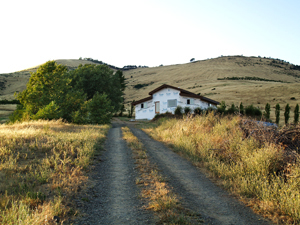
We've decided to use board'n batt siding to match some of the other buildings on the land (ie., pole barn, storage shed, and shop). We like the rustic look and it holds up very well over the years.
A big lumber yard and building supply place called Field's Home Center in Murphy, Oregon sells exactly what we want. They carry a huge supply of rough-cut kiln-dried sugar-pine siding. It's a true 1" thick by a true 12" wide, and comes in 16-foot lengths. It's 99 cents a foot and they deliver for only $95 a load (within a reasonable distance). We'll order 2500 board feet of siding by September first, 2011, and install it with a nail gun like gangbusters, to beat the fall rains.
After the siding is on, we'll build an entrance deck on the north side where we enter the house, and a stairway and railing off the south side of the house (required emergency exit). Then at last we'll call for the final inspection.
Closing thoughts:
We're inching along as fast as we can, but, like any girlie girl, I take time to put on lipstick and curl my eyelashes once in awhile----and Eric, being a serious classical musician, keeps playing the piano even when it seems like the Titanic is sinking! If this unlikely duo can build a house from scratch, anybody can!