2002
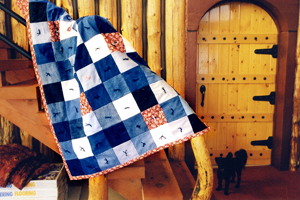
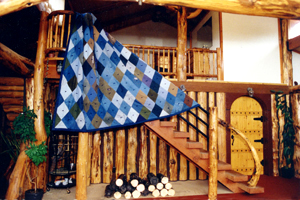
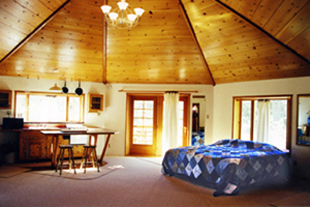
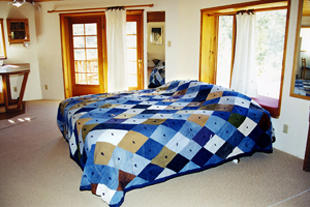
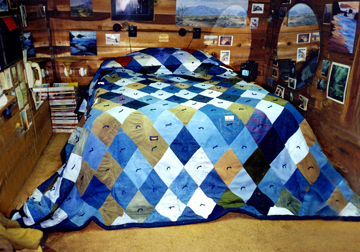 Big quilt in tiny cottage
MAKE A LEVI QUILT
by Dorothy Ainsworth
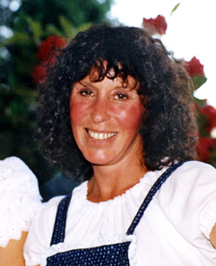
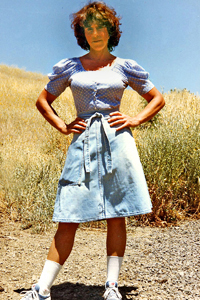 Waitress uniform 1991
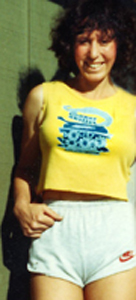 Dorothy before running 6-mile race on 4th of July, advertising Copper Skillet
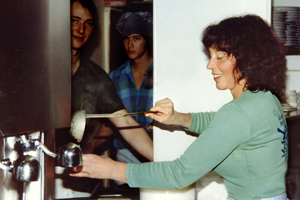
Back in the 1980's I worked as a waitress in a busy little cafe where our mandatory uniform was a pair of Levis and a T-shirt. The only variation of the rule was that the dinner-shift waitresses had to wear the more formal Levi skirt and a T-shirt. That was as regimented as it got.
In the age of Denny's pink-and-orange polyester stripes, starched blouses with name tags, and panty-hosed legs stuffed into clodhoppers, who would protest the Levi dress code? Certainly not we...nor our male customers. It was heaven! We loved our benevolent boss, who understood freedom.
I happily slaved away at that job for 12 years, smiling and comfortable in my blue jeans, cotton T-shirt, and tennies.
The place sold in 1992, and of course the new owners changed the uniform to a straight jacket with arm and leg holes, bound by an apron, so I quit and went elsewhere. Instead of taking all those beautifully faded duds to Goodwill, I decided to cut them up into little pieces and turn them into a quilt. Not only do I love to sew and to indulge in compulsive fabric collecting, but I also have a nostalgic passion for homemade quilts.
 Logo
Logo
I vowed to put into practice an old World War II slogan about conservation my parents used to bark at us: "Use it up, wear it out, make it do, or do without!" What could be more all-American than a Levi quilt, symbolizing capitalism (Levi Strauss & Co.), the work ethic (blue-collar clothes), and the recycling trend? My quilt would be an historical document written in cloth, manifesting my belief in the free-enterprise system of earning one's way through life.
Every pair of my Levis had walked the walk and talked the talk. Each piece in the quilt would represent 1,000 miles and 1,000 words ("May I take your order puleeze?").
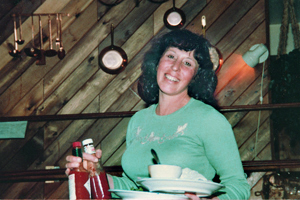
 At work at the Copper Skillet
There were other considerations. Levi material is tough and durable and doesn't show the dirt. A Levi quilt is practical and versatile. Drag it to the beach and the sand brushes right off. Have a picnic on it and the mustard washes right off. Throw it on the floor for the kids to romp on and it's heavy enough to stay put. Carry it in the car for any occasion: an impromptu stop in the park, putting on chains in the snow, or keeping warm at a drive-in theatre if they ever come back in vogue. One thing is for certain--your Levi quilt will always be in style.
 Levi wash-day
Levi quilts make great gifts; they are handsome, unique, and useful. College kids love 'em...think Levi and plaid for a guy or Levi and flowers for a gal. They're also perfect for baby showers and are quick and easy to make: Use the softest blue-jean fabric you can find and alternate small 6" squares with pink or blue calico. Back the quilt with cotton or flannel and tie it out with tiny tufts. Levi material is ideal for babies to crawl on because it doesn't bunch up.
There will never be a shortage of old Levis, and the variety is endless. In any given family you can find a motley assortment: Grandpa's Can't Bust 'Ems, Dad's Wranglers, Mom's designer jeans, the boy's Baggies, and the girl's hip-huggers...all discarded for some reason or another.
Start collecting; it won't be long before you stockpile enough jeans to make a quilt. If you come up short on the home front, ask your neighbors for their castaways or pick up the free rejects from a used Levi outlet store. While you are sorting through the stacks, conjure up some creative ideas about what you want your quilt to look like. Let your imagination go wild but make sure your design is compatible with your ability to sew it!
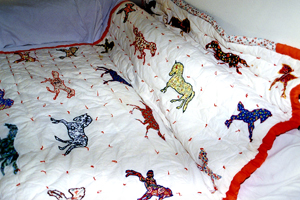
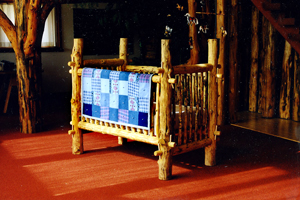 Zane's crib & quilt
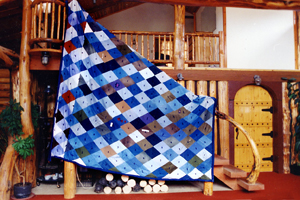 Quilt on railing in log house
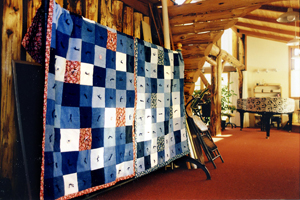
 Baby quilts
I personally envisioned a diamond pattern of faded blues and dark blues and maybe just enough army-green corduroy and white or pin-striped denim to make it interesting. I wanted to create a symphony of muted blues and subtle hues, accented by Levi's signature gold stitching to emulate the brass section in the orchestra. A few labels placed here and there and a tufted yarn tie in the center of each diamond would complete my "Rhapsody in Blue." I couldn't wait to get started!
The first step was to make a cardboard diamond-shaped template. Each diamond would be 9" by 12" with an added 1/2" seam allowance on all 4 sides. I drew a vertical 13" line on a piece of cardboard and halfway down crossed it with a 10" horizontal line. I made sure the lines intersected exactly at their midpoints and at 90-degrees. Then, with a ruler, I connected the tips of the cross to form a diamond and cut it out with an X-ACTO knife. (A template cut out of a flat plastic lid would work nicely, too.)
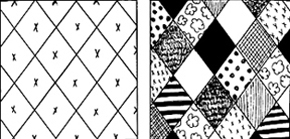 The pattern
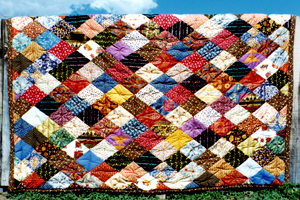 Crazy quilt by Dorothy
 Quilt by Dorothy's great grandmother
 Quilt by Dorothy
Next I put the huge pile of Levis on my dining room table and like a bad surgeon in a hurry slashed open the inseams of all the legs and pressed them into flat pieces to trace the pattern on. I was careful to place the template on the straight grain of the denim, either vertically or horizontally, and drew around it with a black fine point Sharpie (permanent-ink marker). From past sewing experience, I knew that if I cut pieces on the bias (45 degrees to the grain), they might pull funny or pucker later...especially when washed.
I purposely included gold-stitched seams as a design element crisscrossing many of the diamonds and threw in a few pockets for visual appeal.
While cutting out the diamonds with pinking shears (very important so the edges don't fray), I kept visualizing the finished quilt for inspiration. In this daydream stage, I decided I would use my little name-brand-tag collection to decorate the plain blue diamonds. (For years I had cut the neck-scratching tags off my clothes, and saved all the creative artsy ones.) It would be a touch of whimsy and also date the quilt for future generations (clothing companies come and go, and it's fun to look back).
I had planned a larger-than-king-sized quilt, with my (then) Oregon-grown Bunyanesque boyfriend in mind, so I had to cut, cut, and cut diamonds until I was (Levi) blue in the face! It turned out that cutting was the easy part!
Squares are more straight-forward to work with than diamonds, but to the eye they're not as pleasing in large quilts (kinda blocky). However, squares are quite attractive in small quilts....using small squares). When you sew diamonds together, you end up with diagonal strips. This takes a little head-scratching geometry to lay out so that you will end up with a large rectangle.
The best place to mark out your quilt dimensions is on the floor (with masking tape). First, make your longest strip of diamonds, which will span from the upper-left corner of the quilt to the lower-right corner. Now you can determine in advance how much shorter to make each row on either side of that middle strip. At both ends of each strip will be a 1/2 diamond, which is a triangle. A row of these triangles square off the quilt all around the perimeter (see illustration).
After you finish sewing the separate strips (of all different lengths) to fit into the rectangular perimeter you have laid out on the floor, you sew the strips together. This sewing can get a little tricky, so pin the seams as you go. It's easy to get lost swimming in diamonds...like Zza Zza Gabor.
By the time you have sewn several strips together, things start to get a little heavy, especially your breathing. You might need some help wrestling the quilt around while you smoothly control the flow of fabric, which is moving in a nice, straight 1/2" seamline under the sewing machine needle.
Assuming all goes well, it's now time to turn the quilt wrong-side up on the floor and press the seams flat with a steam iron. You don't want lumps and bumps between the layers when you put the batting and backing on.
 Quilt made for Cynthia by mom Dorothy
Because the quilt was so big and heavy, I used thin flannel sheets for the batting (2 sewn together for enough width but then trimmed to exactly the size of the quilt-top). For a more standard-sized quilt you won't have to worry about the weight, so you can buy conventional batting which comes in a variety of thicknesses (starting with 1/2"), depending on how fluffy you want your quilt to be.
For backing, I found some lightweight dark-blue denim on sale at a fabric outlet store and bought the whole bolt for $2/yd. You can choose anything you like for the reverse side of your quilt, but I suggest it be a fabric that wears well and is dirt resistant.
It's important to pre-wash the yardage to pre-shrink and soften it. (100% cotton shrinks quite a bit!) I cut my 12 yards of backing into 3 lengths (each about a foot longer than the longest dimension of the quilt) so the washing machine could handle the load. Again, I used the pinking shears so I wouldn't end up with balls of tangled threads to trim off. The dryer finished the shrinking job; then I ironed the fabric flat.
I sewed the 3 pieces together lengthwise along the selvages (factory-bound edges), pressed the seams open, and laid the backing right-side down on the floor. I placed the diamond quilt-top over the backing and then trimmed the backing (with pinking shears) 4" bigger than the quilt-top all the way around. I removed the quilt-top just long enough to sandwich the batting in and heaved the quilt-top back on. Whew! That left me with 4-inches of backing to overlap the face of the quilt all the way around. I pinned it in place for now, but would sew it down later after I got the quilt tied-out to keep the layers from separating.
 Dorothy at work 1988
I chose yarn that would not be too heavily-gauged to pull through Levi material. I bought a yarning needle (big-eyed) and thimble and went to work on my hands and knees tying a tuft with a square-knot in the center of each diamond to hold the three layers of the quilt securely together. While I was already down there, I sprinkled my little labels all around the quilt in a pleasing arrangement and sewed them on by hand.
I then hefted up the giant quilt and beginning at one corner sewed the overlap down, force-feeding the entire perimeter of the blanket inch by inch under the sewing machine needle. It was slow going, but do-able, even on my 1929 Singer! It took 153 diamonds to create this last vestige of the old Copper Skillet days. My brilliant career as a waitress inadvertently spanned 40 years! (Nobody actually plans on being a waitress for life!) I waited on a million people, walked 100,000 miles in circles, and talked myself silly.
Now as I lie around on my king-sized quilt with my two dogs and the cat, I call my long-awaited-for and much-deserved leisure time "hemmed-in happiness."
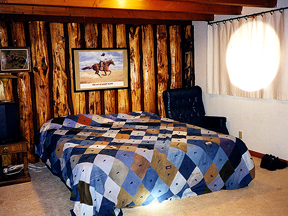 Quilt in log den
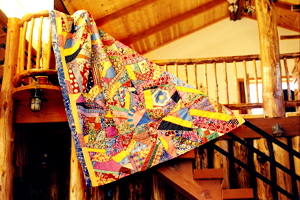
 Quilt in piano studio