April 2015
BUILD AN 8'x 12' LEAN-TO GREENHOUSE
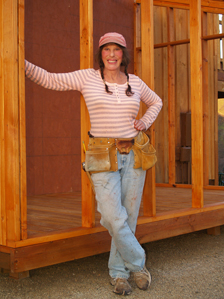
by Dorothy Ainsworth
Just thinking about a greenhouse can stimulate the senses. In our mind's eye, we can see the filtered light shimmering down on rows of greenery, feel the moist warm air, smell the rich soil, and even taste a juicy tomato, now only tiny and green. A greenhouse is a protected and controlled environment that you can create year round in a small simple structure that costs only a few hundred dollars if you build it yourself.
Imagine that! Your first ripe tomato will only cost $800!! but it's worth it, and here's why:
Your miniature Hawaii will allow 365 days of gardening a year. Summer and fall plants will yield for an extra season, and new seeds can gain a head start for spring planting. Frost, snow, rain, and wind can't touch your precious plants and flowers (or YOU) while you are in the nursery tending your babies and puttering around to your heart's desire.
You'll get your initial investment back within a year, and then it earns its keep forever after.
Doctors say that time spent gardening in a greenhouse is a great way to relieve everyday tension and stress—and you can do it standing up, which saves your back. They also say diffused light helps to alleviate SAD (seasonal affective disorder) by lifting your spirits and warming your heart. Son Eric calls it "the greenhouse effect"—it's real and it's palpable.
Location, location, location:
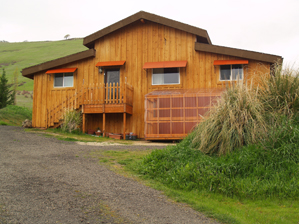
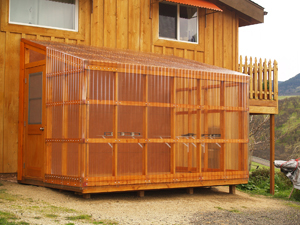
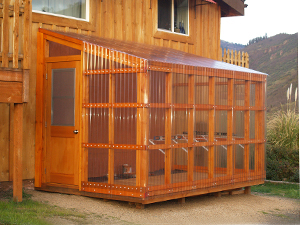
Eric's house with half of its basement above ground created a tall wall facing south with nothing on it but two windows up high. It has been begging for a greenhouse since 2012 when we finished it. (See "Building Eric's House, Parts 1-8")
Last summer Eric grew cherry tomatoes in pots along the base of the wall. They got fried by the sun, beaten by wind, and the soil dried out too fast each day, but they miraculously produced in spite of it all. To make their life a little easier this year, we decided that an 8'x12' attached lean-to type greenhouse was the answer to those harsh conditions on the hill, and began building it in March after the winter storms subsided.
It wasn't a tough project. Just about anybody who can use basic tools and knows a little about stud-frame construction would have no problem building it.
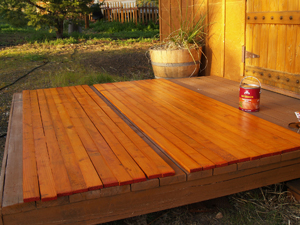
Building the foundation and floor:
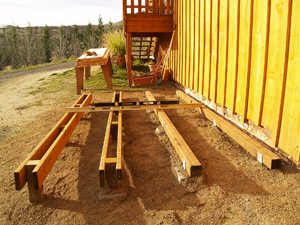
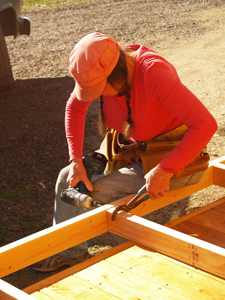
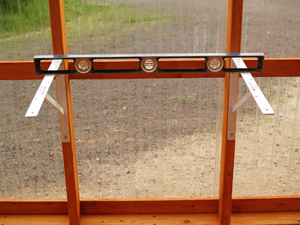
First off, I dug the pier holes deeper on the highest side of the slope and shallower on the low side. The house had been backfilled with decomposed granite so the digging was easy. Then I set 16 piers evenly spaced (4 on the long side 4-feet apart and 4 on the short side 2.5-feet apart) and screwed short posts into their brackets on the low side. I connected the posts in each row with a 12' PT (pressure-treated) 2"x6", and leveled it before attaching it. The four 12' parallel rows were also leveled with each other. To finish off the rectangular layout, I connected the ENDS of the rows with 2"x6" rim joists.
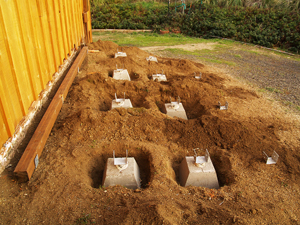
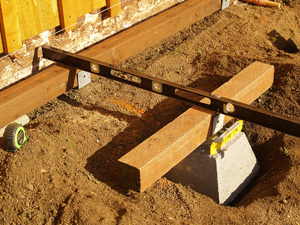
Note: Before attaching anything, I trimmed 3" off the four 12-footers to compensate for the addition of rim joists on the ends, so the floor would end up exactly 12-feet long. If the floor is 3" too long, it throws everything off and wastes standard-sized materials. It always pays off to think a couple of steps ahead when building with dimensional lumber.
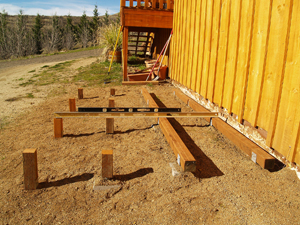
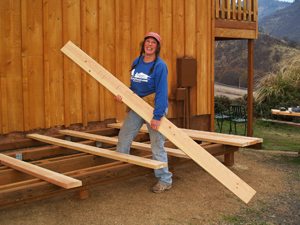
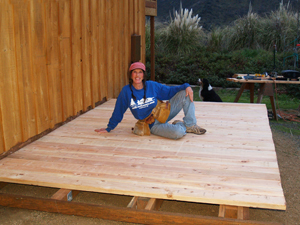
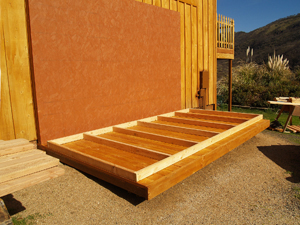
Now there were four 12' stringers (joists) 2-feet apart to fasten the deck boards across. I used (26) 8-foot 2"x6" green DF (Douglas Fir) boards for the flooring. When they dry and shrink there'll be 3/8" gaps between them to let water and stray dirt fall through as we work and irrigate inside the greenhouse. Some people prefer no floor, but we like a floor.
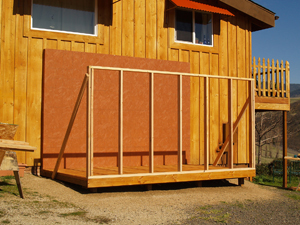
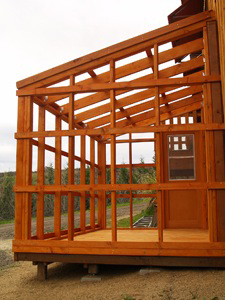
Framing the structure:
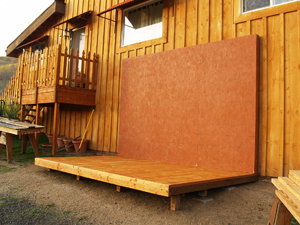
The south wall of the house is basically the back wall of the greenhouse, but I built an 8'x12' frame using 2"x4"s @ 2-foot centers and sheathed it with 7/16" OSB (oriented strand board) to fasten to that wall so the board and batten siding on the house would remain unscathed in case we ever want to remove the greenhouse.

I sealed the outside of the wall with exterior paint and then raised it up and fastened it in place with 3" screws. Then I covered its front face with three more sheets of OSB and painted that too.

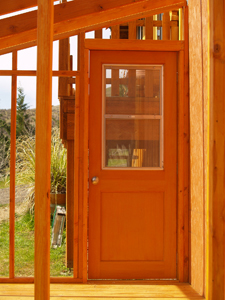
Using KD (kiln-dried) 2"x4" studs @ 2-foot centers, I framed the front wall, then the side walls, including a 30.5" wide door opening (with a 4"x4" header) on one end of the structure. I found an unusual door at the local "Builder's Bargain Center" for $89 and it was perfect for a greenhouse. The top half of the door has a dual window that can be opened by sliding the top down or the bottom up, and it was screened on the outside. I installed a threshold, then attached three hinges and a door knob set, and hung the door with a 3/16" gap all around which disappears against "stops" when closed.
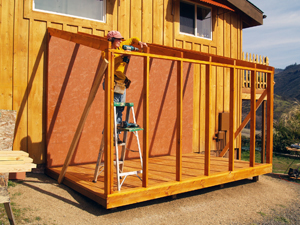
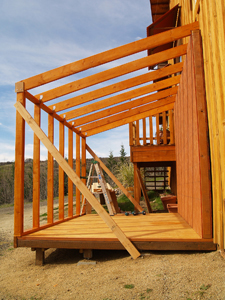
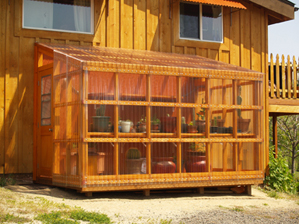
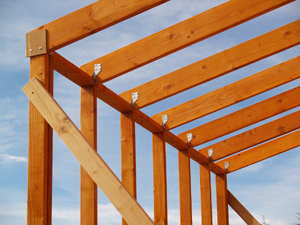
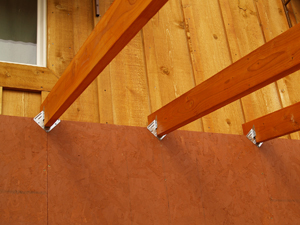
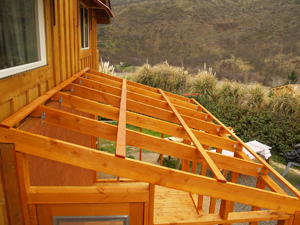
I used seven 2"x6" x 8-foot rafters spaced two feet apart and deeply notched at both ends to keep the roof low and stable at a 15-degree pitch. Brackets hold them securely in place.
After attaching a grid of pre-stained 1"x3" pine boards spaced 30" apart across the top of the rafters and 24" apart across the vertical framing, I covered the whole structure with (18) 2'x8' polycarbonate corrugated transparent panels from Home Depot. I screwed them to the furring strips with hundreds of 1" gasketed screws, one in each corrugation. I chose Palram's "Suntuf" panels because they block harmful UV rays and they are light weight but almost indestructible.
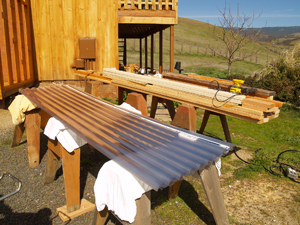
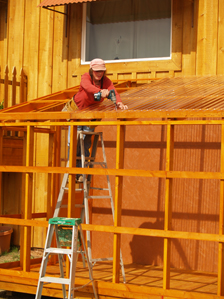

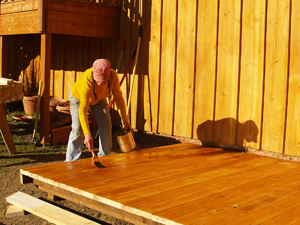
Note: Because it's a greenhouse and will be exposed inside AND out to sun, heat, and moisture on a daily basis, it's a good idea to stain all framing members as you are putting them up (before each step). It's not only easy and practical to do in advance, but looks pretty too. I used Superdeck's "Waterborne" red-cedar stain, which is resin-based but odorless and can be cleaned up with water. The product turned out to be so fantastic, I'll never use stinky petroleum-based stains again!
The fan and thermostat:
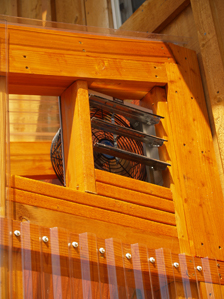
Instead of making vents on the roof (which might leak), I framed in two openings up high on each end of the structure and installed shutters above the door on the windward side and an exhaust-fan on the lee side. The inlet-shutters can be manually opened on hot days to let the breeze flow through and the fan will whisk out hot air through its own flutter-shutters whenever it's on. The screened window in the top half of the door is an additional vent.
I chose the recommended size fan (10" dia. @ 1500 rpm) that moves 800 cfm of air (cubic feet per minute) which is the size of the greenhouse. I hard-wired it in so it's connected to a switch inside the greenhouse and a breaker in the electrical panel nearby. (They DO make fans with plug-in cords so that's an option.) I wired in an adjustable thermostat so the fan will go on when the temperature inside reaches 80 degrees.
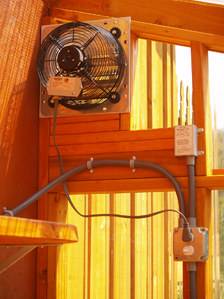
From a nearby faucet, I ran a hose in through a drilled hole so water would always be handy. From a nearby electrical outlet I ran a cord in through another drilled hole for a heater with its own built-in thermostat for winter. I also wired in a wall-mounted light fixture with an electrical outlet in it for convenience.
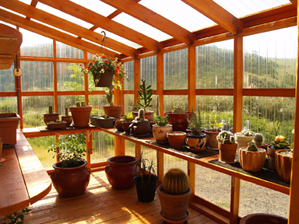
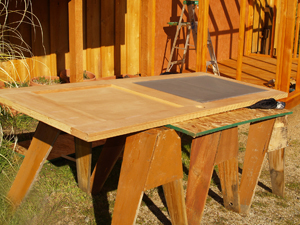
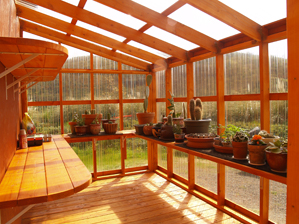
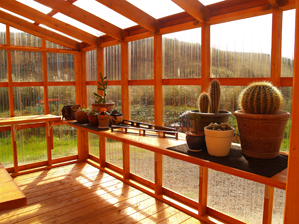
The work benches:
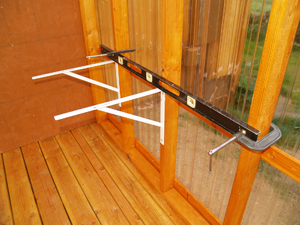
All went well and it was time to build the workbenches inside. Rather than do more carpenter work building bulky table frames and legs, I decided to install heavy duty 20" L-brackets (to each stud) at 30" high and create a 22" wide workbench from four pre-stained DF 2"x6"'s attached across the tops of the brackets. I ran the workbench in a U-shape around the inside of the room, and a second shelf 30" above the first on the high north wall.
I hung a thermometer inside but out of direct sunlight, and another thermometer outside near the door but in the shade so the difference in temps could be readily monitored. The experts say it's not the sunLIGHT, but the HEAT build-up that can damage plants. You don't want to cook your zucchini on the vine, so moving and exchanging the air is mandatory.
Summers can be scorchingly hot here in southern Oregon, so I will install a roll of shade cloth I can pull down over the top and front of the greenhouse on 100 degree days.
Closing thoughts:
"Build it and they will come." Well, here they come—the plants AND the bugs—all vying for an ideal place to live and flourish, not unlike the rest of us seek. The nice thing about plants is they give back so much. For all that nurturing, you get to witness the wonder of life—the sprouting, unfurling, growing, flowering, maturing, and producing—right before your eyes. And to top it all off "you get to nibble and graze on what you raise."