2001
 Dorothy's coop
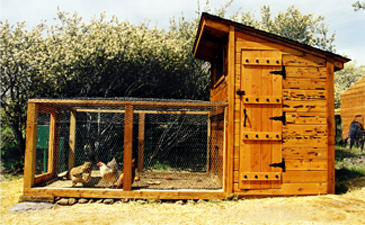
Build A Chicken Coop
by Dorothy Ainsworth
You can buy a dozen eggs at the supermarket for 99 cents, or you can go out to the chicken coop you built and fetch a warm egg out of the soft pine wood shavings in the nesting box...and that's priceless.
 Mattie Sue struts her stuff
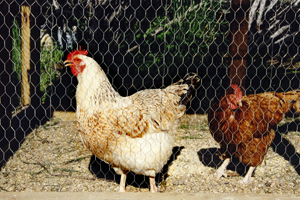
Every day I gently carry my 3 brown eggs into the house marveling all the way to the refrigerator. Maybe I'm a hopeless romantic, but I love my three old hens: Mattie Sue, Splatty Goo, and Fu man chu.
Chickens are delightful characters. They're colorful and animated and a constant source of entertainment. They peck and scratch and strut around kinda jerky, like in an old-time silent movie. But it's their cackling I enjoy the most. My favorite sound resembles the long, drawn-out inhaling effort of old Aunt Ruby when she choked on cake crumbs at the family reunion.
 Goodnight kiss
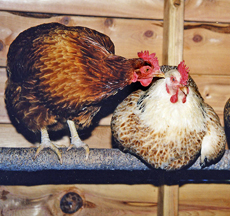
While one hen is laying, the other two hover around like midwives egging her on. Then they all join in the celebration by clucking and hiccupping and doing the Aunt Ruby. After the deed is done, they ruffle their feathers, take a dust bath, dig a crater in the cool dirt for an afternoon snooze, eat a few worms, and go to bed early. It's the good life.
One of the best reasons for keeping your own chickens, and feeding them a varied diet that includes table scraps, is the quality of the eggs. The dark gold yolks and firm whites are so fresh they even squawk when you fry 'em!
Chickens are low-maintenance pets, inexpensive to feed, and they give back that little prize every day. All they ask for in return is a light and airy shelter, kept clean and dry and safe. They like a little shade in the summer and warmth in the winter, just like the rest of us.
Build this sturdy, attractive coop designed for 3 or 4 fine-feathered fowl, and you, too, can enjoy what a country dweller calls the good life.
List of Materials
 (1)   8'  4x4    (pressure treated)
 (4)  12'  4x4's  (pressure treated)
 (6)   8'  2x4's  (to make 5  8-footers & 2  4-footers)
 (4)  10'  2x4's  (to make 8  5-footers)
(10)  12'  2x4's  (to make 20  6-foolers)
 (6)  12'  1x4's  Utility grade is fine
 (2)  12'  2x6's  T&G DF or Pine for door
                  (to make 4  6-footers)
(50)   6'  1x6's  Cedar fencing (pecky-utility is cheap)
 (1)  4x8' Sheet of 5/8" plywood (CDX is fine)
 (1)  Roll 1" chicken wire 50' x 4'
      Tarpaper & shingles to cover 40 sq. ft. of roof
      4 or 5 Hinges and 2 Latches (for 2 doors)
      Sheetrock screws or galvanizcd nails
        (3" for framing; 2" for siding)
 (1)  Quart of stain/sealer
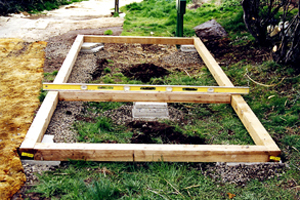 Leveling the foundation
Materials cost $250 total, but you can improvise to fit your budget. Save money every step of the way by scrounging scrap lumber, using painted plywood for siding and doors, and l"x4"'s to frame the chicken-run (space to run around adjacent to the coop).
Start by picking a spot with wind protection, some shade, and good drainage. Level an 8' x 14' pad as best you can. Lay the 4"x4"'s down in troughs filled with gravel, to form a 6' x 12' rectangle divided at 4' for the house, and 8' for the run. Build up the low ends with flat rocks or scraps of concrete, and, of course, level the parallel beams with each other (use a long level). Toenail all the 4"x4"'s to each other at 90-degree angles, remembering the golden rule of carpentry: "Plumb, level, and square."
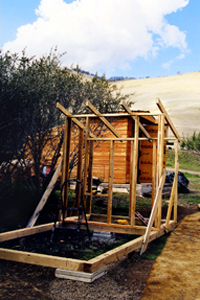 The frame
Frame the henhouse walls one section at a time on the ground, then stand them up and screw them into the foundation beams (the 4"x4"'s).
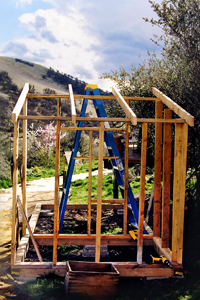
 Braced frame
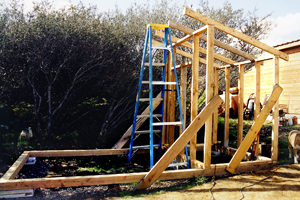
 Kirt roofing
 Pecky cedar siding
The rear wall consists of five 5-foot vertical studs at 18" centers, capped by 6-foot top and bottom plates. The front wall consists of four 6-foot studs at 18" centers, also capped by 6-foot plates, but without the middle stud for now. That 36" gap will be spanned by a horizontal 2"x4" installed as the window sill, 15" down from the top-plate.
Support underneath the sill, in the middle, with a vertical 2"x4" cut to fit (about 55 1/2"). Now frame in the little 18-inch-square hen door by fastening a horizontal 2"x4" between 2 studs, to create the passageway from coop to run.
Plumb and brace the two parallel wa1ls with temporary diagonal braces and install the four rafters (with precut birdsmouths) at 2-foot centers. Allow a 14" overhang at the front and a 4" overhang at the back.
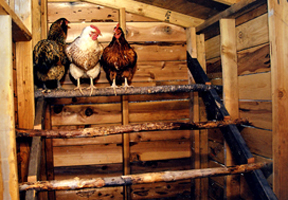
Frame the sides with studs cut to the roof angle, leaving a 20" door opening. To stiffen the structure and support the roosts, screw two 7-foot 2"x4" diagonals onto the front and rear walls inside the coop. Notch them out at 12" centers to hold three 2"-diameter branches or dowels that will step up to the top roost (their favorite). The roosts must be round...but a little textured...for feet to grasp and breasts to rest on.
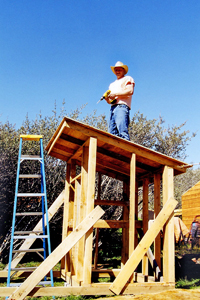
Roof the coop with plywood, tarpaper, and shingles. Install all the cedar siding, the outside comer trim, and the fascia boards to cover the rafter tails.
 Dorothy makes door
Frame the run with three upright 40" 4"x4"'s in the front, toe-nailed in from every angle, and horizontal 2"x4"'s for the top.
 Rear view
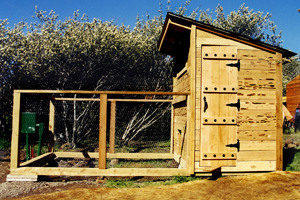
Line the run and the henhouse sub-floors (dirt) with chicken wire, attaching it to the insides of the 4"x4"'s with staples. This important step will foil any attempts of predatory critters from digging under the foundation in hopes of a juicy chicken dinner. Now fill the coop and run with nice earthy soil to the tops of the 4"x4"'s.
Screen the 15" x 36" window opening with chicken wire and frame around it with trim. Cover the sides and top of the run with chicken wire and staple it all securely with hammer-in chicken-wire staples. (Don't use little staple-gun staples that the chickens might eat!)
Build-in-place an 18" square nesting box by the door; about 6" off the dirt floor. Trim the front with a 2" lip so the eggs won't roll out. Three or four hens will share one nesting box.
 Nesting box
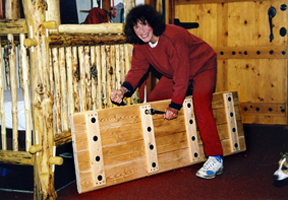
Build the main door out of 2"x6" T&G using clamps to squeeze the four boards tightly together until you get the paired-up battens bolted through on both sides of the door.
Measure the door opening for the run (between two upright 4"x"4's) and make the door out of two identical 1x4 frames sandwiched together using glue as the mayo and chicken wire in between. Screw together every few inches all around.
Hang the doors and install the latches. If you use a gate latch on the main door, attach a shoe-string to the catch lever and thread it through a hole drilled to the inside of the coop, before you lock yourself in. (1 learned the hard way!)
Now for the fun part. Go to the Grange and buy a galvanized chicken feeder and water dispenser, a big bag of layer-feed, a bag of scratch (cracked corn and grain), grit for their gizzards, and some oyster shell bits for calcium. You'll also need straw or pine wood shavings to spread around everywhere to facilitate cleaning the pen every month or so.
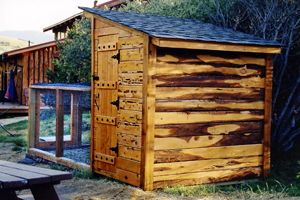
 Coop unstained
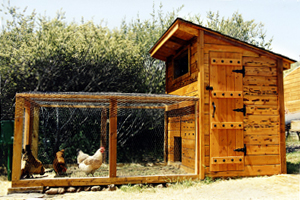 Coop stained
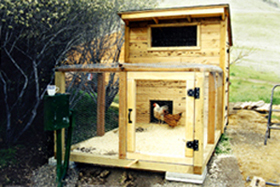 Unstained
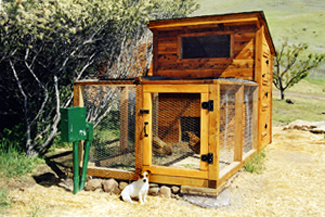 Stained
You'll have no trouble finding mature hens for sale cheap or free. Your happy hens will love their new mansion.
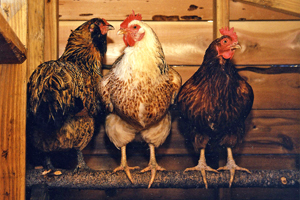 Splatty Goo, Mattie Sue, and Fu Man Chu
If you're anything like me, you'll take great pleasure in imitating chicken sounds every time you go out to the coop. Don't be shy...unless, of course, somebody is listening.