November 2011
 12' x 16' Cabin
DOROTHY'S 2-2-2 PLAN
by Dorothy Ainsworth
If you could use some extra space in the form of a small studio/cabin, and if you know how to use basic tools, I have just the project for you. I call it my 2-2-2 plan: 200 sq.ft., 2 months to build, $2,000, and I might add: 2-cute.
Years ago I built a 16'x 16' storage platform 100 feet downhill from the house my son and I are building for him (see "Building Eric's House", Parts 1-8, BWH Magazine). We piled stuff on it and covered it with a huge silvery gray tarp to reflect heat and shed rain. It looked like a beached whale but that's what I wanted: a LOW-PROFILE temporary storage area to blend in with the weeds.
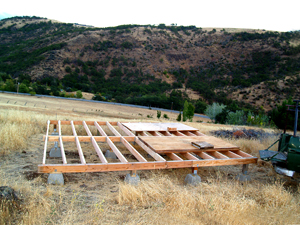 Original platform
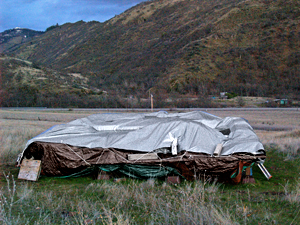
We've since moved most of the stuff into the basement of Eric's almost-finished house, so there sat the platform still covered by the tarp but with only one hump in the middle. It had served its purpose but was now an eyesore and I wanted to get rid of it.
Then I got to thinking. I had built it with a STRONG pier and girder foundation and a thick sub-floor. It not only looked like a whale, but it could have supported one!
It seemed a shame to tear it all down, so I decided to build a little cabin on it. In my county one can build a 200 sq.ft. structure (or less) without buying a permit. A 12'x 16' building would fit on the 16'x 16' platform--with a strip left over for a narrow deck off the back.
The timing was perfect because our big delivery of sugar-pine siding for the new house was delayed 6 weeks, the fall weather was beautiful, and I felt up to the task. I didn't have the extra cash in a bundle but I knew I could charge all the materials at Home Depot on a 12-month interest-free account, so there was no good excuse to put it off.
Once started, it took on a life of its own and ended up being one of my favorite projects of all the structures I've built over the past 30 years. Because it was small, it took shape in a hurry, and each phase of construction was almost text-book perfect. I buried a heavy-duty electrical line over from the main panel at the house to supply the studio with a 20-AMP service for lights, a small heater, and my computer. In only 2 months of spare-time labor and $2000 in materials---some new, some used---it was completely finished.
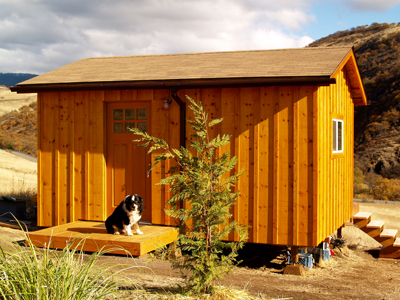
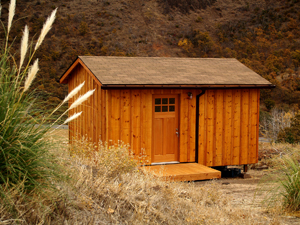
I now have my own quiet office with a beautiful view. It's well-insulated, has a clean white interior belying its rustic exterior, and 2 tiny decks. It's away from distractions when I feel like writing or organizing my thousands of photographs, or just sitting on the back deck with a cup of coffee and gazing across the beautiful rolling hills.
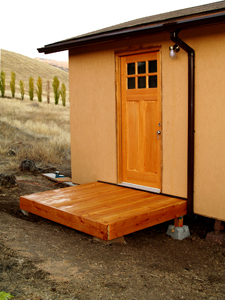
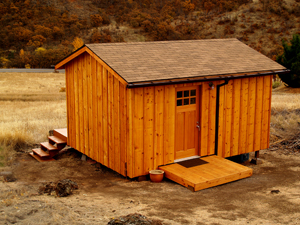
 Front view facing west
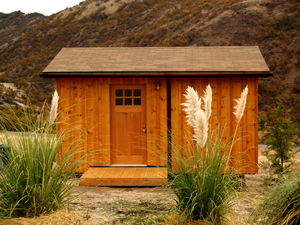
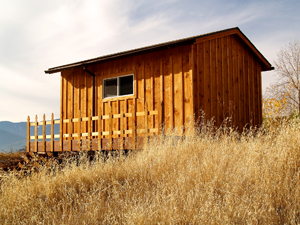 Back view of studio
FOUNDATION AND FLOOR
The following instructions are for building a 12' x 16' cabin on UNEVEN ground, but you can make it any dimensions you want and on any kind of foundation you want, as long as it's under 200 sq. ft, (Check with your building department to make sure the "under 200 sq.ft. rule" is legal in your county.)
1. Stake out your site, then level and square it with "batter boards" and strings (google simple batter-board instructions).
If you are lucky enough to already have level ground and can use regular wood-topped piers, or want to pour a level concrete foundation, build a simple floor frame out of 2"x 6"s and skip to step 5.
Note: For uneven ground I recommend using ADJUSTABLE pier brackets which are like MINI-JACKS if you want to hasten and ease the process of "leveling the playing field". Use piers with a hole in the middle for the threaded bolt on your adjustable bracket to go into.
2. Set your evenly-spaced piers no farther apart than 4-6 feet. You don't need to level them with each other if your ground is sloped because you will be using PT (pressure-treated) 4" x 4" uprights cut at various lengths and put in the adjustable-pier-brackets to compensate for any differences in height.
3. Once you get all the 4"x 4"'s close to the same level (your future floor level), attach another type of bracket to the top of each one (see photo) which will create the channels to slide the 16-ft. girders into. I made my girders out of pairs of straight 16-foot 2"x 6"'s screwed together for ease in handling and because they were affordable (common dimensional lumber is cheap these days). The catch is that two 2" x 6"'s on edge are only 3" thick, and the bracket holds a 4" x 4" so a half-inch-thick plywood spacer has to be put in each bracket to fill it out. (see photo)
 Pier w/adjustable bracket with 4x4 and girder
4. Level all the girders to each other by jacking up the adjustable brackets to meet your level strings going every which way but loose (you don't want LOOSE). All it takes is a wrench on the large nut to run it up or down the threaded bolt to adjust the height.
5. Install your 2"x 6" floor joists at 16" centers between the girders with joist hangers, or if you want your building higher, on TOP of the girders. If you choose to put them on top, you must put blocking (spacers) between the joists at their half-way point and also cap off the joist ends with 2" x 6" rim joists to stabilize them.
6. Now you're ready for the sub-floor. I recommend thick T&G OSB (3/4" or 7/8") because it is inexpensive compared to plywood. It should be screwed down every 8" around the perimeter and every 12" along each floor joist (snap chalk lines).
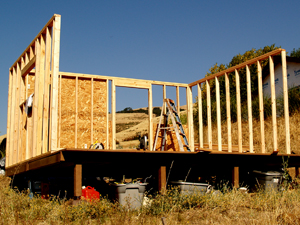 2x4 Framing
FRAMING AND SHEATHING THE STUDIO
7. I used 2" x 4" studs on 16" centers for the walls and 2" x 6" rafters on 2-ft. centers for the roof, and 2" x 6" rafter-tie members every 2 feet (called ceiling joists). I sheathed everything with 4'x 8'x 7/16" OSB because it was only $6.50 a sheet and I knew I'd also be putting a layer of 1"x 12" sugar pine siding on the outside walls (to match the main house).
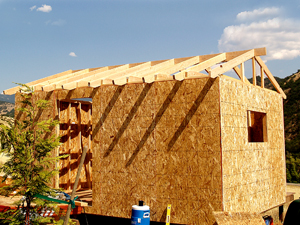 2x6 Rafters
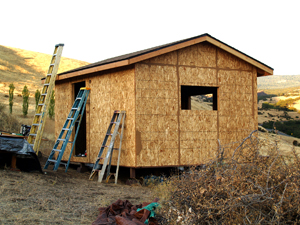 7/16" OSB sheathing
8. I bought a slightly imperfect 36" door with a jamb at Builder's Bargain Center for $99. It was solid straight-grained Douglas Fir and had 6 window lights in the upper half...just what I wanted. I hung it without incident and installed a lockset.
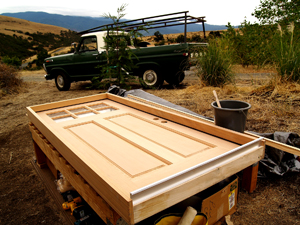 Door and jamb
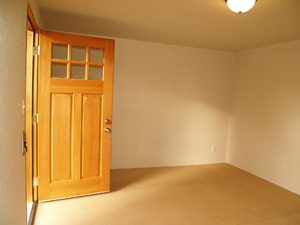 Door opens in
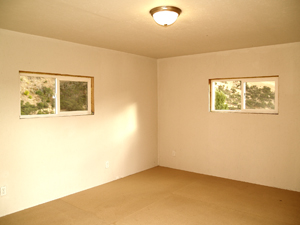 Windows installed
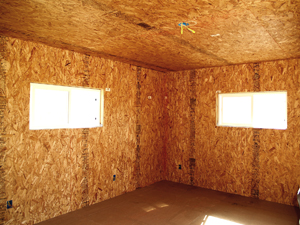
9. I installed two 2'x 4' flange-mount windows from Home Depot (on sale) in the framed openings (very easy). I chose medium-sized windows to save on heat and cooling.
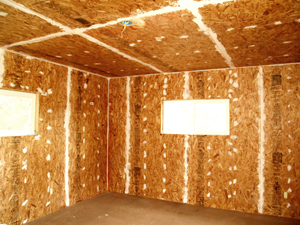
10. After attaching the electrical outlet boxes to the studs and running the wires to each outlet, I installed R-13 fiberglass insulation in the walls and between the rafters, using an electric stapler. Then I sheathed the interior (including the ceiling) with more 7/16" OSB and screws.
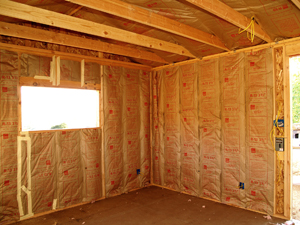 Fiberglass insulation
 7/16" OSB sheathing inside
 Trimming OSB with jigsaw
 Fastening OSB with screws
Note: I used OSB mainly because I did NOT want to deal with sheetrock and all the cutting, mudding, taping, sanding, and texturing involved. I also wanted a wall I could hang a shelf or a picture on or stick a nail in without using special fasteners.
The penalty for avoiding sheetrock was to have to caulk every seam and joint, and use trim in the corners and where the walls met the ceiling, but it was still easier than messing with sheetrock!
 Seams filled with wood spackle
PAINT, CARPET, AND TRIM
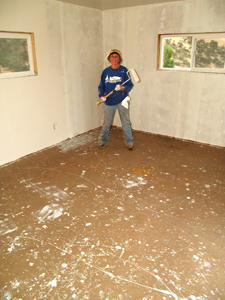
11. Before installing carpet I filled all the screw holes in the walls and ceiling with wood-spackle, using a putty knife, then painted the whole interior with TWO coats of off-white paint. The first coat was an excellent quality primer to seal any out-gassing from the OSB. Then I rolled on regular interior paint very generously to fill all the tiny crevices in the OSB. The result looks like a subtle texturing job.
 Dorothy's "Jackson Pollock"
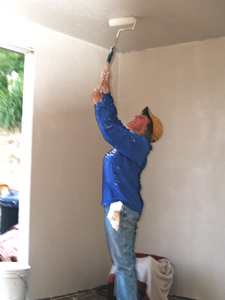 Rollin' rollin' rollin'
12. Fortunately I had stored a sizable roll of beige carpet for YEARS (free gift) and was finally able to use it. I squared it up with a straight edge and utility knife and fitted it to the floor in a dry run. I then covered the rough sub-floor with smooth 5/8" particle board and counter sunk each screw-head so I could GLUE the carpet down (no pad). I used a non-toxic carpet adhesive; the process went smoothly, and the carpet fit perfectly.
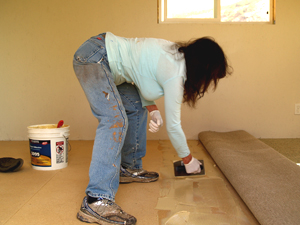 Applying carpet glue with notched trowel
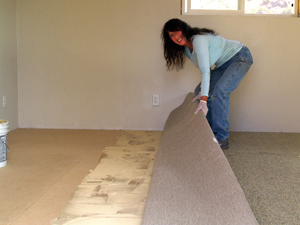 Laying down carpet 2' at a time
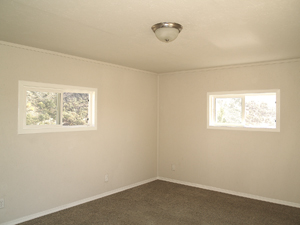 Off-white walls; bright white trim
 Ready for siding
13. After laying the carpet, I installed baseboard, corner molding, ceiling trim, and window trim. I painted all the trim with bright semi-gloss white for contrast against the flat white walls. White on white would help bounce light around from the two windows.
�14. Next came the ceiling light and porch light installation (quick and easy). My retired-electrician friend Russ advised me to put a secondary circuit-breaker box INSIDE the studio and he wired the switches for me so if I trip the breaker by overloading the PLUG-outlets, the lights will remain on. Brilliant!
15. I finally closed the door on the interior job and went outside to do some real work. First off, to create a vapor barrier behind the siding, I painted the OSB with bargain-priced mismatched paint from the hardware store, instead of using expensive Tyvek house-wrap.
Note: Some of my other storage buildings sheathed with OSB are simply painted with 2 coats of exterior paint and have held up for years. Siding is an optional expense.
ROOFING AND RAIN GUTTERS
16. I roofed with 3-tab asphalt shingles---one step up from my usual poorman's rolled roofing on outbuildings---so the roof would look fairly attractive when viewed from Eric's front window.
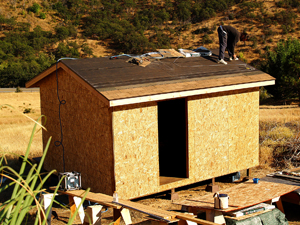 Asphalt roof shingles
 View of roof
17. Rain gutters were imperative because the roof pitch drained over the front door and the back deck. I bought dark brown vinyl gutters and downspouts and all the trimmings from Home Depot (inexpensive) and installed them in a day.
DECKS AND STAIRS
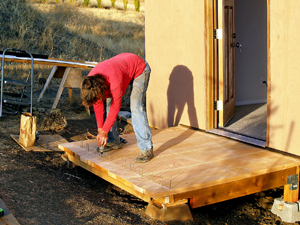 Building deck
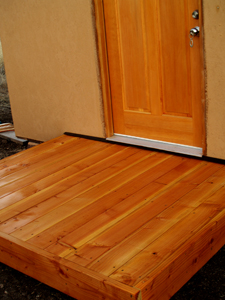 Finished Douglas Fir deck
After the roofing job, I built a small entrance deck on the place. I used some old concrete piers I already had and constructed a 2"x 6" frame on them, and used more DF 2"x 6"'s for the decking itself (only 25 cents a foot).
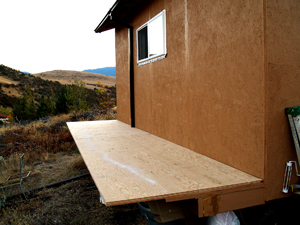 Back deck before paint
18. For the back deck, I attached two 4'x 8' sheets of 1 1/8" sub-floor plywood (end to end) to the 3-foot strip left over on the original platform, and painted the heck out of it with deck paint. The now 4-foot wide x 16-foot long deck is cantilevered out a bit but strong and usable. I capped it off all around with 2" x 12"s and installed a cedar railing. The 20 railing posts were only $1/each at Home Depot. I laid them down on an old sheet of OSB and pre-stained them using a small garden sprayer.
 Rails sprayed with garden sprayer
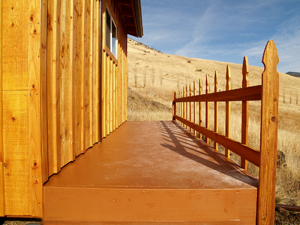 Back deck and railing
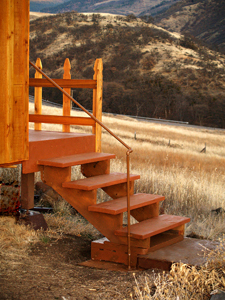
19. I built 2 sets of stairs, one at each end of the long deck, for convenience, but also for my 10-yr. old grandson, Zane. He and his friends (and the dog) can chase each other up one side and down the other like the cartoon characters they are.
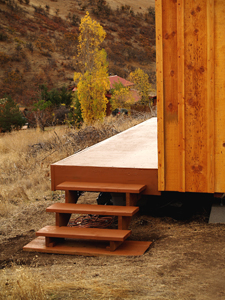
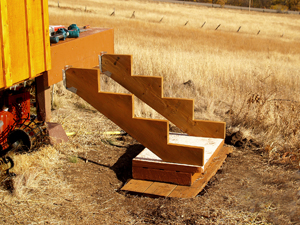 Stair horses on south end of deck
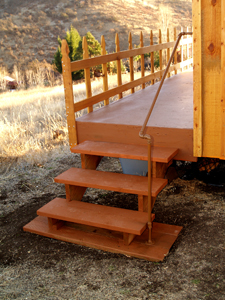
 South stairs with pipe hand-rail
 Stairs on north end of deck
 North stairs with pipe hand-rail
SIDING
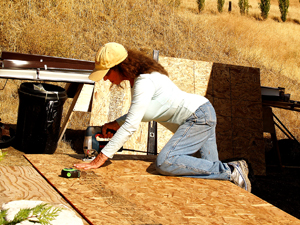
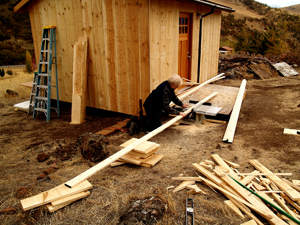
20. Eric's 3200 feet of 1"x 12" sugar-pine siding finally arrived by boom truck, so I set about installing some of it on the cabin first. It was good practice and only took three days to complete. I found that the batts took as much time and effort to install as the boards! Using a small table saw, my friend Russ helped me rip an inch off the width of all the 16-foot 1"x 4" utility pine boards I bought to make narrow batts (20 cents/ft.)
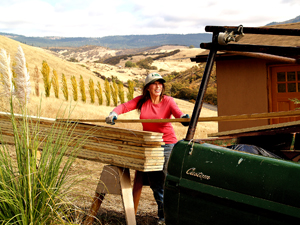 Unloading 16' siding boards
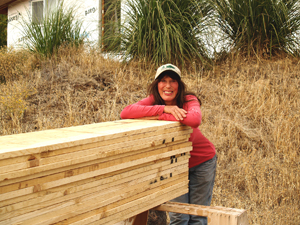 Stack of 1" x 12" siding
 Ripping 16 ft. 1x4 batts into 1x3's
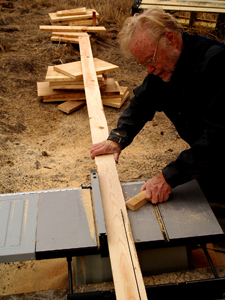 Russ' technique to make narrower batts
After I drove in the last of hundreds of 2" star-headed bronze-coated screws, I slapped on some cedar stain, snapped a few photos and the labor is now history----except for sharing the story so you can do it too!
 Used roller overall, then brushed where needed
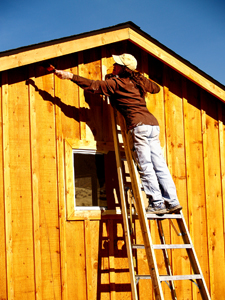 Applying "Super Deck" cedar-tone
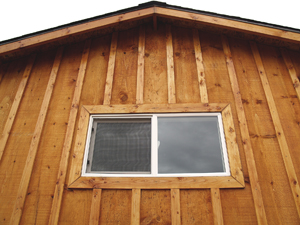 Window framed with 1x4's
CLOSING THOUGHTS
This multi-purpose studio/cabin could be used for just about anything that doesn't require running water, such as: a sewing room, music practice room, artist's studio, writer's den, massage "parlor", yoga and meditation space, dance studio or exercise room (put up mirrors), hobbies of all kinds, plain old storage, or an office. It's a place where you can leave home without running away. Everybody needs a space like that. If Herman Cain wants to follow MY 2-2-2 plan he can have one too.
 Overview of house and studio both facing south
 Northwest view