2011
 Eric
Eric
BUILDING ERIC'S HOUSE
Part 4
by Dorothy Ainsworth
My curmudgeonly father used to grumble in jest: "Nothing's so bad that it can't get worse." And now I know what he meant. That's exactly how I felt about installing fiberglass insulation and then hanging sheetrock. As soon as the itchy twitchy fiberglass job was done, it was time to hurry and cover the walls with sheetrock so we could install the electrical outlets and all the light fixtures. The FINAL electrical inspection deadline was coming up fast!
(Note: "Building Eric's House Part 3" article left off with passing the ROUGH electrical inspection.)
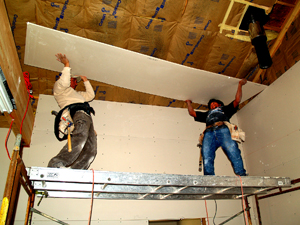
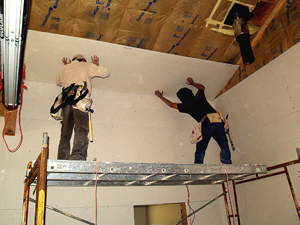
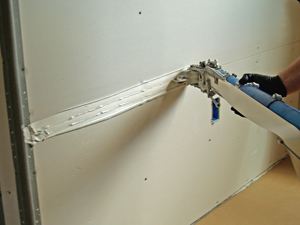
The Sheetrock
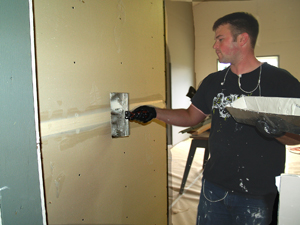
We both knew HOW to do the job, but we'd be slow---painfully slow. The prospect of hanging 100 heavy 4'x 12' sheets of 1/2" sheetrock on the walls and 50 sheets of even heavier 4'x 12' x 5/8" on the vaulted ceilings made me sigh and groan. Considering our regular job schedules, I figured it would take us 4 months to hang, tape, and texture if we averaged 2 sheets a day. With the county's mandatory inspection time frame, that was unacceptable, so I grabbed the phone and called a highly recommended drywall guy named Larry Anderson. I asked if he would come up and give us an estimate for the entire job including taping and texturing (two more groan-jobs).
He's a busy man but he rushed up after work and took measurements and made his calculations on the spot, all the while being incredibly cheerful and accommodating. (I don't think I've ever met a more likable contractor; he could get rich selling his attitude!)
He charged the local going rate which is calculated by multiplying the square footage of the house by a factor of 3.5, but was willing to work with us to keep the price down by letting us do the clean-up work for a $200 deduction and he threw in some extras like using green board on the wrap-around window sills (for moisture resistance) and rounded bull-nose on all the edges, as well as wrapping the ridge beam and the kitchen archway. He said his estimate would also include covering the basement ceiling with sound-proofing board hung from the joists on JC channel and sheetrock over that. This extra step was Eric's request so the basement can be used for piano recordings.
He said the whole job would only take 5 days. It sounded too good to be true but it was an offer we couldn't refuse. Eric agreed that this purchase would be the wisest use of a credit card he ever made in his life. For $5700, his house and basement-ceiling would be ready to paint within a week. We were ecstatic!
Note: The best website I found for a quick description of how to hang drywall and the basic tools to do it is: http://www.hometime.com/Howto/projects/drywall/drwl_1.htm (Note: `Drywall' & `Sheetrock' are synonymous) My experience in hanging and taping drywall was with 4x8 sheets that I could handle just fine by working with another helper of average strength. There is more waste and there are more seams created using 4x8 sheets rather than 4x12's but smaller sheets are more doable for a non-professional.
 Crane
Crane
Many excellent websites offer descriptive tutorials and video tutorials on hanging and taping drywall. Anybody can do it, but it takes A LOT of doing to get really good at it. Fortunately a novice can cover mistakes with extra mud (sheetrock joint compound), and the DIY saving on labor-costs is always huge!
Sheetrock is cheap (about $10/sheet) and so is the tape and mud. The basic tools aren't expensive either. If the county wasn't breathing down our necks for mandatory timely inspections, we would have done it ourselves and saved $4,000.
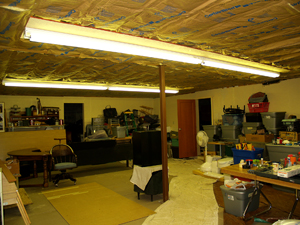
Basement First
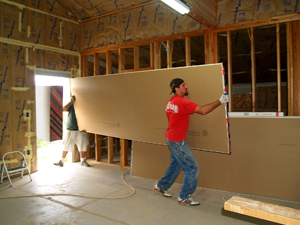 Unloading sheetrock
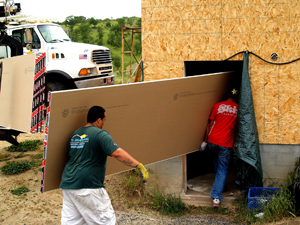 Drywall into basment
Before the soundboard and sheetrock could go on the basement ceiling, we installed 12" thick R-38 insulation in the rafters for extra sound-proofing. While we were at it we installed R-21 insulation in the walls, then covered the walls with 1/2" OSB (oriented-strand-board) at $7/sheet and a coat of paint. To completely finish the basement job first, I installed all the electrical GFI outlets as were required down there, and four 8-foot flourescent light fixtures on the ceiling joists.
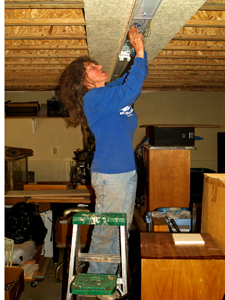 Installing lights
 Basment lights
Note: The basement has no windows (energy efficient) so it's now lit with warm-spectrum bulbs. It was fun punching new holes in the metal fixtures using a set of specialized electrician's hole punchers I bought at a garage sale for only $5.00 (nobody knew what they were, much less what they were worth!) I cut the new holes so the fixture wiring would line up with the electrical boxes already installed on the ceiling joists.
 Cutting hole
 Hole cutter tool
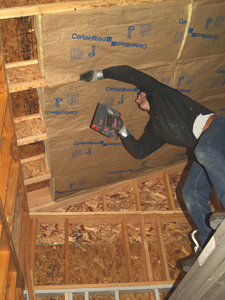
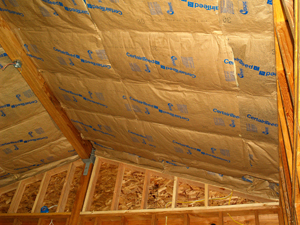
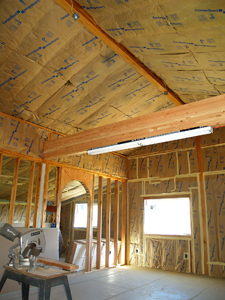
The Insulation
After the ROUGH electrical inspection, we proceeded to install rolls and rolls of FACED fiberglass insulation batts using a battery-powered stapler. We put the vapor barrier side facing the warm (inside) of the room and overlapped the tabs over the stud surface to make a continuous sealed barrier against air infiltration. We were careful to gently part and tuck the insulation around the wires so there were no air gaps.
 Insulation
 Cordless stapler
In southern Oregon 2x6 16" OC (on center) framing is required in the walls which in turn takes 6" thick R-21 insulation. We put 10" thick R-30 between the 2x12 roof rafters. 12" thick R-38 would have been optimal but is a lot more expensive. The cost of insulation in the entire 2020 sq. ft. house and basement totaled $2000, averaging about $1/sq.ft.
 Ceiling insulation
 Insulated room
Important Step
Before the insulation could go in and would be in the way, I had to make sure there was a nailing surface provided for the sheetrock where the intersection of the ceiling met the gabled walls on the front and back of the house. This should have been done during the framing of the house but was overlooked.
I screwed 2x4 furring strips to the top of the gable-angled top plates and let 1 inch protrude out for the necessary nailing surface. If I had forgotten this step, the ceiling-sheetrock would have no substantial support except for the wall-sheetrock to hold it up.
Mechanical Work
 Pilot holes
 Range vent hole
 Range vent duct
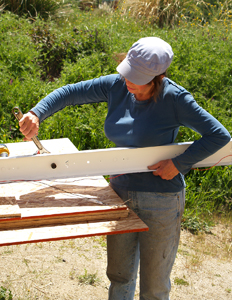
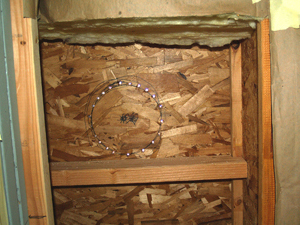
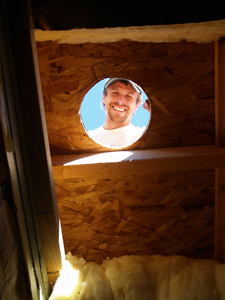
After passing the insulation inspection with flying squirrels (yay!) I got ready for the mechanical inspection. It required a stovepipe installation through the roof, a bathroom ceiling fan vented through the roof, and an overhead range-hood vented through the roof. I was nervous about cutting holes in the roof but had to grit my teeth and just do it. My main concern was measuring carefully enough to cut the holes in exactly the right spots. There is a catch when cutting a hole in an angled roof. The circle is not FLAT to the roof; the pipe or ducting has to go through the slanted roof but remain PLUMB (straight up). Therefore your hole will actually be an oval. I held the pipe/duct up to the ceiling (plumb) and traced around it with a black marking pen, then I drilled up through the roof (from inside) with a long skinny drill bit (1/8"x6") held plumb to make a series of holes around the perimeter of the circle. Then I cut through the tiny holes with a jigsaw and presto! Daylight.
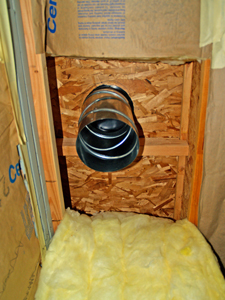
The stovepipe installation through the vaulted ceiling required some extra framing between the 24" apart rafters, in order to attach a 14" square metal 4-sided box that went through the roof as part of the mounting kit. The Metalbestos (insulated) stove pipe needed 2" of cool air clearance all around it where it went through the roof. The box provided that but it was a challenge building that frame while atop a 12-foot ladder! We could have done it when we installed the rafters, but we weren't sure exactly where the wood stove would go and where the stove-pipe would end up exiting through the roof, and we didn't have the mounting kit yet. So after the fact, we located the center of the opening to be cut in the ceiling by hanging a plumb bob down from the ceiling to exactly where it would hit the stove's exit hole, 18" out from the wall. (Note: Each wood stove has its own wall clearance requirement but 18" is usually a safe bet.)
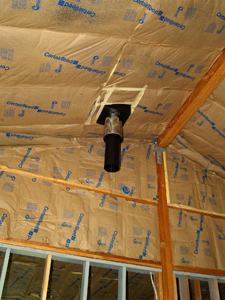 Stovepipe
 Living room
We passed the rough mechanical inspection and at the same time, the gas-line air-pressure test inspection. That was months ago and the gauge is still holding. I don't think it has lost a molecule of air which means it won't leak any propane either when the time comes. (Note: The gas line pipe was stubbed out when the plumbing was done.)
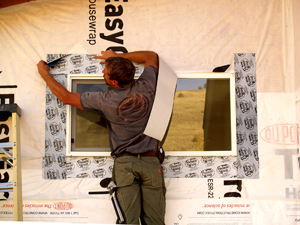
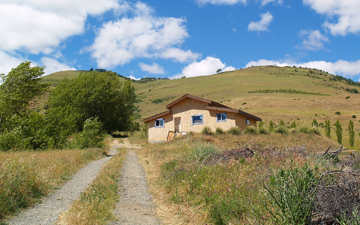
The Windows
 Winter view
During the harsh winter and spring of 2010 when we were working inside the house, we left the window openings covered with the OSB house-sheathing because of high winds and rainy weather that didn't calm down until the very end of June.
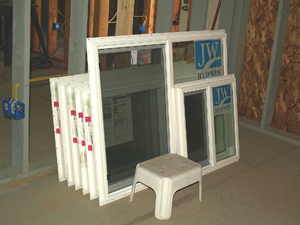
Eric had already bought all his Jeld-Wen vinyl-flanged double-paned Low-E glass windows and had them stored in the house. Home Depot gave him a contractor's discount for buying all 9 windows at once---for a total of $1000.
 Windows
 Sawzall starter holes
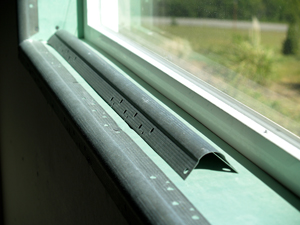
As soon as we could we cut out the openings with a Sawzall in July, and after we applied the recommended sticky sill-seal tape, we installed the windows according to the Jeld-Wen instructions. They pressed into their prepared openings and fit perfectly. They are all rectangular horizontal sliders with screens, except for the fixed pane 5'x 3.5' picture window in the living room.

From the outside it looks like very modest fenestration, but from the inside the amount of light streaming in is plenty and the views are incredible. Eric, who likes cozy more than exposed, is very pleased with the window sizes and their placement. Being a pianist he's more of an auditory than a visual person and more of a cave dweller than a light seeker. He loves the basement room even with NO windows and sometimes practices his piano in the dark. That's the real beauty of building your own home...you can do it YOUR way!
 Overview
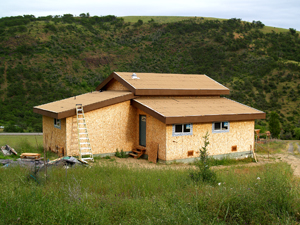 Side view
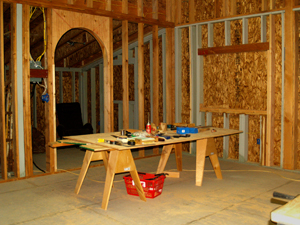
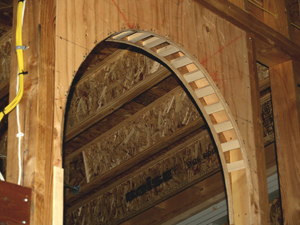
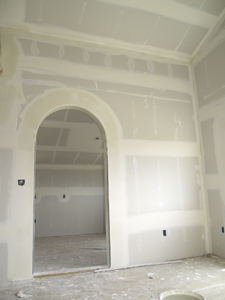
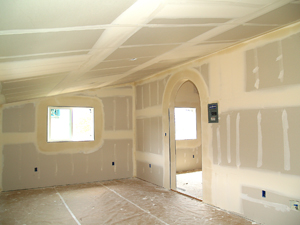
The Archway
 Interior view
 Arch
Arch
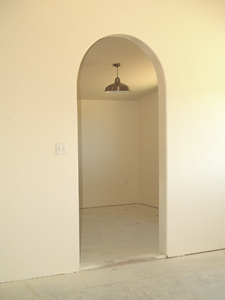
Last winter (2010) I built an archway to add some curvy beauty to the big rectangular entranceway into the kitchen. It was a satisfying rainy day project that required some creative engineering to make it strong and perfect, but it turned out to be a pleasing addition to the design of the interior.
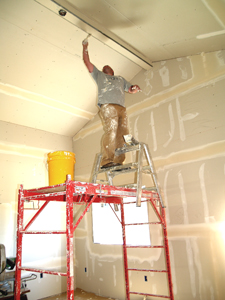
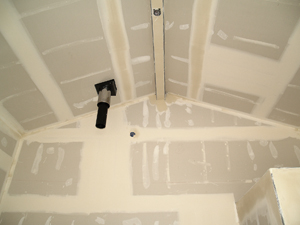
Sheetrock Installation
 Teamwork
 Hardwork
 Sheetrock team
 Greenboard and Bullnose
Larry completed the sheetrock work exactly as promised----and it looked snowy white and beautiful! But it didn't end there: one of Larry's texturing specialists was also a house painter and he offered to spray-paint the whole interior with a primer coat and the satin "Antique White" Eric wanted, for a few hundred bucks--and have it done in 2 days---so Eric sprung for that too. Now he was in debt, but happily ahead of schedule. When it comes to building a house, sometimes you can't have one without the other.
 Taping gun
 Smoothing joints
 Larry ridgebeam
 Taping
 Ceiling taped
 Kitchen taped
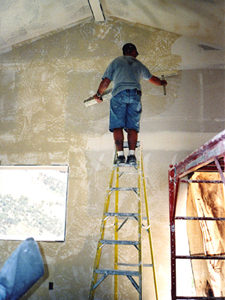 Texturing
 Painting
When it was all said and done, we finally unveiled the attractive laminated beam that spans the living room (it was wrapped for protection) and we were pleased with the colorful and varied laminations of Douglas Fir wood grain in contrast to the soft white walls.
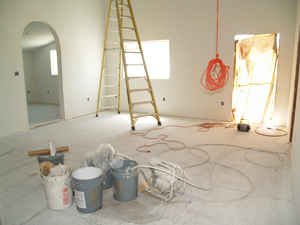
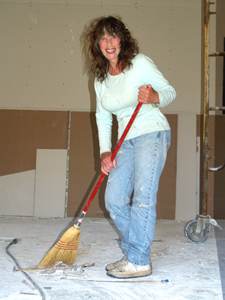 Clean-up
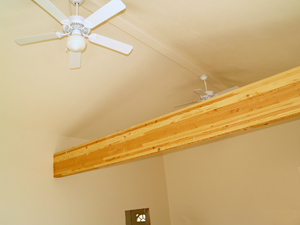 Exposed beam
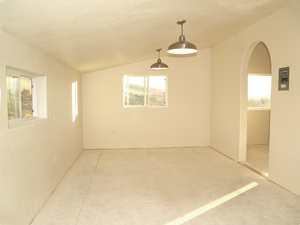
I floated from room to room for a few heavenly minutes, marveling at how a simple wall covering like 1/2" gypsum board could artistically transform all that went before into such clean and defined living spaces. Millions of houses are sheet-rocked but when it's your own and you know all too well the work that went into the anatomy inside those walls, it seems miraculous. But being a practical task-master, I quickly came back to earth and proceeded to install the 60 outlets, 16 lights, and 2 ceiling fans. Eric bought all brushed-nickel fixtures for a slightly industrial look which he likes and they are handsome indeed.
 Kitchen painted
 Kitchen archway
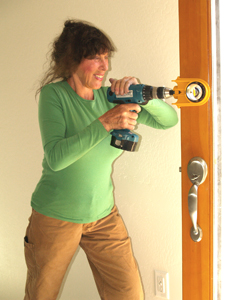 Dorothy drills dead-bolt hole
Photo by grandson Zane, 9
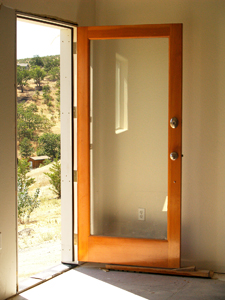 Front door
Final Electrical Inspection
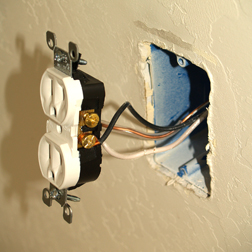 Wired outlet
I established a routine when hooking up each set of wires so I wouldn't accidentally overlook a step, and treated the wires as if the voltage was on even though it wasn't yet. I connected the ground wire first, then the white wire, and then the hot wire (black and/or red). When working with electricity it's critical to have impeccable work habits or one strike and YOUR lights are out!
After an intense week of fiddling with wires and fixtures, I called for the FINAL electrical inspection-----and the only shock I got was passing it without a hitch.
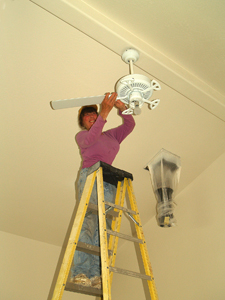 Fan
Fan
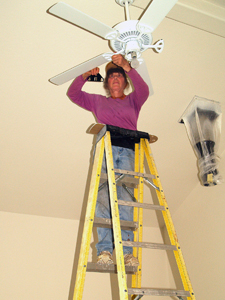 Fan blades
Piano Move
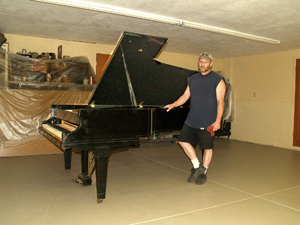 Piano in basement
Eric moved his 9-foot grand piano into the now finished 24'x 30' basement so it would be easy to keep at a constant temperature and humidity through all the seasons---to stay in tune. Not only that, the acoustics bouncing off the smooth concrete floor sound like a concert hall! But I must say that even with all the soundproofing we did, Beethoven is still loud and clear upstairs, and the reverse will be true when the piano is upstairs someday. Its sound-softening effect was no more effective than putting a little cream rinse on Beethoven's hair.
Future Final Inspections
The next inspection will be the FINAL mechanical, which requires the propane range and range hood to be in. Gas ranges cost big bucks so that'll be awhile.
Then there's the FINAL plumbing inspection which requires kitchen and bathroom sinks and toilets and the shower to be in, which requires the floors to be done first. We already have two toilets (free donations) and the vintage enameled cast iron sinks I bought for $1.00 each at the dump back in the 80's and kept stored. Our contractor friend Vadim gave us enough of his left over tile to do the shower so now we just need to put in the labor. Eric's dad Ron gave him an electric water heater so he'll use that until he can afford a propane one (gas water heaters are 3-4 times the cost of electric).
So the next job to tackle will be installing the kitchen and bathroom floors. Eric will probably use some kind of attractive but reasonably priced linoleum-tile for those 3 rooms. He'd love ALL hardwood floors but his budget dictates some compromises. Maybe someday.....
Another FINAL is the fire safety and woodstove inspection. The woodstove purchase will have to wait too, but at least the stovepipe is already in and ready to hook up.
The interior doors will be easy, and the built-in countertops and cupboards will all be hand-built by Eric. Someday he will install a metal roof over the existing rolled roofing, but for now he's good and dry.
The exterior siding will have to wait until we have the money, then we'll install it ourselves, no matter what it is. Eric is contemplating painted metal (industrial fireproof look) or board and battens (barn style look). We estimate it'll cost $2000 in materials.
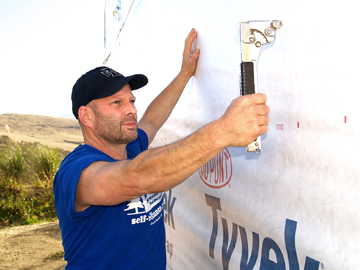
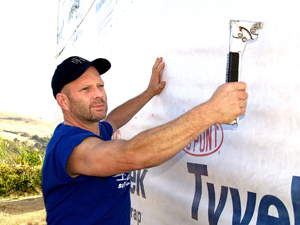
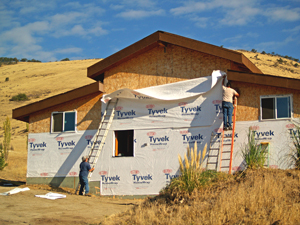
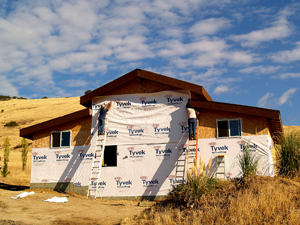
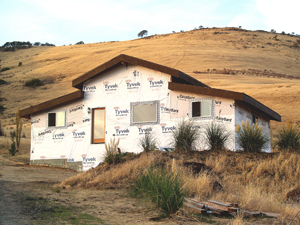
House Wrap
 Eric2
Eric2
We wrapped the house with Tyvek in the fall of 2010 to withstand the winter of 2011, and then waterproofed around each window with 6" wide sticky tape called "Protecto Wrap", a butyl-hybrid window and door sealing tape made for that purpose. The 9 window perimeters and 2 door perimeters took four 50-ft. rolls at $17 each.
Tyvek is just one brand of a breathable membrane house-wrap required by code. Eric bought two 9' wide rolls (1500 sq. ft. each) to the tune of $300 and stapled it on.
 Tyvek
Tyvek
 Tyvek2
He then taped all the Tyvek seams with 2" wide Tyvek tape and it took six 164-ft rolls at $13 each. All totalled it was $450 well spent to waterproof the entire house.
Summary of Our Progress
 Side
Side
 The White House
We're almost home free compared to 5 years ago when we broke ground for the foundation pad. The FINAL building inspection and occupancy permit will optimistically happen by 2012. Maybe I'll hit the lottery before then...but more likely be hit by an asteroid. Now I sound like my father.....