2008
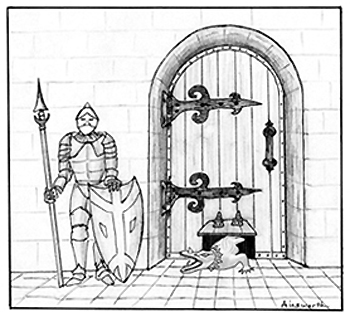 Illustration by Dorothy
DOORTHY'S DOORS
by Dorothy Ainsworth
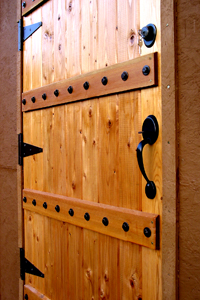
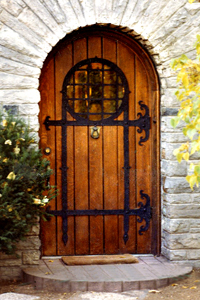 Gorgeous door
We expect a lot from a door. It must protect us from the elements, insure our safety, give us privacy, swing back and forth with ease, and accommodate our moods and situations. When we're mad, we slam it; when we're happy, we swing on it; when our arms are full, we shove it open and kick it shut; and when we're sneaky, we don't want its hinges to creak. If that isn't enough, we want our door to look beautiful and to present a warm welcome to our guests. Indeed, a good or not-so-good impression on a visitor can literally hinge on the front door.
The bathroom door and the refrigerator door are usually the busiest servants in a house, but the front door is the symbolic butler who stands guard and determines who enters our private realm of being.
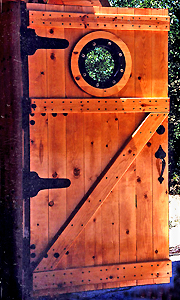
Naturally the type of front door one chooses has to fit the architecture of the house. It's style and character gives a hint about who lives or lurks within. I like solid security when I'm indoors, so I gravitated toward a medieval door design (see illustration). I chose the board and batt look, also known as a "batten door", because it met all the criteria on my list for a hand-made door on a hand-to-mouth budget:
1. The door is beautifully rustic.
2. It is strong and sturdy.
3. You can build one for less than $100.
4. It uses common lumber and standard nuts and bolts.
5. You need only a few hand tools or electric tools to build it (saw, drill, clamps, wrench).
6. It can be built to any size and shape and can accommodate a window of any size and shape.
7. The versatile design can be easily converted into a Dutch door.
8. One can go hog-wild with decorative hinges: cast iron, hand-forged, old barn strap-hinges, or whatever.
9. The ancient design has proven to weather well under extreme use and abuse.
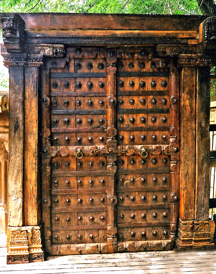 Unique style
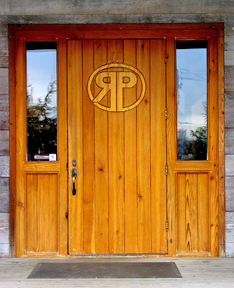 Rogue Pacific Lumber Co. door
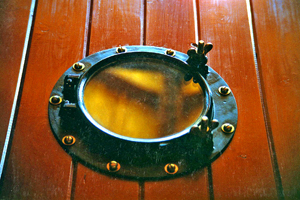
10. The design can be adapted to many different styles, such as early pioneer, gothic, ranch-style, nautical (wooden sailboat doors), and even mixed in with high-tech decor for a contrasting look.
 Dorothy's front door on house that burned
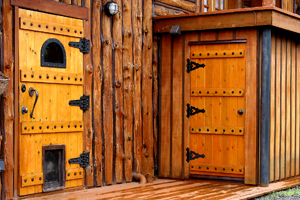 Utility room door (left)
 & pantry room door (right)
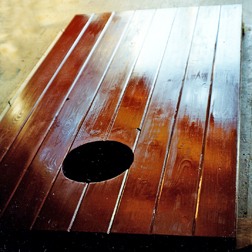
The construction was within my capability and it complemented the style of my log and timber-frame house, so I stuck with the motif. To date I've made fifteen batten doors for various and sundry buildings on my property. I might add that five of them have dog doors...and for good reason. The late poet Ogden Nash said it best, "A door is what a dog is perpetually on the wrong side of"...and he was right. The dogs and cats keep the door flaps flappin'.
Where to Begin
The first step is to measure your door opening width to figure out how many 2"x6" T&G (tongue and groove) boards you'll need to go across. Fitted together tightly, each board will measure 5 inches wide. Keep in mind that on the last board on either side, you will be trimming off the tongue on one side (ouch!) and the groove on the other side (1/2" each) plus any addtional trimming your measurement requires. For instance, if your door opening is 42 inches, it will take 9 boards across (45"), so you will have to trim off a total of 3.5" (1.75" off each side). That extra 1/2" you trim will allow a 1/4" clearance on each side so the door will fit in the opening and there will be room to install the door hardware. Not only that, wood moves. Batten doors tend to expand and contract with the weather, so extra clearance is necessary.
 Small tool shed door & "Teddy"
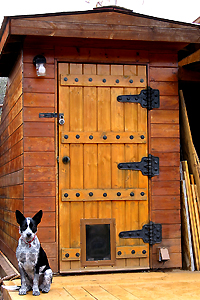
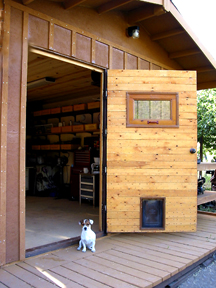 Shop door & "Peaches"
Standard doors are 80" tall, but if you are building your own house and you don't care about standards (maybe you're a hobbit), you can make your door opening any height you want. Measure from the threshold up and subtract 1/2" (1/4" top and 1/4" bottom) for clearance again. Professional home builders allow only 1/8" to 3/16" clearance all around a door, but when you build a rustic or non-conventional house, the door opening could be just ever so slightly out of square. I allow 1/4" clearance all around just in case I end up trying to fit a perfect rectangle into an unintentional parallelogram. You can cover up a multitude of sins later with 3/4" door stops and weather stripping.
Choosing Your Lumber
The secret to a good door is to pick out nice, straight boards to begin with. You might want a drink with a twist, but never a board! One crooked board can tweak your door out of alignment. Sight down each one at the lumber yard to make sure it doesn't have a major crown, bow, cup, or twist. Even though you will be able to FORCE the tongue in the groove by cranking down on the bar clamp, a naughty board will exert its bad behavior on the others, just like peer pressure.
I recommend 8-footers because shorter boards tend to be straighter. But if your door height is 80" to 84", go ahead and buy 14-footers to cut in half, and you will have very little waste, if any. You can make that decision at the lumber yard by checking out the quality of the boards in each length.
Most lumber yards carry a good supply of small-knot pine or Douglas fir in their T&G department. Pine is softer and light-colored; DF is harder and darker. Take your pick...they are both beautiful.
 Plywood spline
A Variation
If you have a table saw or router and want to make your own spline and groove (S&G) lumber so you can use wider boards or some other type of wood besides T&G pine or fir, the technique is quite simple. To cut the groove the same width as the plywood spline you'll be fitting in, run your boards lengthwise on edge through the table saw blade (or double blades) Be sure to center the cut! I used this S&G method on a door I built out of 2"x8" DF boards and 1/2" splines.
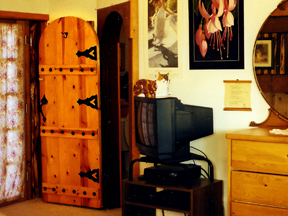
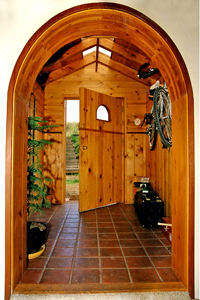 Entrance way in piano studio
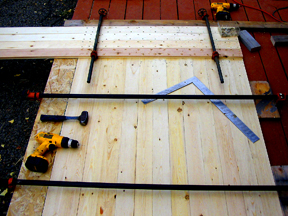
Building The Door
Now you can get right to it. Saw each board to length as accurately as possible. Before cutting with a circular saw or jig saw, run masking tape along the marked cut-line to prevent the blade from splintering the wood. Lay down the number of boards you need (side by side) on two sawhorses that are about 6 feet apart. If the tops of the saw horses are too short, screw a longer, flat 2"x4" temporarily on the top of each horse.
Line up the tongues and grooves and press all the boards together by hand. Place 3 bar clamps across the door (one on each end and one in the middle) and squeeze the boards together evenly by tightening each clamp a little at a time alternately until all the seams are tight. But just before that final squeeze, take a carpenter's square and make sure the corners are square (no parallelogram allowed!) and the top and bottom of the door boards are perfectly lined up. If not, take a hammer and gently tap any errant board back into line. Note: Never use glue on a batten door; it needs to be able expand and contract, as previously mentioned.
Installing The Battens
Now you have a door that's ready to be secured with battens. You will need eight pine or fir 1"x6"'s for the batts. Cut the batts 2 inches shorter than the width of the door to allow a 1" set-back on each side.
 Beveled top edge
Ideally, for the outside of the front door, each batt should receive a 30-degree beveled cut along the top edge, to shed rain. It can be done easily with a table saw or any power saw with an adjustable blade, or with a hand plane. I made several doors without the slanted cut on the batts and I regret it. The doors are fine, but that 3/4" ledge tends to gather water and dirt. If there's an optimum way to do batts, it's to bevel them.
Placement of the batts is important for the strength and stability of the door. I generally put them 4" down from the top and 4" up from the bottom of the door. I divide the rest of the space evenly, creating 3 bays...the spaces between the four batts where the 3 hinges will be mounted.
Secure each pair of batts with C-clamps so they precisely oppose each other on the front and back of the door. (Note: Pad the clamp with a shim or spacer so it won't mar the wood when tightened.) Now that the door is barred, shackled, and clamped every which way but loose, put two 1 5/8" drywall screws close to the ends of the batts...3/4 of an inch in from the edges.
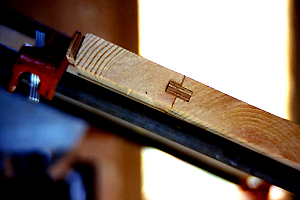
Drilling The Holes
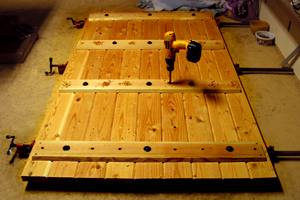 Installing batts on door
This extra step will keep the batts exactly lined up in case a clamp slips or gets bumped.
The next step is to drill the holes that will receive the bolts, nuts, and washers. Space the bolt holes evenly about 5" apart after the first one is marked 1" from the edge of the batt. The drilling technique is critical. You must drill the holes straight up and down at 90 degrees to the door, or when you put the bolts through, they'll be cattywampus (yes, it's in the dictionary). As you are drilling, keep stopping and checking in both directions (12:00 and 3:00) to make sure you are holding the tool perpendicular to the door, and the bit is going in as plumb as possible.
Installing The Nuts And Bolts
Stop drilling just before you break through the back side, then crawl under the door (between the sawhorses) and finish the cut from the bottom. This technique will avoid the splintering that occurs when you blast right through. To ensure you don't go too far and break through by accident, measure the thickness of the door plus both batts and mark your drill bit on the shank with a black Sharpie or a piece of tape. (Using common-dimensional lumber the distance will be 3 inches, so make your mark at 2 3/4".)
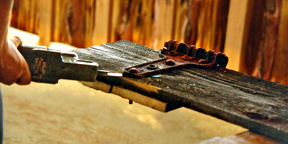
Sometime during the door-making process you will buy the nuts, bolts, and washers, and prepare them for painting. I use standard-thread 4 1/2" galvanized bolts and 1/2" flat washers, lock washers, and nuts that go with them...common items at the hardware store. The door and batts add up to 3" of thickness, so 3.75" or 4" bolts work out perfectly because the washers and nuts also take up space on the bolt. For a sizable door (e.g., 44" x 80"), the nuts and bolts will total 12-13 pounds! Before painting them with metal spray paint (I recommend Rustoleum), I soak them for a minute in Jasco metal-etching solution so the paint will stick better. It's cheap and available at most paint stores. Some people use vinegar, but I've found it's not very effective in preventing paint from peeling off over time. But using vinegar would be better than nothing for cleaning and etching your galvanized assortment. Note: Don't use non-galvanized hardware; it will eventually rust and run, even if painted.
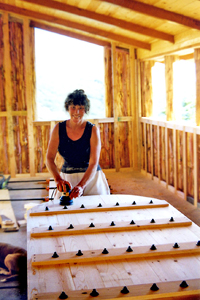 Sanding door
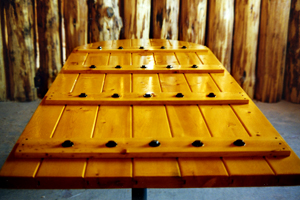 Finished stained door
Staining The Door
When all the holes are drilled, the fun begins! It's very satisfying to put the bolts through the holes, with a large washer on each side and a lock washer on the nut side, and then tighten the nuts down. I use a ratchet and a deep socket on the nut side while I hold a wrench or socket on the other side. I thoroughly enjoy the smoothness and expediency and even the sound of the process, which must be repeated about 40 times. (I need to get a life!) Tighten the nuts snugly so the washers sink slightly into the wood.
You've just built a door! Your next step will be to enhance its inherent beauty with a coat of finish. Now's the time to sand off any rough edges, imperfections, dirty spots, or pencil marks on the wood.
I use a random-orbital sander (lightly) with an 80-grit sanding disk for this touch-up work, but if you are careful not to sand "zones" in your wood, any kind of sander will do the job. I also dress the sharp edges by running the sander all around the perimeter of the door to slightly round them.
While the door is still horizontal, seal it with a clear or tinted sealer, whichever you desire. I use a combination of a 1/4-pint of Ace Hardware's golden oak and Ace's 1/4-pint colonial maple oil-based wood stain, mixed into a quart of Ace's light-oak glossy stain and polyurethane in one easy step (that's what it says on the can). I love the color, protection, and sheen this combo affords. On some of my doors I have used Behr's cedar gloss finish, with beautiful results, but it dries slowly and catches bugs if you have to work outside.
Hanging The Door
One cabinet-maker I know stains his wood creations with whatever color he likes, then rubs and polishes them with Johnson's paste wax. He swears there is no better preservative and water-proofing than paste wax, and he uses it on everything! It might be worth a try.
Now it's time to hang your door. Cinch up your corset; this baby's heavy!
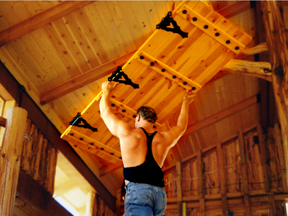 Kirt carries up loft-bathroom door
A large, solid T&G door weighs about 125-135 lbs. Two people can easily carry it, but it's cumbersome for one. A padded hand-truck would be one way to wield it around solo, but to prevent scratches, it would be best to get help moving it and placing it in the door opening. You'll be able to take it from there.
I fastened three 1"x2"x12" temporary stops around the door jamb...one on each side and one on the top, recessed 1.5". That way, when the door was pressed into the opening, it didn't fall in and it also ended up flush with the outside wall and ready for the hinges. With a hammer I tapped in shims all around the door leaving an even 1/4" gap left, right, top, and bottom. The shims held the door tightly in place, but for extra security, I screwed a flat stick to the outside wall (with one screw) and twirled it around to hold the door. This allowed me to install the hinges without incident.
Note: Small packages of carpenter's shims are sold at lumber yards and hardware stores. I can't build anything without them!
Once the hinges and door hardware are mounted, I close the door and trace a pencil mark all around the door on the jamb, then open the door and make another mark spaced 1/4" inside the first one. I then screw the 1"x 4" door stop molding all around the door jamb on that second mark.
That gap between the two marks will be filled by 1/4" thick weather-stripping that self-sticks to the edge of the molding. This foam-strip will keep the weather out and will cushion the door from rattling in the wind!
Hinges
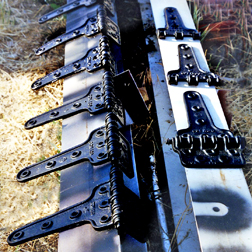 Painting old hinges
 Sawing old hinges off barn wood
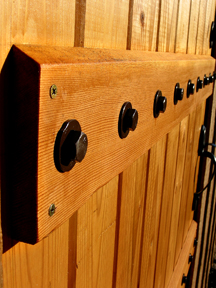
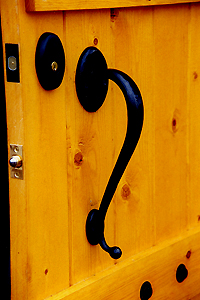 Front door handles made by blacksmith Dennis Debay
Handsome hinges can make your door look regal enough for a castle. You can find old hinges in many predictable places if you actively look for them...antique stores, flea markets, dismantlers, internet, restoration-hardware catalogs, estate sales, auctions, and even garage sales. You can also buy sizable heavy-duty hinges at the hardware store.
I lucked out by knowing an old farmer who was tearing down his huge, dilapidated barn. He told me I could have all thirty of the rusty cast-iron hinges if I wanted to hand-saw them off the gray splintered barn-wood (no electricity was available). I jumped at the opportunity and put in a hard day's work, but those hinges happily ended up on all my doors in the house. I had them sandblasted, then spray-painted 'em black. When finished, they looked as good as old.
Installing The Door Hardware
For the front door entrance handle, I mortgaged the farm and hired the local blacksmith to make two large, curvy, respectable door pulls for $100.00 ea., but they were worth every penny. If you prefer the warmth of wood, I've seen wooden hinges and door handles carved or fashioned from hardwood, and they were sensational!
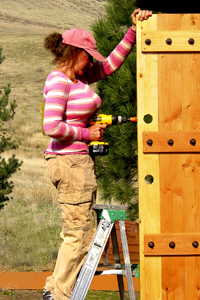 Dorothy drills dead-bolt hole
 Finished door with hardware
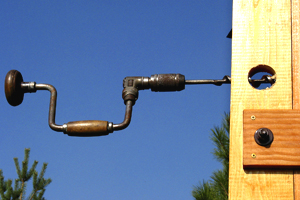 Brace & bit
Door-entry sets, deadbolts, and all the trimmings are available for reasonable prices and in a wide variety of colors and styles at every hardware store and at all the big Do-It-Yourself outlets such as Home Depot and Lowe's. Just follow the directions in the package. You'll need two hole-saw sizes, one for the door face where the doorknob goes (usually 2 1/8" dia.). and one for the door edge where the latch goes (usually 1"dia.).
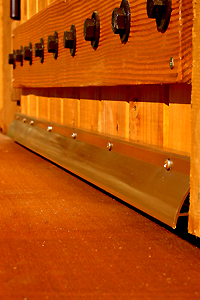 Water deflector on bottom of door
The instructions come with a template to mark exactly where to drill the holes. You should use a jig (guide) that clamps on the door to ensure that you drill perfectly straight (plumb) holes. (Buy or borrow a door lock installation kit.) The hole-saw will have a pilot drill-bit sticking out of the center of it about 1/2" beyond the hole-saw itself and that bit will break through the door first. When you feel the point coming through, stop drilling! Then go to the other side and drill a clean hole back the other way. This important step will avoid any splintering that your door knob might not cover up.
Installing the door hardware may seem a little intimidating at first, but it's actually quite easy if you make sure each step is done as accurately as possible (particularly the template markings and the 90-degree hole-cuts). If you don't have electricity, a brace-and-bit takes Popeye forearms to operate...but cuts very nice holes and can give you the opportunity to impress Olive Oyl. But if you are Olive Oyl, better call Popeye.
After the door is hung and latched, I sometimes install two water-deflector metal strips...one screwed on the building just over the top of the door, and one on the bottom of the door. They are common items at the hardware store. They deflect the driving rain, as the name implies.
Dutch Doors And Other Variations
 Door to den
 Loft-bathroom door
When it comes to batten doors, there are unlimited variations you can adapt the design to, to suit your architectural preferences and your creativity. You might want to build an interior door using 2"x FOUR"...instead of 2"x6"... T&G boards and narrow battens. You could paint the door white, or any color you like, and attach fancy brass hinges and door handles. Maybe you like the boards horizontal instead of vertical? No problem. Let your imagination and your personality be your guide. Don't be afraid to think out of the rectangle.
Dutch Doors
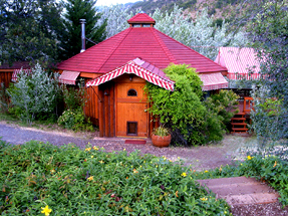
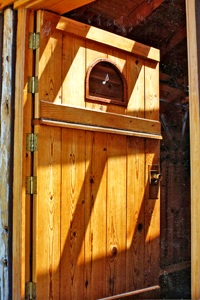 Piano studio Dutch door
If you want to get violently creative and prematurely age your door, there's a process called distressing the wood. This time-worn look is achieved by beating up the wood here and there with various tools to dent, nick, and even char it. It sounds terrible, but can result in quite an authentic antiqued effect.
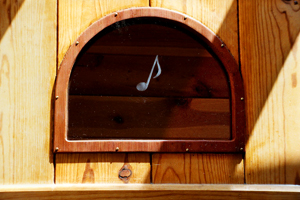 Etched note in piano studio window
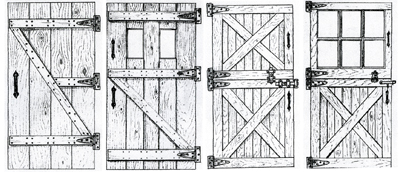 Different styles of batten doors
 One of my batten doors
I transformed one batten door into a Dutch door for the piano studio I built. The top half could be opened for ventilation...and for the music to waft out...and the lower half could be latched. I put in a bolt-latch to fasten the lower half to the upper half and installed regular door-knob hardware on the lower half.
Dutch doors are ideal for kitchens. You can open the upper half to air out the smoke after you burn the beans, or you can use its mantle to cool a pie or a batch of cookies. The lower half will slow down the stampede when the kids "playing" outside get a whiff of the aroma.
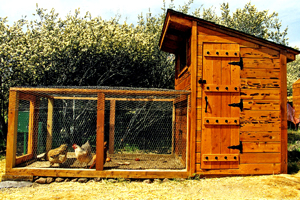 Chicken coop door
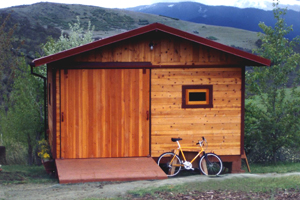
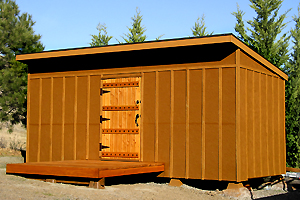 Storage shed door
Another Quick And Easy Door Design
 Building shop door
Dutch doors are used a lot in horse stalls and barns. For those locations it's a good idea to put cross battens on the doors for extra strength. To keep the door from sagging, a cross batten should slant from the upper latch side to the lower hinge side (like the hypotenuse of a right triangle).
 Piano repair shop with sliding door
A Business Idea
In addition to my batten doors and for special applications, I've made a few other easy-to-build doors out of 1"x4"'s in utility-grade pine and/or fir. One was a 7.5' x 8' hanging-track sliding door on a small piano-repair shop, and the second was a 4' x 7' door for a larger shop, and the third was a triangular-shaped door for a tree house. These doors were inexpensive, easy to build, and look good. The 1"x4"'s are simply screwed together in a grid, with all verticals on one side and all horizontals on the other (no glue). They are strong, and they don't warp. Hanging-track hardware is available for any width door, such as for barns and shops. The large doors slide easily on rollers that ride in the overhead track and, when opened, stay flat against the building and out of the way.
Closing (Door) Thoughts
A good craftsman woodworker could specialize in building every conceivable variation of the batten-style door, take orders for custom sizes and styles, and probably sell them like hotcakes. I reckon it could turn into a cottage industry, backwoodshome-style. Batten doors are here to stay and re-gaining favor as more and more people are appreciating the natural rugged and rustic look, as well as the medieval look that has been popularized by Harry Potter movies and recent pirate movies.
I don't claim to be a consummate door maker. Far from it. I'll leave fancy conventional doors to the expert woodworkers with well-equipped shops full of stationary saws, jigs, planers, routers, and sanders.
I wouldn't even attempt to build a complicated door requiring extreme accuracy in its construction, like something you'd see in Fine Home Building magazine...a door consisting of rails and stiles surrounding one or more raised panels, all put together with mortise and tenon joints, and sporting decorative molding such as pilasters and pediments. It makes the revolving door in my head spin just contemplating such a task.
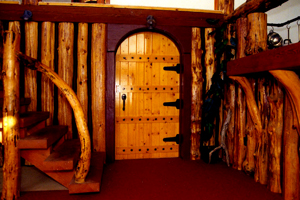
 Log house and batten doors
 Piano studio door
I'm perfectly happy with my batten doors. It's a good thing I find them so presentable and attractive, because that's what I know how to build!